
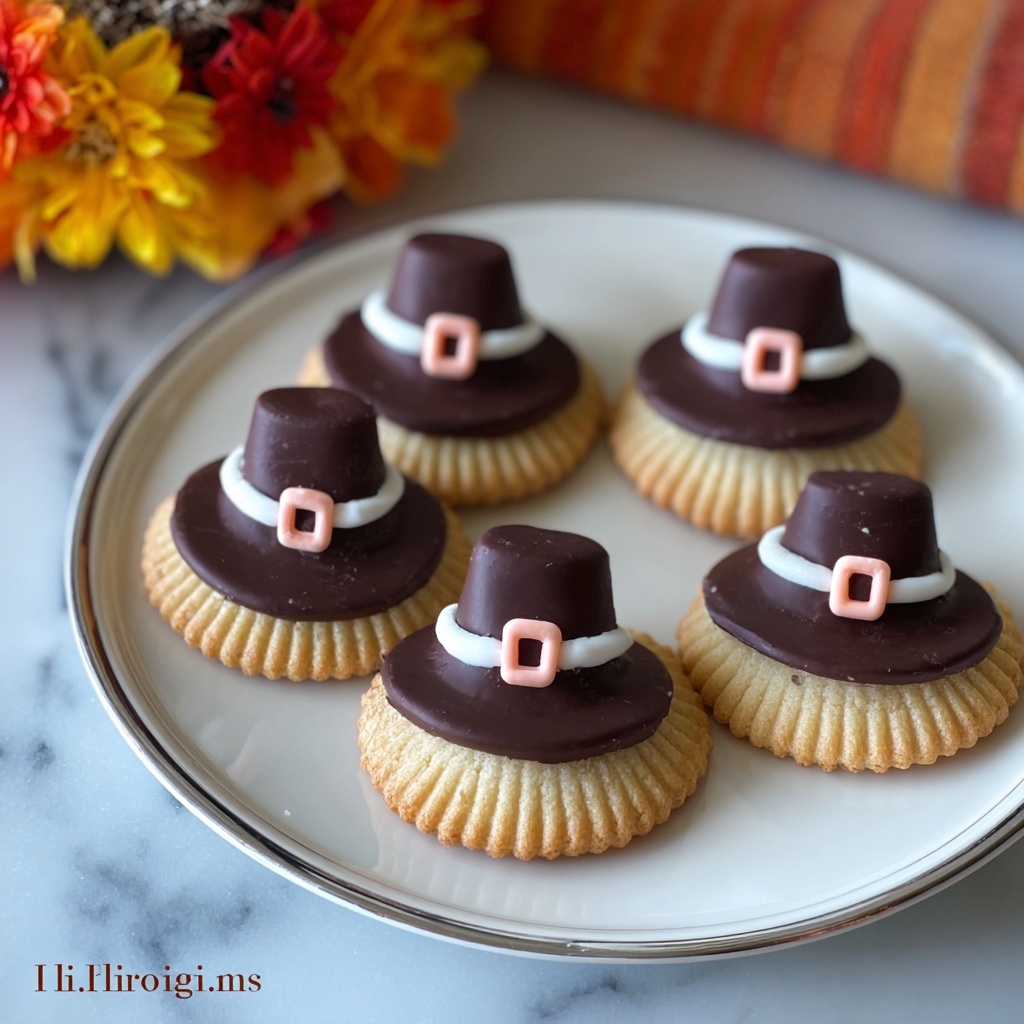
If you’ve been searching for a festive, fun, and utterly charming treat to brighten your holiday dessert table, the Pilgrim Hat Cookies Recipe is exactly what you need. These delightful little cookies capture the spirit of Thanksgiving with their whimsical design and rich flavors—all without requiring you to turn on the oven. Featuring classic chocolate sandwich cookies topped with peanut butter cups and a candy buckle, this easy-to-make dessert is a crowd-pleaser that brings a smile to both kids and adults alike. Get ready for a playful baking adventure that celebrates tradition and sweetness in one bite!
Ingredients You’ll Need
Gathering the right ingredients for the Pilgrim Hat Cookies Recipe is simple but essential to get that perfect combination of texture and taste. Each component plays a unique role—from the crunch and creaminess of the cookies to the smooth, rich chocolate that holds it all together, plus a pop of color that makes these treats irresistibly cute.
- 24 chocolate sandwich cookies: The base of your pilgrim hats, providing crunch and that classic cookie flavor everyone loves.
- 24 miniature peanut butter cups: These act as the hat’s crown with a creamy, nutty center that complements the chocolate perfectly.
- 1 cup semisweet chocolate chips: Melted to glue the pieces together, adding a rich, luscious coat that sets the tone for indulgence.
- 1 tablespoon vegetable oil: Keeps the melted chocolate smooth and glossy, making it easier to work with.
- 24 small yellow candy-coated chocolates or butterscotch chips: The adorable buckle detail that completes the pilgrim hat look with a bright burst of color.
How to Make Pilgrim Hat Cookies Recipe
Step 1: Prepare Your Workspace
Start by lining a baking sheet with parchment paper to create a clean, non-stick surface perfect for assembling your cookies. Carefully separate your chocolate sandwich cookies so that the flat sides are facing up—this will be where the peanut butter cup sits snugly in the next step.
Step 2: Melt the Chocolate
Combine the semisweet chocolate chips and vegetable oil in a microwave-safe bowl. Heat in 20-second increments, stirring well each time, until the chocolate is silky smooth. This melted chocolate acts as the glue that holds your pilgrim hats together, so take your time to achieve a glossy finish.
Step 3: Assemble the Pilgrim Hats
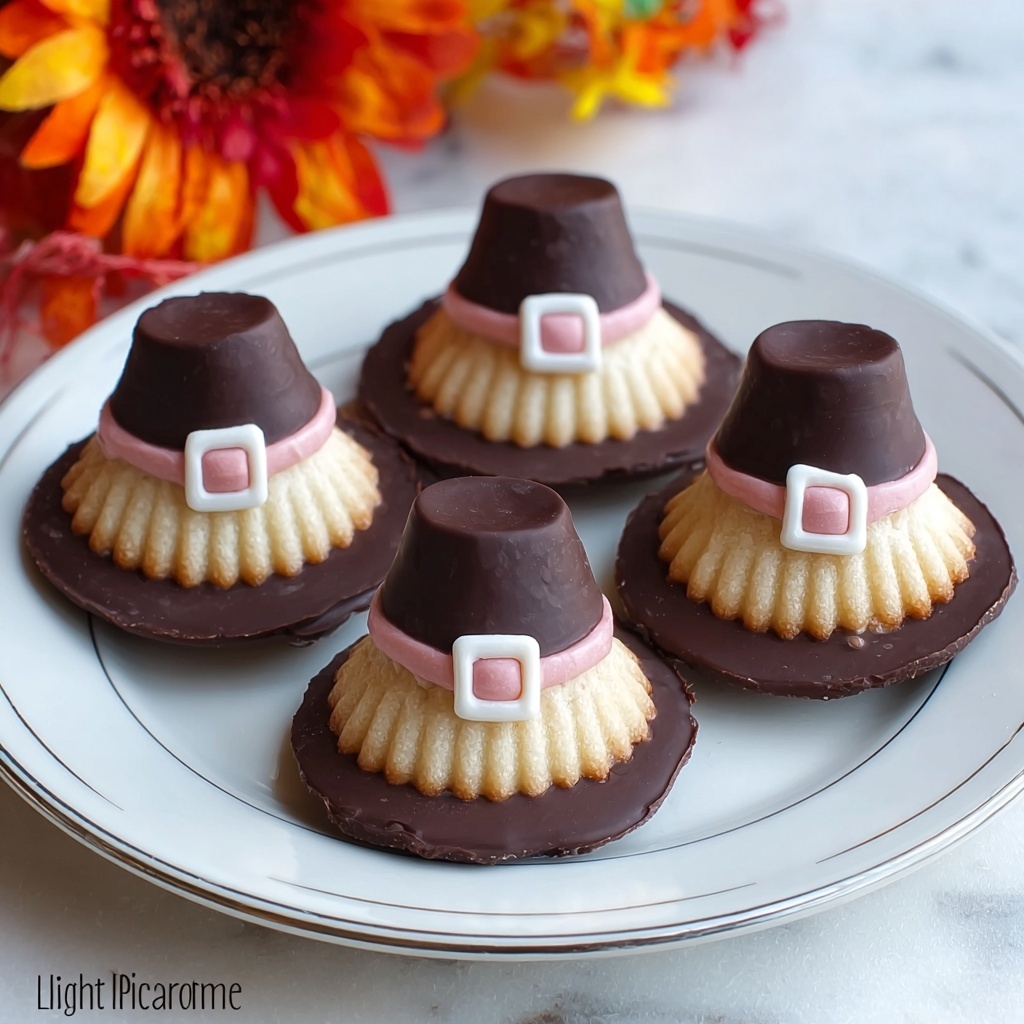
Spoon a small dollop of the melted chocolate right in the center of each cookie. Immediately press a miniature peanut butter cup upside down onto the chocolate dollop to mimic the shape of a pilgrim hat’s crown. This delightful step is where the visual charm of these cookies really starts to shine.
Step 4: Add the Buckle
With a small spoon or piping tool, carefully create a thin ring of melted chocolate around the base of each peanut butter cup where it meets the cookie. Then, place a yellow candy-coated chocolate or butterscotch chip right in the center of this ring. This little ‘buckle’ detail transforms your cookies into works of edible art.
Step 5: Let Them Set
Allow the freshly assembled cookies to sit at room temperature or pop them into the refrigerator for a few minutes until the chocolate hardens completely. Once set, your Pilgrim Hat Cookies will be ready to impress everyone at your next holiday gathering.
How to Serve Pilgrim Hat Cookies Recipe
Garnishes
To elevate the look and flavor of your Pilgrim Hat Cookies, consider adding a light dusting of powdered sugar to give a gentle hint of a frosty holiday morning. Fresh cranberries or a sprig of rosemary placed styled nearby can add both color and festive flair when serving.
Side Dishes
These cookies pair wonderfully with warm drinks like spiced cider, hot chocolate, or a creamy latte, enhancing the cozy feel of the season. For a party, serve alongside a simple platter of seasonal fruits and nuts to balance the sweetness.
Creative Ways to Present
Try stacking the pilgrim hat cookies on a tiered serving tray to resemble a festive display of tiny hats. Another charming idea is to arrange them around a pumpkin or cornucopia centerpiece on your dessert table, making them part of the holiday décor as well as the menu.
Make Ahead and Storage
Storing Leftovers
You can store your Pilgrim Hat Cookies in an airtight container at room temperature for up to five days. Keep them away from direct sunlight or heat sources to preserve the chocolate’s shine and maintain that perfect crunch from the cookies.
Freezing
If you want to make these treats ahead for a big celebration, freezing is a great option. Place the cookies in a single layer on a baking sheet to freeze until solid, then transfer to a freezer-safe container with parchment layers to prevent sticking. They will keep well for up to one month.
Reheating
Because these are no-bake cookies, reheating isn’t necessary—simply allow any frozen cookies to thaw at room temperature for about 30 minutes before serving. This will return them to their original delicious texture and shine.
FAQs
Can I use a different type of cookie instead of chocolate sandwich cookies?
Absolutely! While chocolate sandwich cookies provide the classic base, fudge-striped cookies can add a decorative brim and a slightly different flavor. Feel free to experiment to find your favorite twist.
Are Pilgrim Hat Cookies suitable for kids to help make?
Definitely! This recipe is straightforward and involves no baking, making it a fantastic project for kids with some adult supervision, particularly when melting the chocolate or handling small candy pieces.
What if I’m allergic to peanut butter cups?
Not a problem. You can substitute the miniature peanut butter cups with other small chocolate candies, like chocolate buttons or even marshmallow drops, though the flavor profile will change slightly.
How long do these cookies last once assembled?
When stored in an airtight container at room temperature, the Pilgrim Hat Cookies stay fresh and delicious for up to five days. Beyond that, the cookie texture may soften and the candy may lose its shine.
Can I make these gluten-free?
Yes! Look for gluten-free chocolate sandwich cookies and ensure all other ingredients, especially candies and chocolate chips, are certified gluten-free. This way, you can enjoy the Pilgrim Hat Cookies Recipe without worry.
Final Thoughts
There is something truly magical about creating Pilgrim Hat Cookies Recipe with your own hands—the way simple ingredients come together to form festive, flavorful bites that evoke the warmth and joy of the season. Whether you’re baking with family or looking for a quick and charming dessert, these hats will steal the show. Don’t hesitate to try this recipe; it’s guaranteed to add a sprinkle of sweetness and a dash of fun to your holiday celebrations!
Print
Pilgrim Hat Cookies Recipe
- Prep Time: 15 minutes
- Cook Time: 5 minutes
- Total Time: 20 minutes
- Yield: 24 cookies
- Category: Dessert
- Method: No-Cook
- Cuisine: American
- Diet: Vegetarian
Description
Delightfully festive and easy-to-make Pilgrim Hat Cookies perfect for Thanksgiving celebrations. These no-bake treats combine chocolate sandwich cookies, miniature peanut butter cups, and candy accents to create charming hat-shaped desserts that kids and adults will love.
Ingredients
Cookies and Candy
- 24 chocolate sandwich cookies
- 24 miniature peanut butter cups
- 24 small yellow candy-coated chocolates or butterscotch chips
Chocolate Melt
- 1 cup semisweet chocolate chips
- 1 tablespoon vegetable oil
Instructions
- Prepare the Base: Line a baking sheet with parchment paper. Carefully separate the chocolate sandwich cookies as needed so the flat side is facing up, creating the base for each pilgrim hat.
- Melt the Chocolate: In a microwave-safe bowl, combine the semisweet chocolate chips and vegetable oil. Microwave in 20-second intervals, stirring between each, until the chocolate is smooth and melted.
- Assemble the Hats: Place a small spoonful of melted chocolate in the center of each cookie. Immediately press a miniature peanut butter cup upside down onto the chocolate to form the hat shape.
- Add the Buckle Detail: Pipe or spoon a thin ring of melted chocolate around the base of the peanut butter cup where it meets the cookie.
- Place the Buckle Candy: Place a yellow candy-coated chocolate or butterscotch chip in the center of the chocolate ring to resemble the hat buckle.
- Set the Chocolate: Allow the cookies to sit at room temperature or refrigerate briefly until the chocolate sets completely and holds the components together.
Notes
- For a decorative brim, try using fudge-striped cookies instead of plain chocolate sandwich cookies.
- Store the assembled cookies in an airtight container at room temperature for up to 5 days to maintain freshness.


