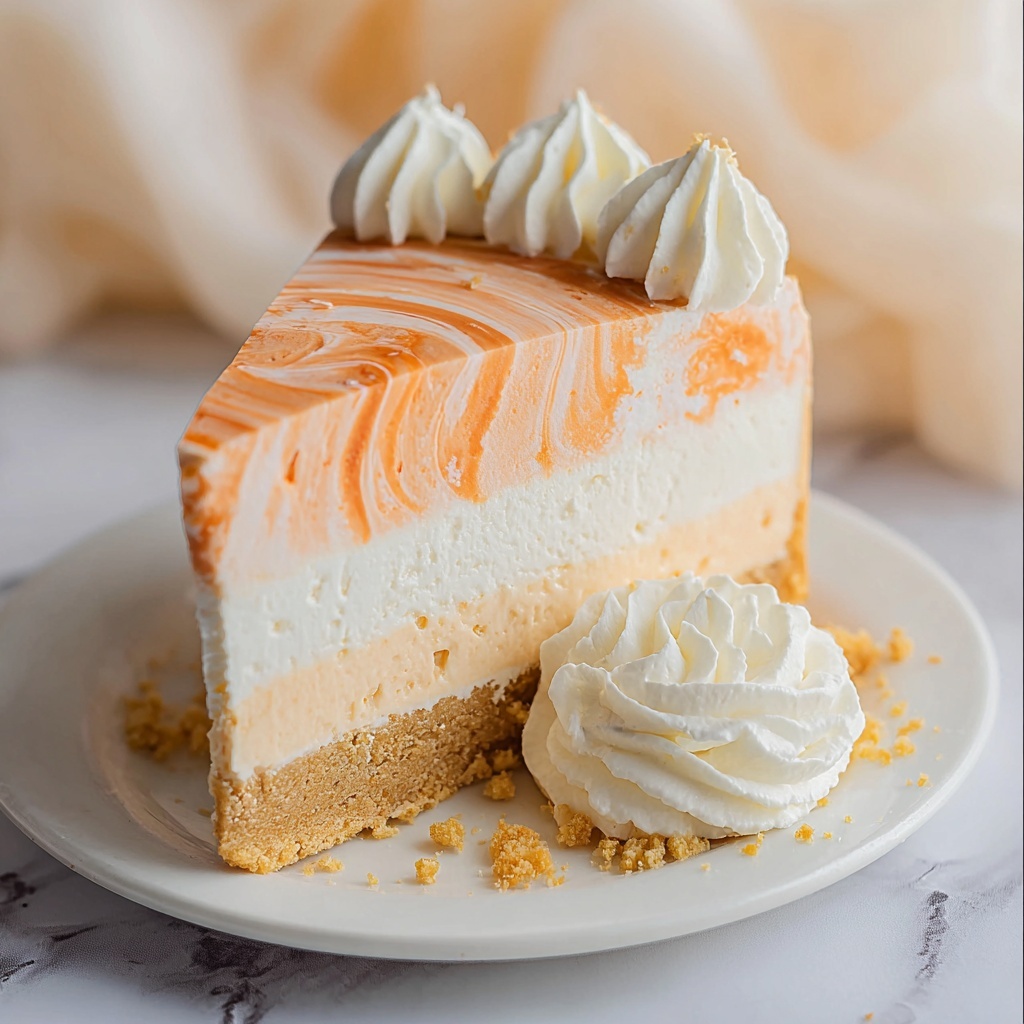
If you are craving a dessert that perfectly balances the bright, zesty flavor of orange with the creamy smoothness of cheesecake, look no further than this irresistible No Bake Orange Creamsicle Cheesecake Recipe. This dreamy, no fuss cheesecake captures the nostalgic taste of a creamsicle in every bite, all without ever turning on your oven. It’s a refreshing, light treat that beautifully blends citrusy orange gelatin with luscious whipped cream and tangy cream cheese, making it a delightful centerpiece for any occasion. The simplicity and elegance of this no bake dessert will have you reaching for seconds—and maybe even thirds.
Ingredients You’ll Need
Believe it or not, this No Bake Orange Creamsicle Cheesecake Recipe calls for simple, everyday ingredients that come together to create a truly showstopping dessert. Each ingredient plays a vital role, whether it’s the buttery vanilla wafer crust for texture, the zesty orange jello for vibrant color and flavor, or the fluffy whipped cream that adds perfect creaminess.
- Vanilla wafers (11 ounces, finely crushed): The base of the crust, offering a sweet, crunchy foundation.
- Granulated sugar (3 tablespoons plus ¾ cup): Sweetens the crust and the cheesecake layers just right.
- Unsalted butter (8 tablespoons, melted): Binds the crust ingredients together for that perfect firmness.
- Heavy cream (2 cups): Whipped to fluffy perfection, it adds lightness and richness to the filling.
- Clear vanilla flavoring (1 teaspoon total): Enhances all the flavors without overpowering them.
- Powdered sugar (½ cup plus 1 tablespoon): Adds smooth sweetness to the whipped cream and jello mixture.
- Boiling water (¾ cup): The key to dissolving the orange jello quickly and evenly.
- Orange-flavored jello (3 ounces): Brings that unmistakable citrus pop and creamy texture when folded in.
- Orange zest (1 tablespoon): Gives an extra punch of fresh orange flavor and a lovely aroma.
- Cream cheese (16 ounces, softened): The heart of the cheesecake—creamy, tangy, and utterly luscious.
How to Make No Bake Orange Creamsicle Cheesecake Recipe
Step 1: Prepare the Crust
Start by spraying a 9-inch springform pan with nonstick spray to ensure your cheesecake will release easily later. Then, mix the finely crushed vanilla wafers, granulated sugar, and melted butter in a bowl until combined. Press this mixture firmly into the bottom of the pan to create an even, compact crust, then pop it into the freezer to set while you move on to the filling. This crust provides the perfect crunchy contrast to the creamy layers that follow.
Step 2: Whip the Cream
In a chilled bowl, whip the heavy cream with the clear vanilla flavoring and powdered sugar until stiff peaks form. This light, airy whipped cream will be the key to making your cheesecake so silky, so fluffy, and utterly dreamy. Once whipped, divide the cream into two portions — you’ll use them in different parts of the filling and the swirls, so keep this in mind.
Step 3: Dissolve the Orange Jello
Pour boiling water over the orange-flavored jello and add orange zest for a burst of freshness. Stir until fully dissolved and let this mixture cool completely before folding in the whipped cream. The jello’s natural bright orange color and citrus flavor will combine beautifully with the creamy whipped cream to give you that authentic creamsicle flavor everyone loves.
Step 4: Make the Cheesecake Base
Beat the softened cream cheese in a large bowl until it’s smooth and creamy. Then add the granulated sugar and vanilla flavoring, mixing until everything is perfectly combined. This rich, tangy cream cheese base is the essence of any cheesecake, and combining this with whipped cream makes the texture lighter without losing that classic cheesiness.
Step 5: Fold and Layer
Fold half of the whipped cream into the cream cheese mixture, reserving ¾ cup for later swirling. Similarly, fold half of the whipped cream portion into the cooled orange jello, saving ½ cup for swirls. Now, spread the cream cheese mixture evenly over the chilled crust, leaving some space for adding swirls of the orange cream. Carefully dollop the reserved orange cream over the cheesecake layer and gently swirl with a fork to create beautiful, enticing patterns. Finish by spreading the remaining cheesecake mixture over your swirls, and top with the remaining orange cream. This layering and swirling process creates that stunning creamsicle effect.
Step 6: Chill and Set
Cover your cheesecake and refrigerate for at least 6 hours, or overnight if possible. This no bake cheesecake needs time to firm up and let the flavors meld. Once set, run a knife gently around the pan’s edge before removing the springform ring to reveal your masterpiece. Trust me, the wait is so worth it!
How to Serve No Bake Orange Creamsicle Cheesecake Recipe
Garnishes
Calling all garnish lovers! Sprinkle a little extra orange zest on top right before serving for a burst of citrus aroma. Fresh mint leaves add a pop of green that looks as great as it tastes. For an added crunch, consider some finely chopped toasted almonds or pistachios on the side. Each little touch can elevate your cheesecake’s presentation and flavor.
Side Dishes
This no bake orange creamsicle cheesecake pairs wonderfully with fresh berries like raspberries or blueberries to balance the sweetness with tartness. A light fruit salad or a scoop of vanilla bean ice cream makes for an indulgent but refreshing accompaniment. If you want to add a beverage, try a chilled glass of sparkling water with a hint of lemon or orange for a palate cleanser that complements the dessert perfectly.
Creative Ways to Present
If you’re serving guests or want to make it extra special, try cutting individual portions and placing them on pretty plates with a drizzle of orange-infused glaze or a small dollop of whipped cream on the side. For a party, serve in clear glass jars or mini dessert cups with alternating layers of crust, cheesecake, and orange cream to give a sophisticated yet fun twist. Get creative and show off that gorgeous orange swirl!
Make Ahead and Storage
Storing Leftovers
Leftover No Bake Orange Creamsicle Cheesecake Recipe can be stored covered in the refrigerator for up to 5 days. Just make sure to keep it tightly wrapped to prevent it from absorbing any fridge odors, and to maintain that wonderfully creamy texture.
Freezing
This cheesecake freezes beautifully, making it a convenient dessert to prepare ahead of time. Wrap it securely in plastic wrap and aluminum foil to avoid freezer burn, and freeze for up to a month. When you’re ready to enjoy it, transfer it to the refrigerator to thaw overnight.
Reheating
Since this No Bake Orange Creamsicle Cheesecake Recipe is best served chilled, there’s no need to reheat. Just let it come to fridge temperature or slightly warmer for a few minutes before slicing—this helps the flavors fully shine without losing the creamy texture.
FAQs
Can I use a different type of crust for this cheesecake?
Absolutely! While vanilla wafers create a deliciously sweet and light crust, you could also use graham crackers or even gingersnaps for a spicier twist that complements the orange flavor nicely.
Is it possible to make this recipe vegan or dairy-free?
This recipe relies heavily on cream cheese and heavy cream for its signature texture and flavor, but you can experiment with vegan cream cheese and coconut cream as substitutes. Keep in mind, the texture and taste may vary slightly.
How long does it take for the cheesecake to set properly?
For the best results, allow the cheesecake to chill for at least 6 hours, but overnight is ideal. This wait ensures the layers firm up completely and the gorgeous swirls stay intact when sliced.
Can I prepare this No Bake Orange Creamsicle Cheesecake Recipe in advance for a party?
Definitely! This cheesecake is perfect for making a day or two ahead. Just keep it refrigerated and add any garnishes right before serving for maximum freshness.
What if I want a stronger orange flavor?
To boost the orange punch, feel free to add a bit more orange zest or a teaspoon of orange extract. Both options work beautifully without overwhelming the delicate balance of the cheesecake flavors.
Final Thoughts
I cannot recommend this No Bake Orange Creamsicle Cheesecake Recipe enough if you want a dessert that’s truly special but easy to make. Every bite bursts with nostalgic citrus goodness, creamy indulgence, and a delightful balance of textures that will have friends and family asking for your secret. Go ahead, try it for your next gathering or whenever you need a sweet pick-me-up that feels like sunshine on a plate.
Print
No Bake Orange Creamsicle Cheesecake Recipe
- Prep Time: 25 minutes
- Cook Time: 0 minutes
- Total Time: 6 hours 25 minutes
- Yield: 8 servings
- Category: Dessert
- Method: No-Cook
- Cuisine: American
- Diet: Vegetarian
Description
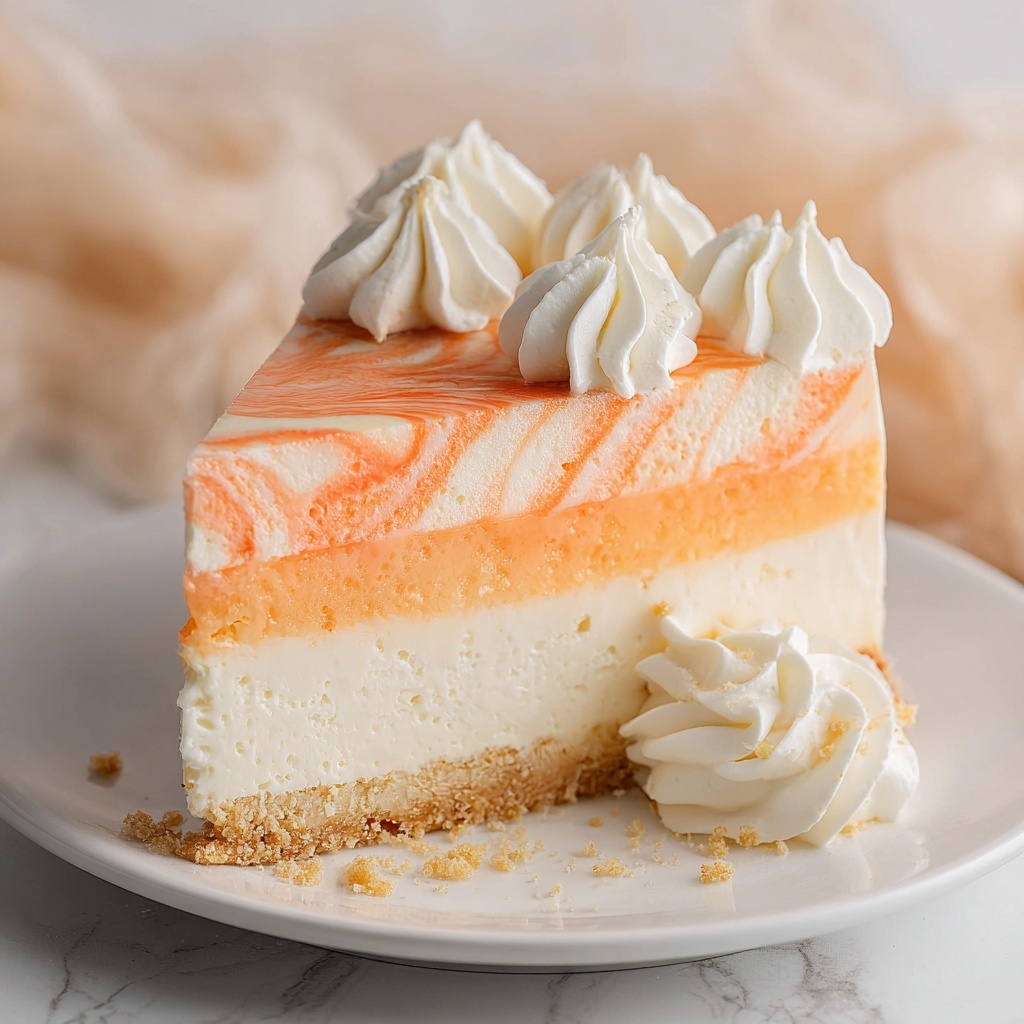
A luscious no-bake Orange Creamsicle Cheesecake that combines a crisp vanilla wafer crust with creamy, zesty orange and vanilla-flavored layers. This refreshing dessert is perfect for warm days or any occasion that calls for a smooth, citrusy treat with a delightful swirl design.
Ingredients
Crust
- 11 ounces vanilla wafers, finely crushed
- 3 tablespoons granulated sugar
- 8 tablespoons unsalted butter, melted
Cheesecake Filling and Swirl
- 2 cups heavy cream
- ½ teaspoon clear vanilla flavoring
- ½ cup powdered sugar, plus 1 tablespoon
- ¾ cup boiling water
- 3 ounces orange-flavored jello
- 1 tablespoon orange zest (about 2½ to 3 tablespoons depending on size)
- 16 ounces cream cheese, softened
- ¾ cup granulated sugar
- ½ teaspoon clear vanilla flavoring
Instructions
- Prepare the Pan: Spray a 9-inch springform pan thoroughly with nonstick spray to ensure easy removal of the cheesecake later.
- Make the Crust: In a bowl, combine the finely crushed vanilla wafers with 3 tablespoons granulated sugar and melted butter. Mix until well incorporated, then press this mixture firmly into the bottom of the prepared springform pan. Freeze this crust to set firmly while preparing the filling.
- Whip the Cream: In a large mixing bowl, whip together 2 cups heavy cream, ½ teaspoon clear vanilla flavoring, and ½ cup powdered sugar on high speed until stiff peaks form. Divide this whipped cream into two equal portions for layering later.
- Prepare the Orange Jello Mixture: Dissolve 3 ounces of orange-flavored jello and 1 tablespoon orange zest into ¾ cup boiling water. Stir until fully dissolved, then cool the mixture completely to room temperature.
- Create the Orange Cream Swirl: Fold half of one portion of the whipped cream into the cooled jello mixture until well combined. Set aside ½ cup of this orange cream mixture for swirling into the cheesecake later.
- Beat Cream Cheese Mixture: In a separate bowl, beat 16 ounces of softened cream cheese until smooth. Add ¾ cup granulated sugar and ½ teaspoon clear vanilla flavoring, mixing until the mixture is creamy and well blended.
- Combine Whipped Cream and Cream Cheese: Fold half of the remaining whipped cream mixture into the cream cheese mixture until smooth and fluffy. Reserve about ¾ cup of this cheesecake mixture for swirling purposes.
- Assemble the Cheesecake Base Layer: Spread the remaining cheesecake mixture evenly over the chilled crumb crust in the springform pan, leaving some space to add the swirls on top.
- Add the Swirls: Dollop the reserved orange cream mixture randomly over the cheesecake layer. Using a fork, gently swirl it into the cheesecake layer to create a marbled effect.
- Layer More Cheesecake Mixture: Spread the reserved ¾ cup cheesecake mixture gently over the marbled swirls to create an even top layer.
- Finish with Orange Cream: Spread the remaining orange cream mixture on top as the final layer, smoothing it out evenly for a polished finish.
- Chill to Set: Refrigerate the assembled cheesecake for at least 6 hours or ideally overnight to allow it to firm up completely.
- Release from Pan and Serve: Before serving, run a knife carefully around the edge of the springform pan to loosen the cheesecake. Remove the springform ring and slice to serve.
Notes
- For best flavor, use freshly grated orange zest.
- Ensure the cream cheese is softened to room temperature for smoother mixing.
- Use a sharp knife dipped in hot water for clean cheesecake slices.
- This cheesecake is best served chilled and consumed within 3 days.
- Freezing leftovers is possible; thaw in refrigerator overnight before serving.


