
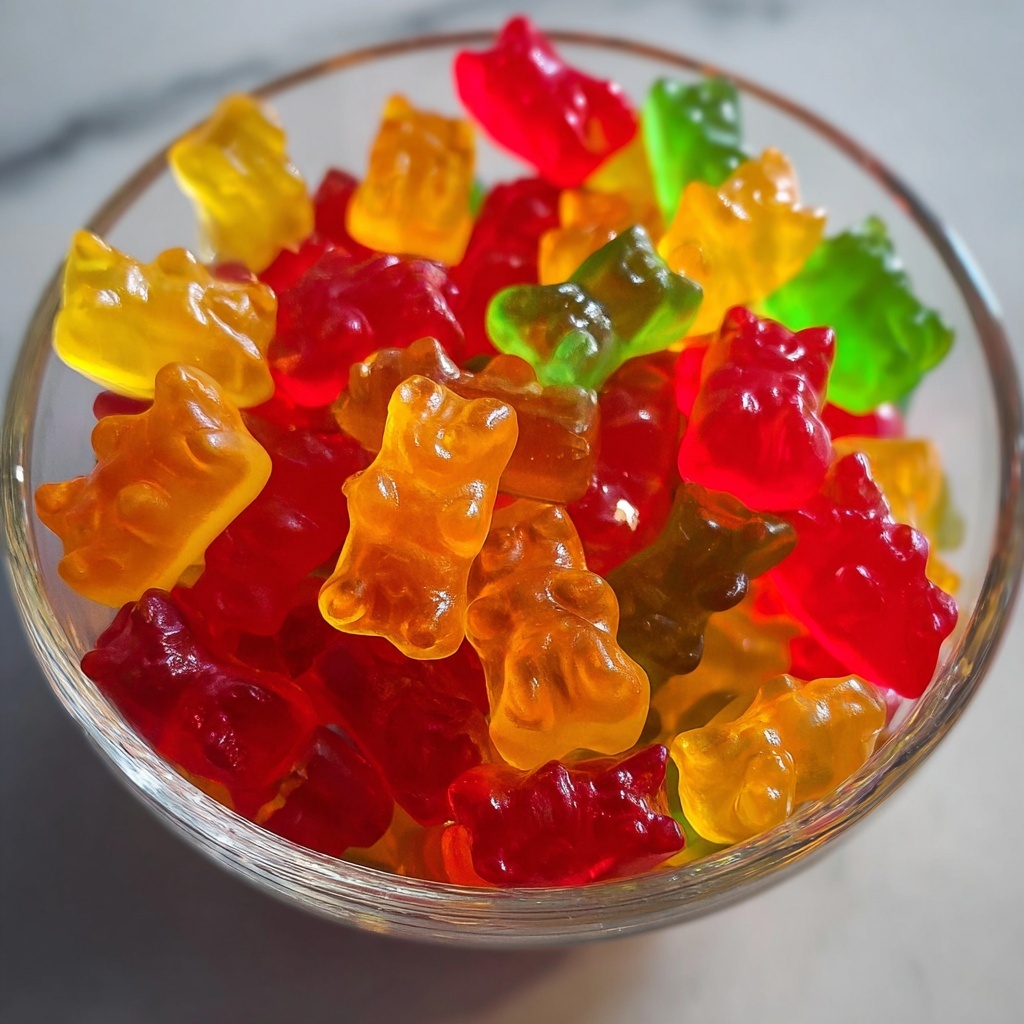
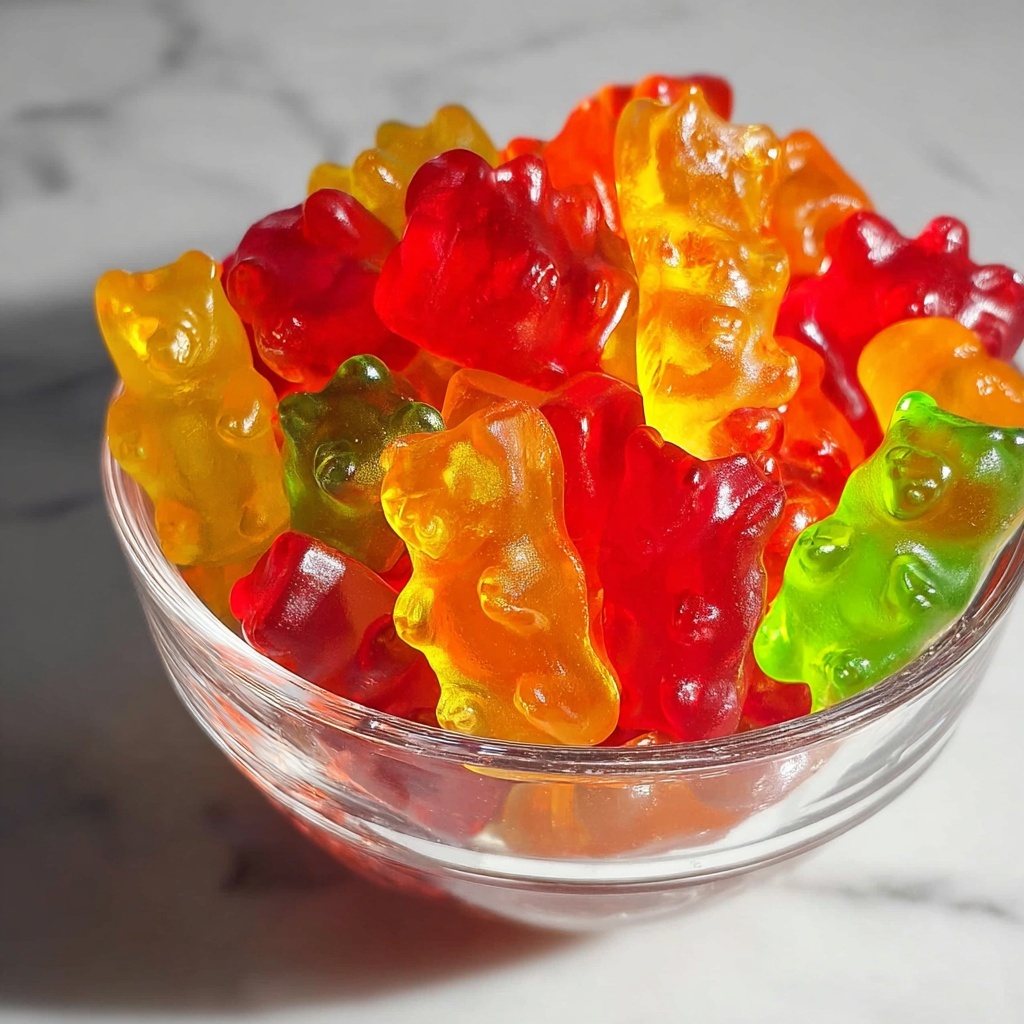
If you’re craving a sweet trip down memory lane, these Kool Aid Gummy Treats: 5 Easy Steps to Nostalgic Fun Recipe are just the ticket. Bursting with vibrant colors and that unmistakable tangy-sweet flavor, they instantly bring back those carefree childhood afternoons spent savoring every chewy bite. This recipe is wonderfully simple, transforming just a handful of everyday ingredients into chewy, fruity gummies that will have everyone smiling and maybe even reminiscing about the good old days.
Ingredients You’ll Need
Gathering the right ingredients is half the joy of making these delightful Kool Aid gummies. Each plays a key role, from delivering the bold flavor to achieving that perfect chew and vibrant color that makes these treats so irresistible.
- 1 cup water: This is the base that dissolves the Kool Aid and sugar, creating a smooth mixture for the gummies.
- 1 packet Kool Aid (any flavor): Choose your favorite for that trademark fruity punch and vivid color.
- 2 cups granulated sugar: Adds the essential sweetness and helps the gummies set with a firm, chewy texture.
- 2 tablespoons unflavored gelatin: The magic ingredient that creates that classic gummy chewiness everyone loves.
How to Make Kool Aid Gummy Treats: 5 Easy Steps to Nostalgic Fun Recipe
Step 1: Boil the Water
Begin by heating 1 cup of water in a saucepan until it reaches a rolling boil. This step is important because hot water helps dissolve the Kool Aid and sugar fully, ensuring an even flavor throughout your gummy mixture.
Step 2: Stir in Kool Aid and Sugar
Once the water is boiling, quickly stir in the entire packet of Kool Aid and 2 cups of granulated sugar. Mix it thoroughly until the sugar and Kool Aid powder completely dissolve. This is where your gummies get their signature color and deliciously tangy sweetness.
Step 3: Add Gelatin and Stir
Sprinkle the 2 tablespoons of unflavored gelatin over the hot mixture. Stir continuously until the gelatin is fully dissolved. This ensures your gummy treats will set properly with that perfect chewy texture we all crave.
Step 4: Pour into Molds
Remove the saucepan from heat and carefully pour the mixture into your chosen molds. Silicone molds work beautifully, but any shallow pan will do. This is the fun part where you shape your nostalgic treats.
Step 5: Refrigerate Until Set
Pop your molds into the refrigerator and let them chill for at least 4 hours. This waiting period allows the gelatin to work its magic, transforming the liquid mixture into the firm, chewy delights you’ve been anticipating.
How to Serve Kool Aid Gummy Treats: 5 Easy Steps to Nostalgic Fun Recipe
Garnishes
To elevate your Kool Aid Gummy Treats, consider lightly dusting them with a bit of sugar or even a splash of citrus zest. It adds a little sparkle and kick that takes these treats from simple to spectacular at any gathering.
Side Dishes
Serve these gummy treats alongside a refreshing fruit salad or a scoop of vanilla ice cream for a fun and colorful dessert spread. Their chewy texture pairs perfectly with creamy or juicy complements.
Creative Ways to Present
Think beyond the molds! Arrange your Kool Aid gummy treats on a whimsical platter or thread them onto skewers for a festive party snack. You can even place them in small cellophane bags tied with ribbons for charming homemade gifts.
Make Ahead and Storage
Storing Leftovers
Keep your Kool Aid Gummy Treats in an airtight container at room temperature for up to a week. This will preserve their chewy texture and bright flavor without drying out.
Freezing
If you want to keep them longer, feel free to freeze the gummies in a sealed bag. Thaw at room temperature when you’re ready to enjoy, though they taste best eaten fresh or within a week.
Reheating
Since these treats are meant to be chewed cold or at room temperature, reheating is not recommended. Just pull them from the fridge or freezer and enjoy their nostalgic chewiness fresh.
FAQs
Can I use sugar substitutes in the Kool Aid Gummy Treats?
While you can experiment with sugar substitutes, the texture and setting quality may be affected. Granulated sugar helps the gummies set with that ideal firmness and chew, so alternatives might result in softer gummies.
What molds work best for these gummy treats?
Silicone molds are fantastic because they make removing the gummies easy and come in lots of fun shapes. However, any shallow pan or baking dish can work if you plan to cut the gummies into squares after setting.
Can I use different Kool Aid flavors or mix them?
Absolutely! Feel free to swap out flavors or even mix a couple of packets to create your own unique combinations. This recipe is a great canvas for experimenting with fun fruity flavors.
How long do these gummies last before they go bad?
At room temperature in an airtight container, they usually last about one week. Storing them in the fridge or freezer can extend their freshness by a few days, but they’re best enjoyed fresh when their texture is at its peak.
Is it possible to make these gummies vegan?
The recipe relies on gelatin, which is animal-based. To make a vegan version, you’d need to substitute gelatin with a plant-based alternative like agar-agar, though the texture and setting time will differ.
Final Thoughts
There’s something truly magical about making and sharing Kool Aid Gummy Treats: 5 Easy Steps to Nostalgic Fun Recipe. They bring a burst of color, flavor, and joy that’s hard to beat. Whether you’re making them for a party, a gift, or a sweet afternoon snack, this recipe is sure to become a beloved classic. So grab your ingredients, dive in, and enjoy every chewy, nostalgic bite!
Print
Kool Aid Gummy Treats: 5 Easy Steps to Nostalgic Fun Recipe
- Prep Time: 10 minutes
- Cook Time: 5 minutes
- Total Time: 4 hours 15 minutes
- Yield: 24 servings
- Category: Dessert
- Method: Stovetop
- Cuisine: American
Description
These Kool Aid Gummy Treats are a fun, nostalgic snack that combines the sweet, tangy flavor of Kool Aid with a chewy gummy texture. Made in just five easy steps, this recipe uses simple ingredients and requires minimal preparation, making it perfect for a colorful and playful treat that both kids and adults will love.
Ingredients
Ingredients
- 1 cup water
- 1 packet Kool Aid (any flavor)
- 2 cups granulated sugar
- 2 tablespoons unflavored gelatin
Instructions
- Boil Water: In a saucepan, heat 1 cup of water over medium-high heat until it reaches a rolling boil, preparing the base for dissolving the ingredients.
- Dissolve Kool Aid and Sugar: Stir the packet of Kool Aid powder and 2 cups of granulated sugar into the boiling water until both are fully dissolved, creating a flavorful syrup.
- Add Gelatin: Sprinkle 2 tablespoons of unflavored gelatin over the hot mixture and stir continuously until the gelatin is completely dissolved, ensuring a smooth gummy texture.
- Pour into Molds: Remove the saucepan from heat and carefully pour the mixture into silicone or plastic molds of your choice, shaping your gummy treats.
- Refrigerate and Set: Place the filled molds in the refrigerator and chill for at least 4 hours, allowing the gummies to firm up properly before removing them from the molds and enjoying.
Notes
- You can substitute the granulated sugar with a sugar substitute for a lower-calorie version, but texture may vary.
- Make sure to fully dissolve the gelatin to prevent lumps in the gummies.
- Use silicone molds for easier removal of gummy treats.
- Try mixing different Kool Aid flavors to create colorful layered gummy snacks.
- Store gummies in an airtight container in the refrigerator to maintain freshness and texture.


