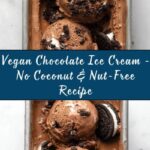
If you have been searching high and low for a deliciously creamy dessert that is completely free from coconut and nuts, your search ends here with this delightful Vegan Chocolate Ice Cream – No Coconut & Nut-Free Recipe. This luscious treat combines the richness of Dutch processed cocoa with the smoothness of soy cream and the gentle sweetness of homemade sweetened condensed soy milk. It is the perfect way to enjoy a dairy-free, allergen-conscious dessert that doesn’t compromise on flavor or texture. You and your loved ones are going to adore every scoop of this velvety, chocolaty goodness!
Ingredients You’ll Need
This recipe keeps things simple but relies on carefully chosen ingredients to create its irresistible flavor and texture. Each component plays a key role, contributing to a rich, smooth, and perfectly balanced ice cream.
- Unsweetened soy milk (4.25 cups): The creamy base that creates a silky texture without added sugars or fats.
- Caster sugar (1 cup): Also known as superfine sugar, it dissolves easily and sweetens the ice cream gently.
- Sea salt (¼ teaspoon): Enhances the chocolate flavor and balances sweetness.
- Soy cream (14.1 oz): Adds lush creaminess and helps mimic traditional dairy ice cream fat content.
- Oat milk (⅓ cup): Provides a hint of natural sweetness and softens the blend.
- Vanilla extract (1 teaspoon): Brings warmth and depth to the chocolate notes.
- Dutch processed cocoa powder (6 tablespoons): Gives that rich, deep chocolate flavor and smooth dark hue.
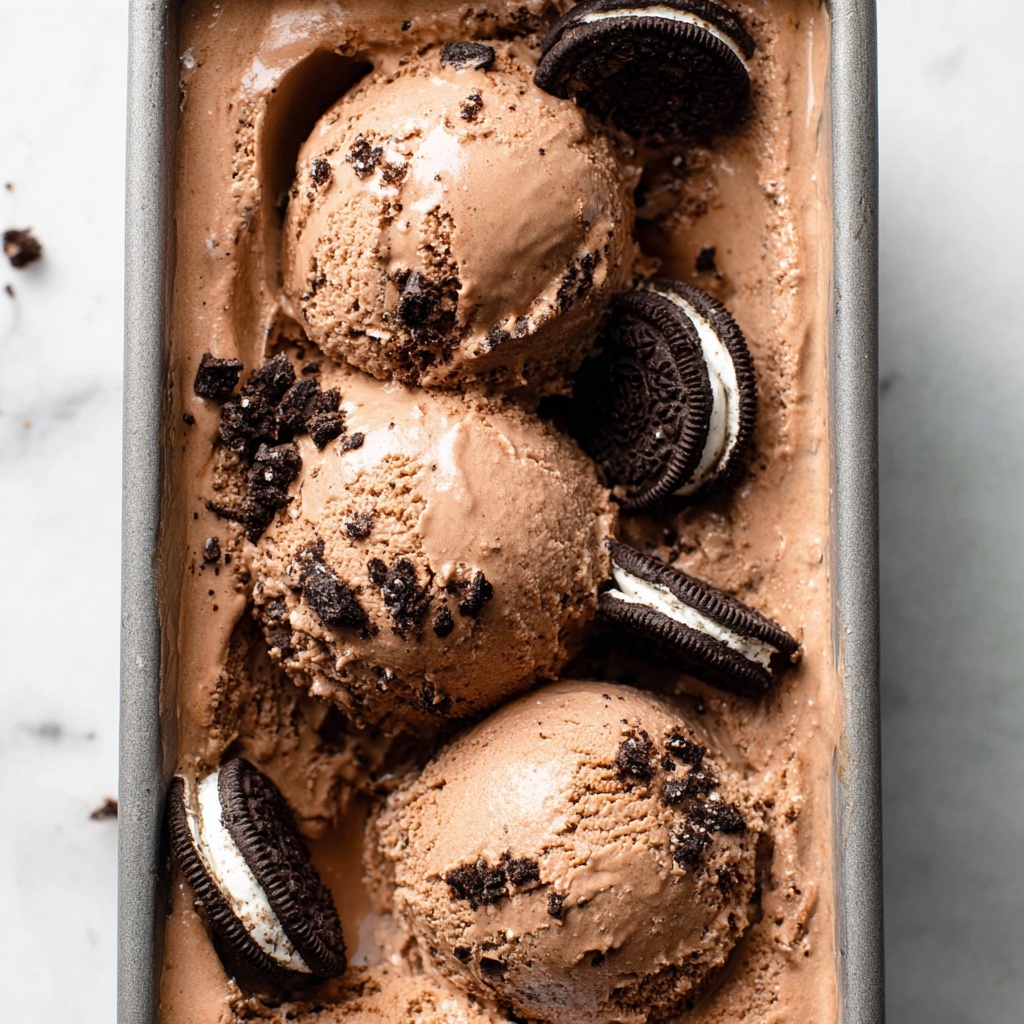
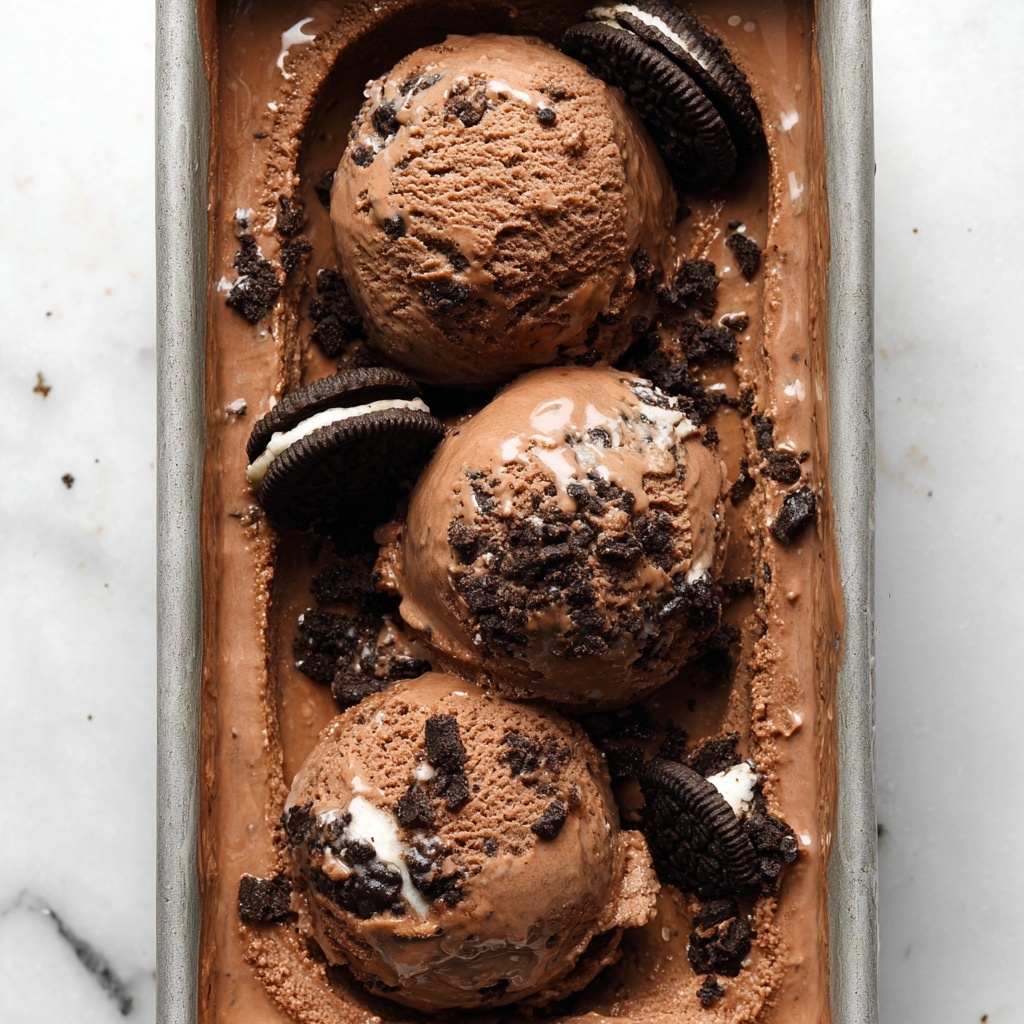
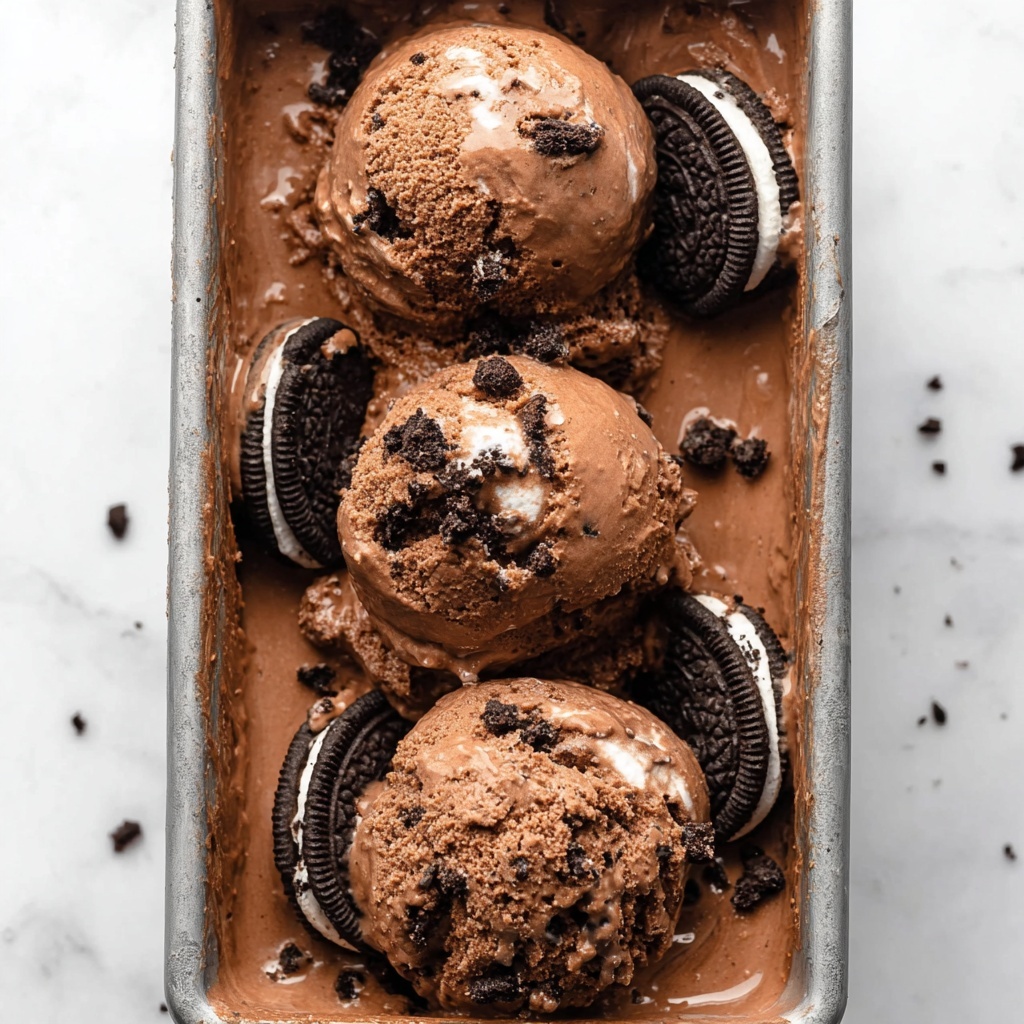
- Vegan Oreo cookies (8-10 pieces): Optional, but their crunch and chocolate flavor add an exciting texture contrast.
How to Make Vegan Chocolate Ice Cream – No Coconut & Nut-Free Recipe
Step 1: Make the Sweetened Condensed Soy Milk
This is the heart of your ice cream’s lusciousness, and making it at home is key for flavor and texture. Start by combining your unsweetened soy milk, caster sugar, and sea salt in a large saucepan with enough room for bubbling and expansion. Heat the mixture over medium heat, stirring occasionally until all the sugar has dissolved.
Step 2: Simmer and Reduce
Once dissolved, increase the heat until the mixture comes to a gentle simmer. Reduce to medium-low and keep it at a steady simmer for approximately two hours. Stir every 15 minutes to prevent sticking and burning, ensuring the mixture thickens slowly and the sugars caramelize beautifully without scorching.
Step 3: Check for Thickness
At the two-hour mark, your sweetened condensed soy milk should be thick, slightly sticky, and resemble the consistency of regular condensed milk. Measure about 350 grams for the next stage. If it’s still too runny or too much liquid remains, simmer a little longer while stirring continuously to achieve the perfect thickness essential for creamy ice cream.
Step 4: Combine the Cream and Flavorings
Allow the condensed soy milk to cool, then whisk it vigorously into the soy cream. Slowly add your oat milk and vanilla extract, blending everything into a luxuriously smooth mixture. This combination is what gives the ice cream its richness and silky mouthfeel.
Step 5: Add the Chocolate
Incorporate the Dutch processed cocoa powder in small increments, whisking for about 10 seconds after adding each tablespoon. This method helps fully blend the cocoa powder without clumping, infusing the mixture with that deep, chocolate intensity you crave.
Step 6: Churn and Add Cookies
Pour your chocolate mixture into an ice cream machine and churn according to your machine’s instructions—mine takes about 40 minutes for the perfect texture. Just before finishing, fold in crushed vegan Oreos or your favorite vegan cookies to elevate texture and give a delightful crunch.
Step 7: Freeze and Serve
Transfer the churned mixture to a loaf pan lined with parchment paper, cover tightly, and freeze for a minimum of two hours. When ready to indulge, remove the ice cream 5 to 10 minutes beforehand so it softens slightly for perfect scooping without melting too fast.
How to Serve Vegan Chocolate Ice Cream – No Coconut & Nut-Free Recipe
Garnishes
Enhance your Vegan Chocolate Ice Cream – No Coconut & Nut-Free Recipe experience with simple yet elegant garnishes. Fresh berries, a dusting of cocoa powder, or a drizzle of vegan chocolate syrup complement the deep chocolate flavor beautifully. For a crunch, sprinkle some crushed vegan cookies on top.
Side Dishes
This ice cream pairs wonderfully with warm desserts like a dairy-free brownie or a slice of vegan chocolate cake. The contrast between warm and cold is irresistible. Alternatively, fresh fruit salads add a light and refreshing balance to this rich chocolatey treat.
Creative Ways to Present
For a fun twist, serve the ice cream scoops inside vegan waffle cones or hollowed-out fruit shells like coconut halves (if you’re not allergic) or small melons. You can also create a layered parfait with vegan granola and dairy-free whipped cream for a striking presentation that’s sure to impress guests.
Make Ahead and Storage
Storing Leftovers
Your Vegan Chocolate Ice Cream – No Coconut & Nut-Free Recipe stores beautifully in the freezer. Keep it in an airtight container or tightly wrapped with plastic wrap to prevent ice crystals from forming and preserve that rich texture you worked so hard to create.
Freezing
Freeze your ice cream fully for at least two hours after churning. For longer storage, it will keep well for up to a month. Be sure to label the container with the date so you enjoy it at its freshest.
Reheating
While ice cream is meant to be enjoyed frozen, letting it sit at room temperature for about 5 to 10 minutes before scooping will soften it perfectly without any need for microwaving, which can cause undesirable texture changes.
FAQs
Can I use a different plant milk instead of soy milk?
Yes! While soy milk provides the best creaminess and structure for this recipe, you can experiment with other plant milks like oat or pea milk, though the texture may vary slightly.
Why is there no coconut in this recipe?
This recipe is designed specifically for those with coconut allergies or who prefer to avoid coconut products while still enjoying creamy, delicious vegan ice cream.
Are the vegan Oreo cookies necessary?
The cookies are optional but highly recommended for added texture and flavor contrast. You can try other vegan cookies or skip them altogether for a smooth chocolate ice cream.
Can I make this recipe without an ice cream machine?
Yes, but you’ll need to periodically whisk the mixture every 30 minutes as it freezes to break up ice crystals. It will take longer and require more effort but can still yield good results.
How long does the homemade condensed soy milk last?
You can store homemade condensed soy milk in the refrigerator for up to 5 days in an airtight container. It’s handy for other vegan desserts or coffee sweetening!
Final Thoughts
I can’t recommend this Vegan Chocolate Ice Cream – No Coconut & Nut-Free Recipe enough for anyone craving a luscious, allergen-friendly treat that’s easy to make and endlessly satisfying. It’s perfect for gatherings or cozy nights in, giving you all the indulgent chocolate flavor without dairy, nuts, or coconut. Give it a try—you’ll be amazed at how simple ingredients come together to create pure dessert magic!
Print
Vegan Chocolate Ice Cream – No Coconut & Nut-Free Recipe
- Prep Time: 15 minutes
- Cook Time: 2 hours 15 minutes
- Total Time: 4 hours 30 minutes
- Yield: 8 servings
- Category: Dessert
- Method: Churning
- Cuisine: Vegan
- Diet: Vegan
Description
This rich and creamy vegan chocolate ice cream is completely free of coconut and nuts, making it perfect for those with allergies or dietary restrictions. Made with a homemade sweetened condensed soy milk base, soy cream, and oat milk, it delivers decadent chocolate flavor with a smooth texture. Vegan Oreos add a delightful crunch inside, while the recipe relies on an ice cream machine and freezer for the perfect frozen treat.
Ingredients
Condensed Soy Milk
- 4.25 cups unsweetened soy milk
- 1 cup caster sugar (superfine or cane sugar)
- ¼ teaspoon sea salt
Ice Cream Base
- 14.1 oz soy cream
- ⅓ cup oat milk (or other plant-based milk of choice)
- 1 teaspoon vanilla extract
- 6 tablespoons Dutch processed cocoa powder
Extras
- 8–10 vegan Oreos (or other vegan cookies of choice)
Instructions
- Make Sweetened Condensed Soy Milk: In a large saucepan, combine the soy milk, caster sugar, and sea salt. Heat over medium, stirring for a few minutes until the sugar dissolves completely.
- Simmer the Mixture: Increase the heat until the mixture begins to simmer, then lower to medium to maintain a gentle simmer. Watch carefully to prevent boiling over during the first ten minutes.
- Reduce Slowly: Set a timer and whisk the mixture every 15 minutes for 2 hours, allowing it to reduce and thicken gradually.
- Final Reduction & Measure: In the last 15 minutes, vigilantly monitor the mixture as it thickens to a sticky, condensed milk consistency. Pour into a heat-proof container to measure; aim for about 350g. If there’s too much, continue simmering and stirring for another 10–15 minutes to reduce further.
- Prepare Ice Cream Base: Once cooled, whisk the chilled condensed soy milk in a large bowl. Gradually whisk in the soy cream until fully incorporated.
- Add Additional Liquids & Flavor: Mix in the oat milk and vanilla extract until smooth.
- Incorporate Cocoa Powder: Add the Dutch processed cocoa powder in tablespoon increments, whisking about 10 seconds after each addition to blend thoroughly.
- Churn the Ice Cream: Pour the mixture into an ice cream machine and churn according to manufacturer instructions (typically 40 minutes).
- Add Cookies: Transfer the churned ice cream to a bowl and gently fold in crushed vegan Oreos if using.
- Freeze to Firm: Line a loaf pan with parchment paper and transfer the ice cream into it. Cover and freeze for at least 2 hours to set.
- Serve: Remove the ice cream from the freezer about 5-10 minutes before serving to allow it to soften slightly for the perfect scoop.
Notes
- You can substitute oat milk with any plant-based milk of your choice for variation.
- Ensure to use vegan-certified Oreos or cookies to keep the recipe fully vegan.
- Whisking frequently during the reduction prevents scorching and ensures an even texture in the condensed milk.
- For best results, use a good quality ice cream machine to achieve the ideal creamy consistency.
- This recipe contains no coconut or nuts, making it suitable for those with allergies to these ingredients.


