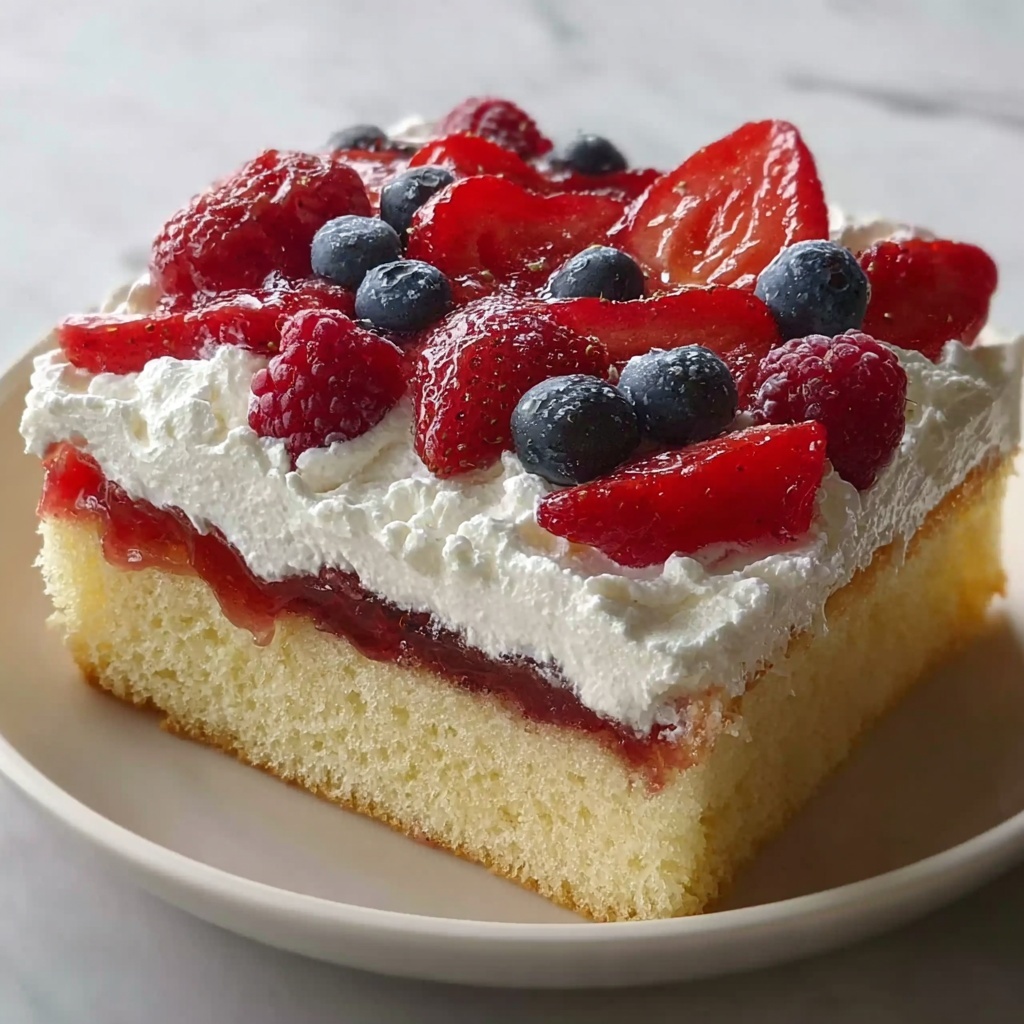
If you’re dreaming of a dessert that perfectly captures the joy of warm days and vibrant flavors, this Summer Berry Poke Cake Recipe is your new best friend. Imagine a moist vanilla cake bursting with luscious mixed berries and vibrant berry gelatin, all crowned by fluffy whipped topping that melts in your mouth. It’s a celebration of summer’s best fruits and a foolproof way to impress at any gathering. Once you try it, you’ll see why this cake is a staple for warm-weather indulgence and happy memories.
Ingredients You’ll Need
Gathering these simple yet essential ingredients is your first step toward homemade magic. Each one plays a crucial role: the vanilla cake mix provides the tender, airy base, while the mixed berries and berry gelatin bring fresh, tangy bursts of color and flavor. The whipped topping finishes everything off with a light, creamy texture that ties all the elements together beautifully.
- Vanilla cake mix: The foundation of your cake, ensuring moistness and a delicate crumb every time.
- Large eggs: They bind the cake batter and add richness for a perfect structure.
- Water: Hydrates the cake mix and helps create the ideal batter consistency.
- Mixed berries: A colorful blend of strawberries, blueberries, and raspberries that add fresh, bright flavor bursts.
- Berry gelatin: Infuses the cake with sweet, fruity jelly that soaks into every poke, amplifying the berry essence.
- Whipped topping: This creamy layer brings a light and airy contrast to the cake’s texture.
- Fresh whipped cream: Adds an extra touch of indulgence and creaminess right before serving.
How to Make Summer Berry Poke Cake Recipe
Step 1: Preheat and Prepare the Cake Batter
Start by preheating your oven to 350°F (175°C) — this ensures a perfectly even bake later on. Follow the package instructions to mix your vanilla cake batter, folding in eggs and water gently but thoroughly. Pour this luscious batter into a greased 9×13 inch baking dish to set the stage for your berry masterpiece.
Step 2: Bake Until Golden and Perfectly Done
Bake your cake for 30 to 35 minutes, or until a toothpick inserted in the center comes out clean. This timing guarantees a moist crumb without being soggy, so keep an eye as the end nears. Once done, let the cake rest for 10 minutes to cool slightly and firm up for the next crucial step.
Step 3: Poke the Cake and Add Berry Gelatin
Here comes the fun! Using the handle of a wooden spoon, poke holes all over the surface of the warm cake. These little pockets are what make this recipe remarkable — they allow the berry gelatin to seep deep into the cake layers, creating juicy bites of summer in every slice. Prepare your berry gelatin according to the package directions and pour it gently but evenly over the cake, making sure it sinks into all those holes.
Step 4: Chill Until the Flavors Meld
Transfer your cake to the refrigerator and let it cool completely for at least 2 hours. This cooling step lets the gelatin set beautifully and the fruity flavors infuse the cake, creating a refreshing and indulgent dessert perfect for any sunny day.
Step 5: Top with Whipped Cream and Fresh Berries
Just before serving, slather the cake with whipped topping and a generous scoop of fresh whipped cream. Then, crown your creation with extra fresh berries for a vibrant, eye-catching finish that’s as delicious as it looks.
How to Serve Summer Berry Poke Cake Recipe
Garnishes
Garnishes are your chance to turn this cake into a feast for both eyes and taste buds. Fresh mixed berries tossed on top bring dazzling color and a juicy pop, while a sprig of mint adds a refreshing aroma. A light dusting of powdered sugar over the berries can create a charming, delicate touch reminiscent of summer mornings.
Side Dishes
This Summer Berry Poke Cake pairs wonderfully with a chilled glass of sparkling lemonade or a cup of freshly brewed iced tea. If you want to turn it into a more filling dessert spread, consider serving alongside creamy vanilla ice cream or a small bowl of fresh berry compote for extra fruity goodness.
Creative Ways to Present
Try serving this poke cake in individual parfait glasses, layering chunks of cake with whipped cream and berries for a stunning, portable treat. Alternatively, cut the cake into squares and top each with an edible flower for an elegant summer picnic dessert. No matter how you present it, the natural beauty of the berries and fluffy topping makes this recipe a showstopper.
Make Ahead and Storage
Storing Leftovers
Keep your Summer Berry Poke Cake refrigerated in an airtight container to maintain its luscious texture and fresh flavor. It will stay delicious for up to 4 days, giving you plenty of time to savor every last bite or enjoy unexpected guests with a quick slice ready to go.
Freezing
If you want to extend the joy, you can freeze the cake after it’s fully set but before adding whipped toppings. Wrap it tightly in plastic wrap and foil to protect it from freezer burn. When you’re ready, thaw it overnight in the fridge and add fresh whipped cream and berries before serving to bring it back to life.
Reheating
This cake is best enjoyed chilled or at room temperature to preserve its delicate textures. If you prefer to serve it slightly warmed, gently heat individual slices in the microwave for 10 to 15 seconds, but be careful not to melt the gelatin or whipped topping.
FAQs
Can I use fresh berries instead of frozen?
Absolutely! Fresh berries will enhance the flavor and texture, giving your Summer Berry Poke Cake Recipe an even brighter, juicier finish. Just be sure to gently pat them dry to avoid adding extra moisture to the cake before layering.
What if I don’t have berry gelatin?
No worries. You can substitute with other flavored gelatin like strawberry or raspberry, or make a homemade berry syrup to drizzle over the cake — just make sure it’s not too runny so it soaks in nicely without making the cake soggy.
Can this recipe be made gluten-free?
Yes! Simply swap the vanilla cake mix for a gluten-free version and double-check that your gelatin and whipped toppings are gluten-free. This way, everyone can enjoy the summer delight without compromise.
Is this cake suitable for a party?
Definitely! The Summer Berry Poke Cake Recipe serves about 12 people and is vibrant enough to be the centerpiece dessert. Plus, it can be made ahead, which means less stress on party day and more time to enjoy your company.
Can I use homemade whipped cream instead of store-bought topping?
Yes, homemade whipped cream works wonderfully here and adds a fresh, creamy taste that pairs beautifully with the berries. Whip heavy cream with a touch of sugar and vanilla until soft peaks form, then spread generously just before serving.
Final Thoughts
There’s something truly special about a dessert that’s as fun to make as it is to eat, and this Summer Berry Poke Cake Recipe delivers on every level. Whether it’s a casual weekend treat or a festive gathering, this cake’s moist vanilla base, juicy berry pockets, and cloud-like topping will keep everyone coming back for more. So go ahead and dive into this summer sensation — your taste buds will thank you!
Print
Summer Berry Poke Cake Recipe
- Prep Time: 15 minutes
- Cook Time: 35 minutes
- Total Time: 2 hours 55 minutes
- Yield: 12 servings
- Category: Dessert
- Method: Baking
- Cuisine: American
- Diet: Vegetarian
Description
This Summer Berry Poke Cake is a delightful and refreshing dessert perfect for warm weather. Featuring a moist vanilla cake base infused with mixed berry gelatin and topped with whipped cream and fresh berries, it offers a burst of fruity flavor in every bite. The poke cake technique allows the gelatin to soak through, creating a beautifully textured and flavorful treat that’s loved by all ages.
Ingredients
Cake Ingredients
- 1 box vanilla cake mix
- 3 large eggs
- 1 cup water
- 1 cup mixed berries (strawberries, blueberries, raspberries)
Gelatin and Topping
- 1 cup berry gelatin
- 1 cup whipped topping
- 1 cup fresh whipped cream
Instructions
- Preheat Oven: Preheat your oven to 350°F (175°C) to prepare for baking the cake.
- Prepare Cake Batter: Mix the vanilla cake mix with 3 large eggs and 1 cup of water following the package instructions until the batter is smooth.
- Pour Batter: Grease a 9×13 inch baking dish and pour the prepared batter evenly into it.
- Bake Cake: Bake in the preheated oven for 30-35 minutes or until a toothpick inserted in the center comes out clean.
- Cool Slightly: Remove the cake from the oven and let it cool for about 10 minutes to make it easier to handle.
- Poke Holes: Using the handle of a wooden spoon, poke holes evenly all over the surface of the warm cake to allow the gelatin to seep in.
- Prepare Gelatin: Prepare the berry gelatin according to the package instructions, then pour it slowly over the cake, letting it fill the poke holes.
- Refrigerate Cake: Place the cake in the refrigerator and let it chill completely for at least 2 hours to set the gelatin and enhance flavors.
- Add Toppings: Before serving, spread whipped topping evenly over the cake and garnish with fresh whipped cream and the remaining mixed berries for a fresh, fruity finish.
Notes
- For best results, ensure the cake is still warm when poking holes to allow the gelatin to soak through fully.
- You can substitute the berry gelatin with other flavors to suit your preference.
- Fresh whipped cream adds a rich, creamy texture, but store-bought whipped topping can be used for convenience.
- This cake should be stored refrigerated and consumed within 3 days for optimal freshness.
- Use a sharp toothpick or skewer if you prefer smaller holes for a more delicate texture.


