If you’ve ever dreamed of a cake that feels like a warm hug on a chilly day, then the Red Velvet Cake: 7 Secrets to Unforgettable Indulgence Recipe is your new obsession. This cake is the perfect balance of rich cocoa flavor, vibrant red color, and that moist, tender crumb that just melts in your mouth. What makes it truly unforgettable are the subtle twists and tips embedded in these seven secrets, elevating red velvet from a classic dessert to a masterpiece worth sharing with friends and family. Whether it’s a special celebration or just a “treat yourself” moment, this recipe promises indulgence like no other.
Ingredients You’ll Need
The magic behind the Red Velvet Cake: 7 Secrets to Unforgettable Indulgence Recipe is how simple, everyday ingredients join forces to create extraordinary flavor and texture. Each plays a starring role, from the tang of buttermilk enhancing tenderness to the vinegar brightening the red hue.
- All-purpose flour: The structural base for a soft yet sturdy crumb.
- Sugar: Sweetens while helping to keep the cake moist.
- Baking soda: Acts as a leavening agent to lift the cake and give it lightness.
- Salt: Balances sweetness and sharpens flavor.
- Cocoa powder: Just a touch to give red velvet its signature mild chocolate depth.
- Vegetable oil: Ensures the cake stays moist and tender for days.
- Buttermilk, room temperature: Adds acidity that reacts with baking soda for fluffiness and adds a slight tang.
- Large eggs, room temperature: Provide structure and richness.
- Red food coloring: The eye-catching star that makes this cake unforgettable visually.
- Vanilla extract: Rounds out the flavors with warm, sweet complexity.
- White vinegar: Enhances the cake’s bright color and tender crumb.
How to Make Red Velvet Cake: 7 Secrets to Unforgettable Indulgence Recipe
Step 1: Prepare Your Oven and Pans
Start by preheating your oven to 350°F (175°C), and don’t skip greasing and flouring your two 9-inch round cake pans. This simple prep ensures your gorgeous red velvet layers come out perfectly without sticking, setting the stage for beauty and ease.
Step 2: Combine Dry Ingredients
Mix the all-purpose flour, sugar, baking soda, salt, and cocoa powder in a large bowl until they are evenly distributed. This step is essential for a balanced mix, making sure that every bite has a consistent, light cocoa flavor that isn’t overpowering.
Step 3: Mix Wet Ingredients Thoroughly
In a separate bowl, whisk together vegetable oil, buttermilk, eggs, red food coloring, vanilla extract, and white vinegar. Each of these ingredients brings something special — oil for moistness, buttermilk and vinegar for tenderness and tang, eggs for richness, vanilla for depth, and the red food coloring for that stunning, vibrant appearance.
Step 4: Marry the Mixtures Gently
Gradually add the dry ingredients to the wet, stirring carefully until the batter is smooth and silky. Don’t overmix; the goal here is to combine everything evenly while preserving the tender crumb you want in the final cake.
Step 5: Divide and Bake
Pour the batter evenly into your two prepared pans. Bake for 25 to 30 minutes, keeping an eye out—when a toothpick inserted in the center comes out clean, you’re golden. This sensitive baking time is one of the true secrets to perfect texture.
Step 6: Cool Your Cakes Properly
Once baked, allow the cakes to cool in the pans for about 10 minutes before gently transferring them onto wire racks to cool completely. This cooling step keeps the cakes from breaking and ensures the frosting adheres beautifully later on.
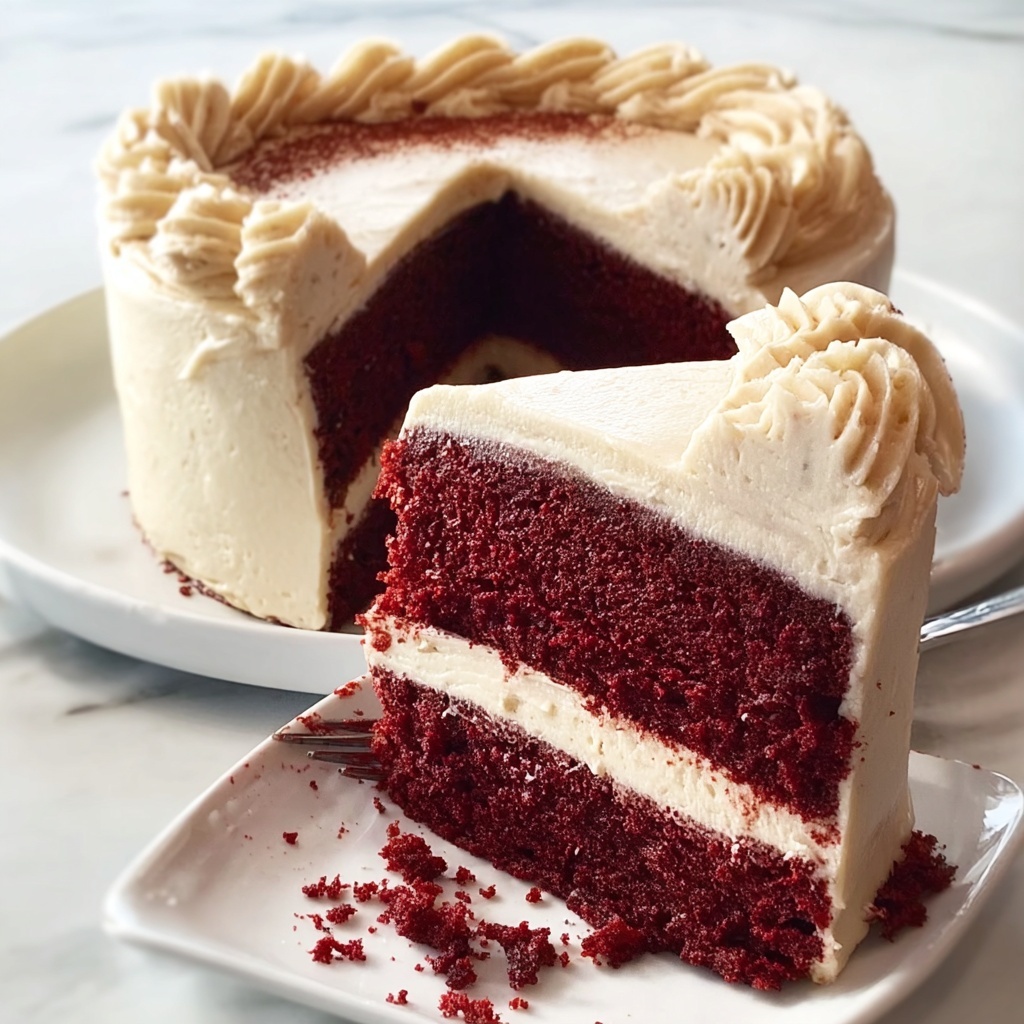
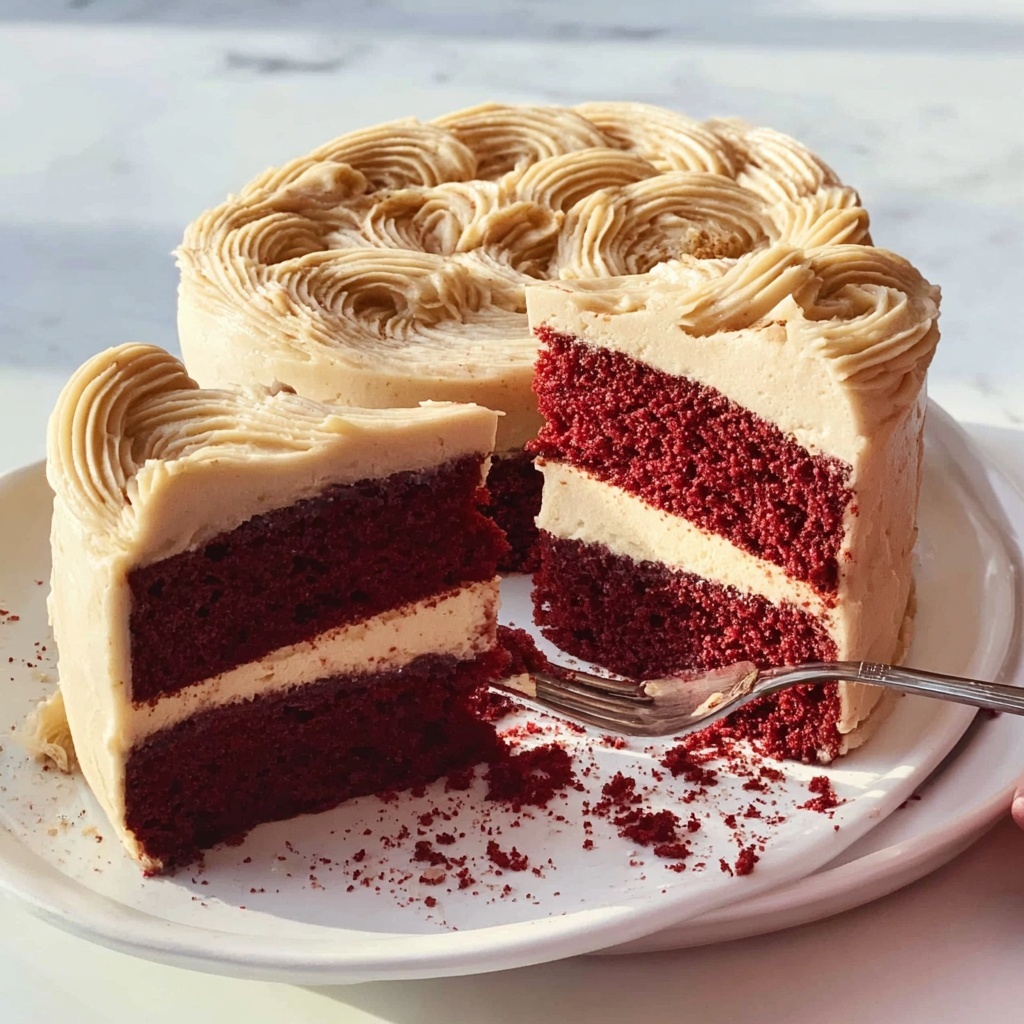
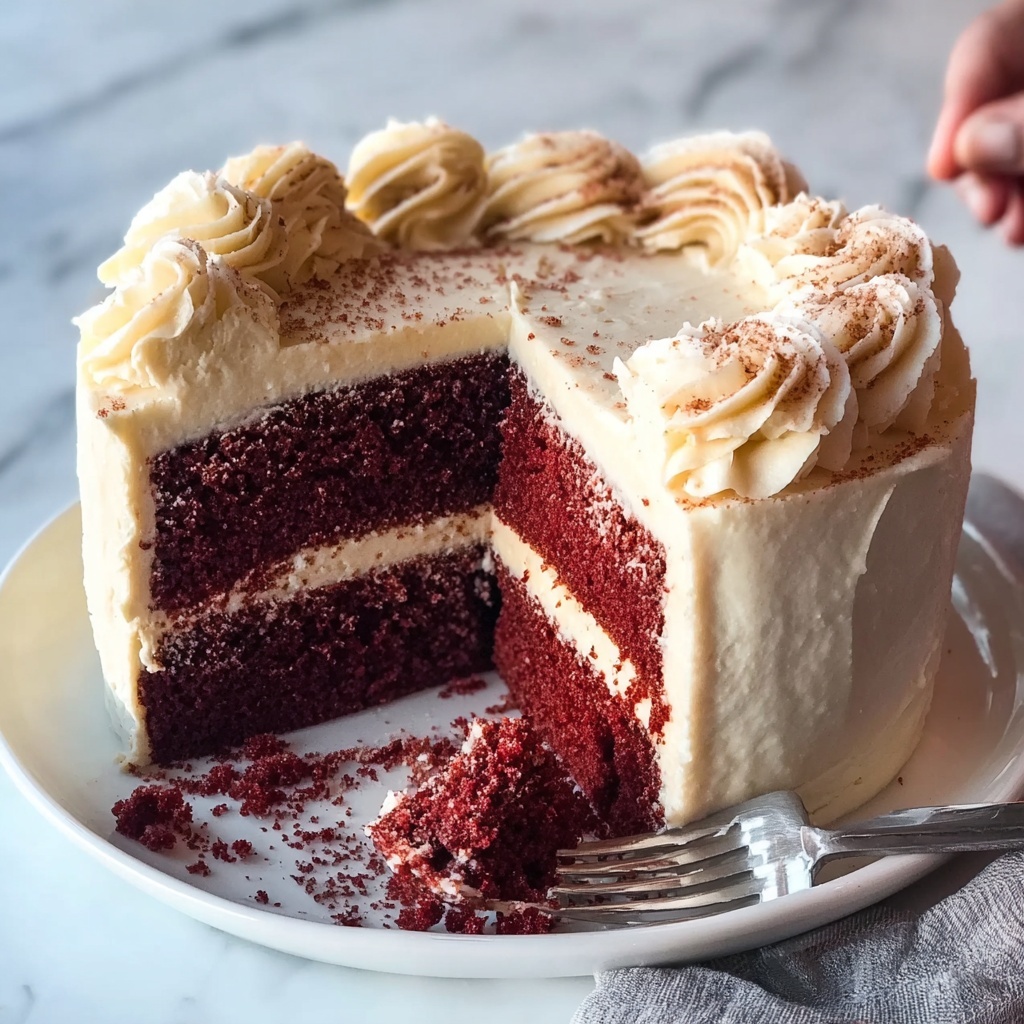
Step 7: Frost for the Finale
Once cooled, frost with your favorite cream cheese frosting for that classic tangy sweetness that completes the Red Velvet Cake: 7 Secrets to Unforgettable Indulgence Recipe. Smooth it on thickly and don’t be shy — the frosting is part of the indulgence.
How to Serve Red Velvet Cake: 7 Secrets to Unforgettable Indulgence Recipe
Garnishes
A sprinkle of finely grated white chocolate or a few fresh raspberries can add just the right touch of elegance and contrast. These garnishes not only make the cake look irresistible but also enhance the flavor profile with complementary sweetness and tartness.
Side Dishes
Pair your red velvet slices with a scoop of vanilla bean ice cream or a dollop of whipped cream. The creamy coldness balances the cake’s rich and moist texture beautifully, creating an uplifting sensory experience.
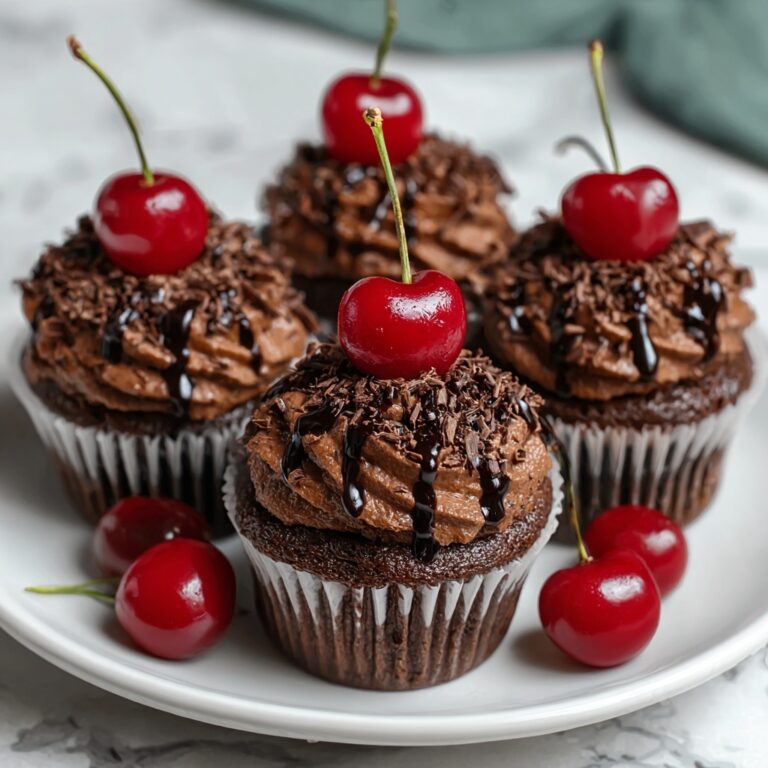
Creative Ways to Present
Try turning the cake into mini cupcakes or cake pops for a fun take, perfect for parties or gifting. Alternatively, layer the cake crumbs with cream cheese mousse in clear glasses for an elegant dessert parfait that wows visually and tastes incredible.
Make Ahead and Storage
Storing Leftovers
Wrap your leftover cake tightly in plastic wrap or store in an airtight container to maintain moisture. It’s best kept refrigerated if you have cream cheese frosting, and it should stay fresh for about 3 to 4 days.
Freezing
You can freeze unfrosted cake layers wrapped well in plastic wrap and foil for up to 3 months. When you’re ready to enjoy, thaw them overnight in the fridge and frost as usual for freshly baked taste any day.
Reheating
If you prefer your cake slightly warmed, a few seconds in the microwave (about 15-20 seconds) will soften it up without drying it out, making your Red Velvet Cake: 7 Secrets to Unforgettable Indulgence Recipe feel like it just came out of the oven.
FAQs
Can I use regular milk instead of buttermilk?
While regular milk is fine, buttermilk adds acidity that reacts with the baking soda to create a lighter, fluffier texture and a subtle tang that’s signature to red velvet cake.
Is the red food coloring necessary?
The red food coloring is what gives red velvet its iconic vibrant appearance. Without it, you’d have a mild chocolate cake. If you prefer natural options, beet juice can sometimes replicate the reddish tone.
Can I make this cake gluten-free?
You can substitute all-purpose flour with a gluten-free baking blend, but it may affect texture slightly. Make sure to use a blend that includes xanthan gum for the best results.
What can I use instead of white vinegar?
Apple cider vinegar is a suitable substitute and may even add a slight fruity tang that complements the cake beautifully.
How do I get the cream cheese frosting perfect?
Use full-fat cream cheese and unsalted butter, both softened, and sift your powdered sugar. Beat slowly at first to avoid lumps, then increase speed for a fluffy, smooth frosting.
Final Thoughts
There is something truly special about mastering the Red Velvet Cake: 7 Secrets to Unforgettable Indulgence Recipe. It’s not just about the vibrant red color or the moist crumb—it’s about creating a luscious memory with every forkful. I promise once you try this recipe, it will become your go-to for celebrations and cozy nights alike. So, give it a whirl, savor the secrets, and delight in a dessert that’s pure indulgence from start to finish!
Print
Red Velvet Cake: 7 Secrets to Unforgettable Indulgence Recipe
- Prep Time: 15 minutes
- Cook Time: 30 minutes
- Total Time: 1 hour
- Yield: 12 servings
- Category: Dessert
- Method: Baking
- Cuisine: American
Description
This classic Red Velvet Cake recipe delivers a moist, tender crumb with its perfect blend of cocoa, buttermilk, and red food coloring. The cake is enhanced by subtle hints of vanilla and a touch of tang from vinegar, finished with a luscious cream cheese frosting. Ideal for celebrations, it produces an unforgettable indulgent dessert that serves 12.
Ingredients
Dry Ingredients
- 2 1/2 cups all-purpose flour
- 1 1/2 cups sugar
- 1 teaspoon baking soda
- 1 teaspoon salt
- 1 teaspoon cocoa powder
Wet Ingredients
- 1 1/2 cups vegetable oil
- 1 cup buttermilk, room temperature
- 2 large eggs, room temperature
- 2 tablespoons red food coloring
- 1 teaspoon vanilla extract
- 1 teaspoon white vinegar
Instructions
- Preheat oven: Preheat your oven to 350°F (175°C) to ensure it reaches the ideal baking temperature before placing the cake pans inside.
- Prepare pans: Grease two 9-inch round cake pans with butter or non-stick spray, then dust them lightly with flour to prevent the cake from sticking.
- Mix dry ingredients: In a large mixing bowl, sift together the all-purpose flour, sugar, baking soda, salt, and cocoa powder to evenly distribute and aerate the dry components.
- Combine wet ingredients: In a separate bowl, whisk together the vegetable oil, room temperature buttermilk, eggs, red food coloring, vanilla extract, and white vinegar until the mixture is smooth and uniform.
- Incorporate dry into wet: Gradually add the dry ingredient mixture into the wet ingredients, mixing continuously until you achieve a smooth, lump-free batter. Be careful not to overmix to maintain cake tenderness.
- Divide and bake: Evenly divide the batter between the prepared cake pans. Place them in the preheated oven and bake for 25 to 30 minutes, or until a toothpick inserted in the center comes out clean.
- Cool the cakes: Remove the pans from the oven and allow the cakes to cool in the pans for 10 minutes. Then, carefully remove the cakes and transfer them onto wire racks to cool completely to prevent sogginess.
- Frost the cake: Once cooled, frost the cakes with your favorite cream cheese frosting, layering and decorating as desired for optimal flavor and presentation.
Notes
- Make sure all wet ingredients are at room temperature to ensure better mixing and a tender crumb.
- Use high-quality red food coloring for vibrant color; gel-based colors work best without altering batter consistency.
- Do not overmix the batter to avoid a dense cake.
- Allow cakes to cool completely before frosting to prevent the frosting from melting.
- Cream cheese frosting pairs exceptionally well with red velvet, but you can also use buttercream if preferred.
- Store the finished cake in the refrigerator and bring to room temperature before serving for best taste.

