
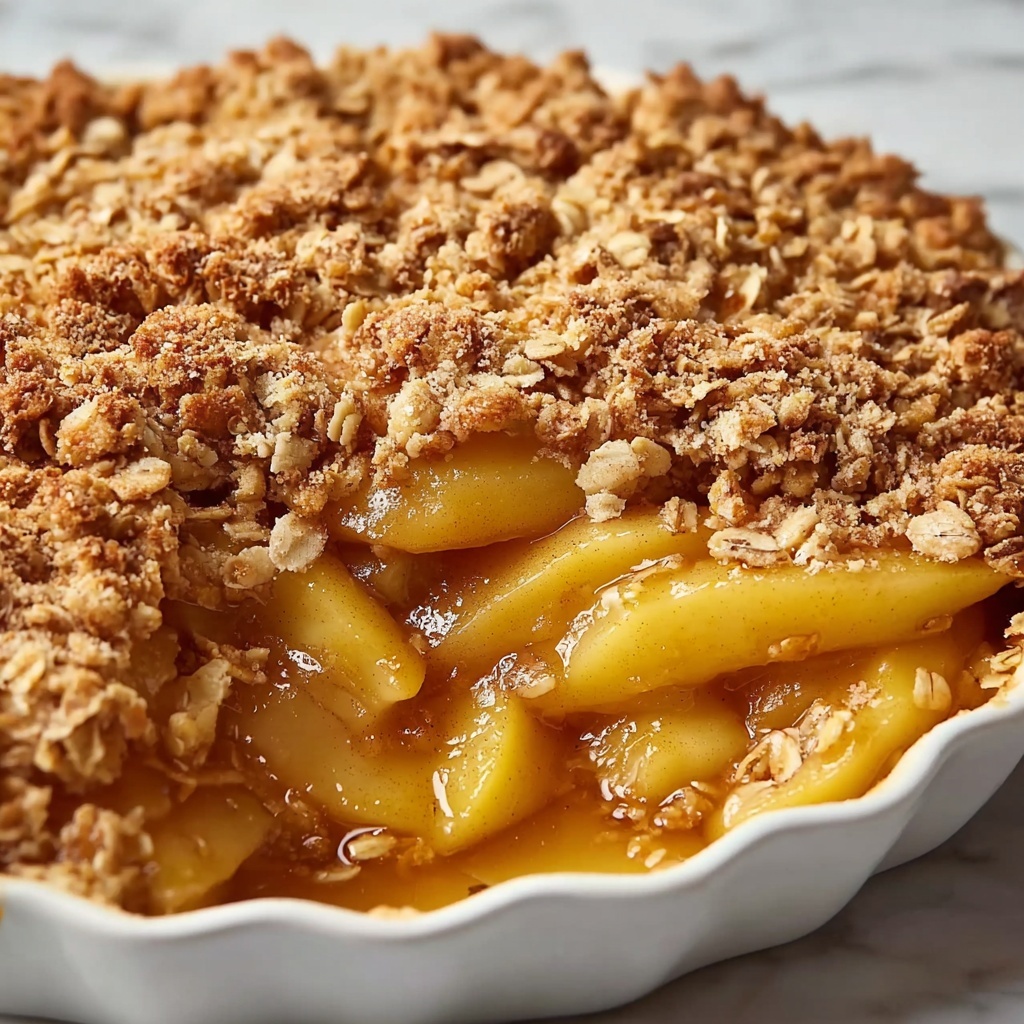
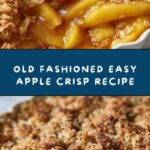
When it comes to cozy, comforting desserts that make your kitchen smell like pure happiness, nothing beats the Old Fashioned Easy Apple Crisp Recipe. This classic treat features tender, cinnamon-spiced apples nestled under a perfectly crumbly, buttery oat topping. It’s one of those desserts that instantly brings back warm memories of family gatherings and chilly autumn evenings, all while being surprisingly simple to make. Whether it’s your first time or you’ve made it a hundred times, this recipe is pure joy in every bite.
Ingredients You’ll Need
The magic of this Old Fashioned Easy Apple Crisp Recipe lies in the simplicity of its ingredients. Each element plays a vital role in achieving the perfect balance of flavor and texture—from the sweetness of the golden delicious apples to the rich, buttery crumbly topping. Let’s break down what you’ll need to bring this dessert to life.
- 6 golden delicious apples, peeled and chopped or sliced: These apples offer the ideal sweetness and tenderness once baked.
- 2 tbsp granulated sugar: Adds just the right touch of sweetness to the apple filling.
- ¾ tsp ground cinnamon: Brings warm, fragrant spice to the apples.
- 1½ tsp lemon juice: A splash of brightness to balance the flavors and keep the apples from browning.
- 1 cup light brown sugar: Essential for a deep, caramel-like sweetness in the topping.
- ¾ cup old-fashioned oats: Gives the topping its signature chewy texture.
- ¾ cup all-purpose flour: Binds the topping ingredients together for that crumbly crust.
- 1 tsp ground cinnamon: Enhances the topping with additional warmth and spice.
- Pinch of kosher salt: Balances sweetness and elevates all flavors.
- ½ cup cold unsalted butter, diced into small cubes: Creates the rich, crumbly topping when mixed in.
How to Make Old Fashioned Easy Apple Crisp Recipe
Step 1: Preheat the Oven and Prepare the Dish
Start by setting your oven to 350°F (175°C). While it’s heating up, grease an 8×8-inch baking dish with butter or non-stick spray. This little prep step will ensure your apple crisp comes out clean and ready to enjoy without sticking.
Step 2: Prepare the Apple Filling
In a large mixing bowl, toss your peeled and chopped apples with the granulated sugar, ¾ teaspoon ground cinnamon, and lemon juice. This simple combination creates a filling that’s sweet, tangy, and perfectly spiced. Once everything is well coated, transfer the apple mixture evenly into the prepared baking dish.
Step 3: Make the Topping
In another bowl, combine the brown sugar, oats, flour, a teaspoon of cinnamon, and a pinch of kosher salt. Add in the cold, diced butter. Use a pastry cutter or your clean hands to blend everything together until the mixture resembles coarse, pea-sized crumbs. This step is where the magic happens—the cold butter creates that irresistible crumbly texture you’ll love.
Step 4: Assemble and Bake
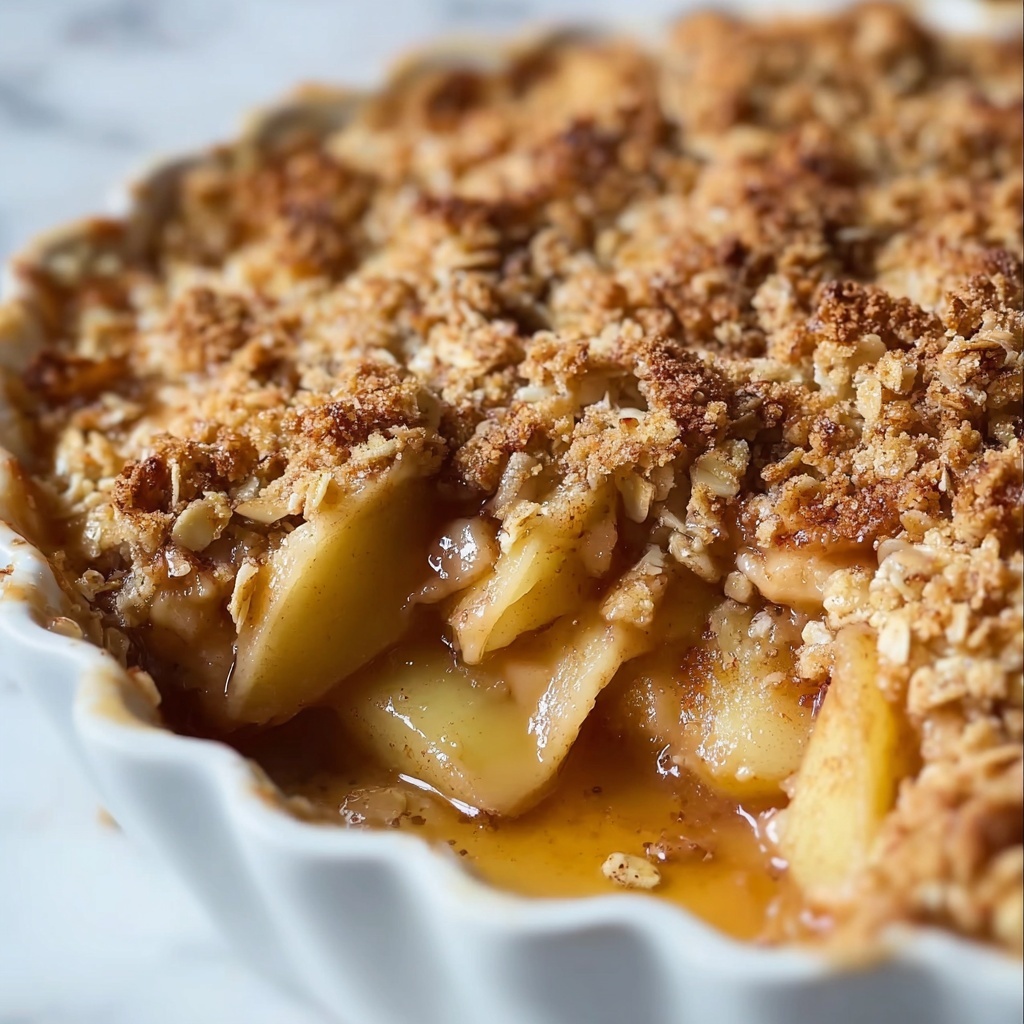
Sprinkle the topping evenly over the apple filling, gently pressing it down so it sticks together but remains crumbly. Pop your dish in the oven and bake for 40 to 50 minutes. You’ll know it’s done when the topping is golden brown and the apple juices are bubbling around the edges—pure deliciousness in the making.
Step 5: Serve and Enjoy!
Once baked to perfection, serve your apple crisp warm, ideally with a scoop of vanilla ice cream or a dollop of whipped cream. The contrast between the hot, spiced fruit and the cool creaminess will make every bite simply unforgettable.
How to Serve Old Fashioned Easy Apple Crisp Recipe
Garnishes
Adding garnishes takes this classic dish to the next level. A drizzle of caramel sauce or a sprinkle of chopped toasted pecans adds texture and an extra layer of indulgence. Fresh mint leaves can add a delightful pop of color and freshness, making your dessert even more inviting.
Side Dishes
This apple crisp pairs wonderfully with light, fresh sides like a crisp green salad or simply a cup of spiced chai or coffee. The warmth from your drink complements the cinnamon and buttery notes, creating a perfectly cozy dessert experience.
Creative Ways to Present
If you want to wow your guests, try serving individual portions in small ramekins. Layer the apple crisp with whipped cream or custard in a clear glass for a beautiful parfait-style presentation. You can even top mini apple crisps with a cinnamon stick or edible flowers for a charming touch.
Make Ahead and Storage
Storing Leftovers
Store any leftover apple crisp in an airtight container in the refrigerator for up to 3 days. When chilled, the topping may soften a bit, but reheating will bring back its crisp texture and warm flavors wonderfully.
Freezing
If you want to make this Old Fashioned Easy Apple Crisp Recipe ahead of time, freezing works beautifully. After assembling and baking, allow it to cool completely, then wrap tightly in plastic wrap and foil or transfer to a freezer-safe container. It will keep well for up to 3 months. Thaw overnight in the fridge before reheating.
Reheating
To reheat, place the apple crisp in an oven-safe dish and warm it at 325°F (160°C) for about 15 to 20 minutes. This gentle heat will re-crisp the topping and warm the filling without drying it out. Microwave reheating is a quick option but may result in a softer topping.
FAQs
Can I use a different type of apple for this recipe?
Absolutely! While golden delicious apples are recommended for their sweetness and texture, tart apples like Granny Smith or a mix of both can add a nice balance and brightness to the dish.
Is it necessary to peel the apples?
Peeling the apples helps create a smoother texture and lets the spices and sugar soak in fully, but you can leave the skins on for added color and nutrients if you prefer a more rustic apple crisp.
Can I substitute the butter with a non-dairy alternative?
Yes, you can use vegan butter or coconut oil to make a dairy-free version of this apple crisp. The texture might differ slightly, but the dessert will still be delicious.
What can I use instead of old-fashioned oats?
If you don’t have old-fashioned oats on hand, quick oats can be used, though the topping may be less chewy. For a gluten-free option, certified gluten-free oats work perfectly.
Can I make this recipe gluten-free?
By using gluten-free all-purpose flour and gluten-free oats, you can easily turn this Old Fashioned Easy Apple Crisp Recipe into a gluten-free treat everyone will enjoy.
Final Thoughts
There’s something truly heartwarming about this Old Fashioned Easy Apple Crisp Recipe—it’s a dessert that feels like a warm hug after a long day. Its simplicity makes it approachable for cooks of all levels, while its classic flavors never fail to delight. Whether you’re serving it for a special occasion or simply craving something sweet and comforting, this recipe deserves a spot in your kitchen rotation. Go ahead, give it a try, and watch smiles light up around your table.
Print
Old Fashioned Easy Apple Crisp Recipe
- Prep Time: 15 minutes
- Cook Time: 45 minutes
- Total Time: 60 minutes
- Yield: 6 servings
- Category: Dessert
- Method: Baking
- Cuisine: American
Description
This Old Fashioned Easy Apple Crisp is a comforting and classic dessert featuring tender golden delicious apples baked under a crispy, buttery oat topping. Perfect for a cozy evening, it combines warm cinnamon spices with a hint of lemon juice to enhance the apple’s natural flavor. Easy to prepare and bake, this apple crisp serves 6 and pairs wonderfully with ice cream or whipped cream.
Ingredients
Apple Filling
- 6 golden delicious apples, peeled and chopped or sliced
- 2 tbsp granulated sugar
- ¾ tsp ground cinnamon
- 1½ tsp lemon juice
Topping
- 1 cup light brown sugar
- ¾ cup old-fashioned oats
- ¾ cup all-purpose flour
- 1 tsp ground cinnamon
- Pinch of kosher salt
- ½ cup cold unsalted butter, diced into small cubes
Instructions
- Preheat the Oven: Set your oven to 350°F (175°C). Grease an 8×8-inch baking dish with butter or non-stick spray to prevent the apple crisp from sticking during baking.
- Prepare the Apple Filling: In a mixing bowl, toss the peeled and chopped apples with granulated sugar, ¾ teaspoon ground cinnamon, and lemon juice. This mixture not only sweetens and flavors the apples but also helps prevent browning. Transfer the apple mixture evenly into the prepared baking dish.
- Make the Topping: In another bowl, combine the light brown sugar, old-fashioned oats, all-purpose flour, 1 teaspoon ground cinnamon, and a pinch of kosher salt. Add the cold, diced butter and mix using a pastry cutter or your hands until the mixture forms pea-sized crumbs. This crumbly topping will create a delightful texture contrast once baked.
- Assemble & Bake: Evenly spread the crumb topping over the apples in the baking dish and gently press down. Bake in the preheated oven for 40 to 50 minutes, or until the topping turns a golden brown and the apple filling is bubbly and soft.
- Serve: Allow the apple crisp to cool slightly before serving. Enjoy warm, optionally topped with ice cream or whipped cream for an extra indulgent treat.
Notes
- Use golden delicious apples for a sweet, tender filling; tart apples like Granny Smith can be used for more bite.
- Chilling the butter before mixing helps create a flakier topping texture.
- For a nutty flavor, consider adding chopped walnuts or pecans to the topping.
- Leftovers can be stored covered in the refrigerator for up to 3 days and reheated before serving.
- To make it gluten-free, substitute all-purpose flour with gluten-free flour blend.
