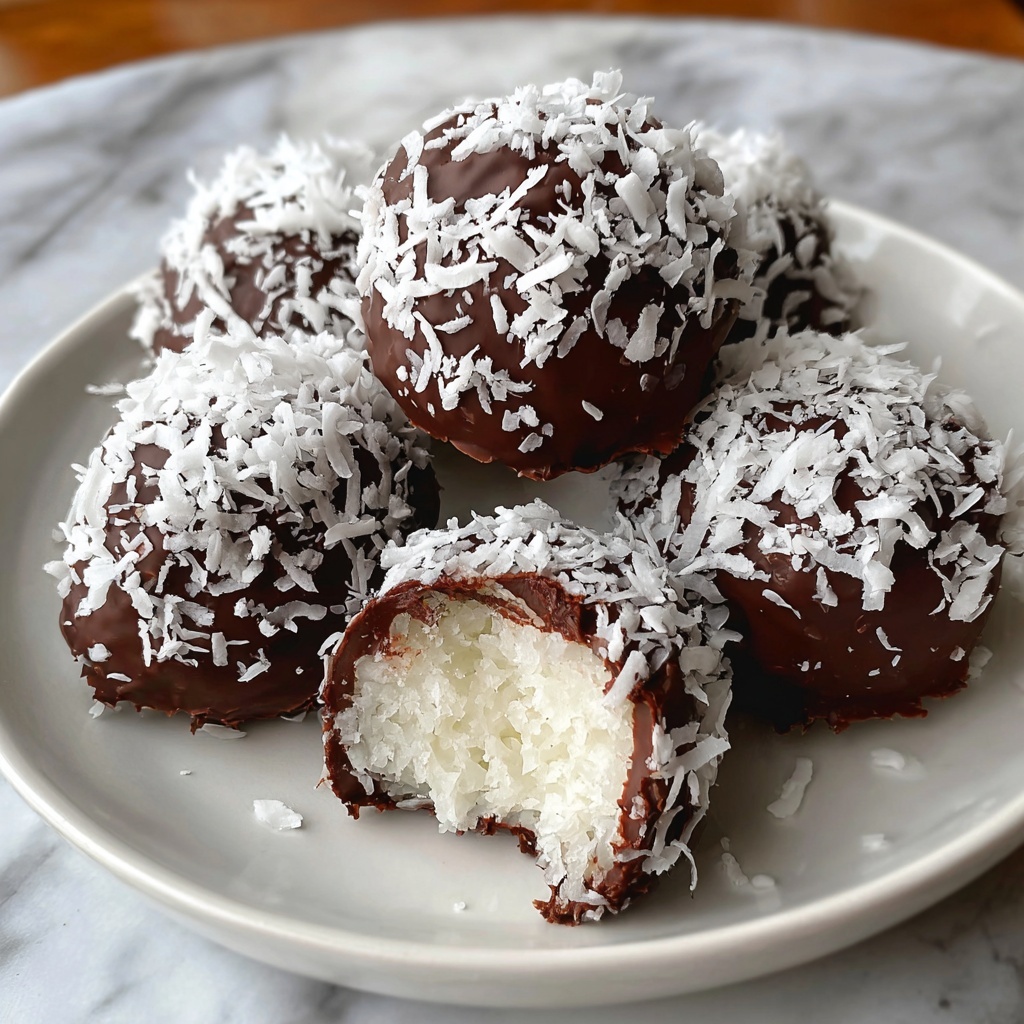
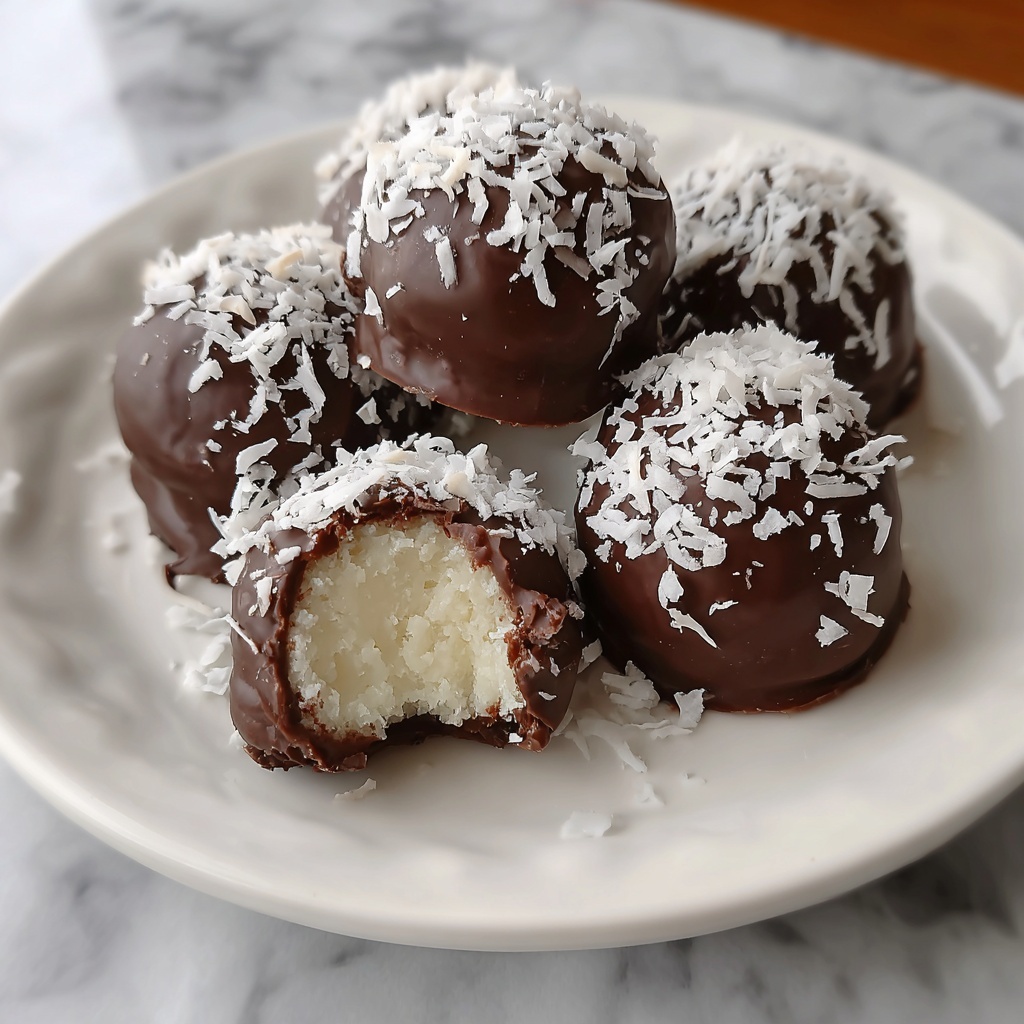
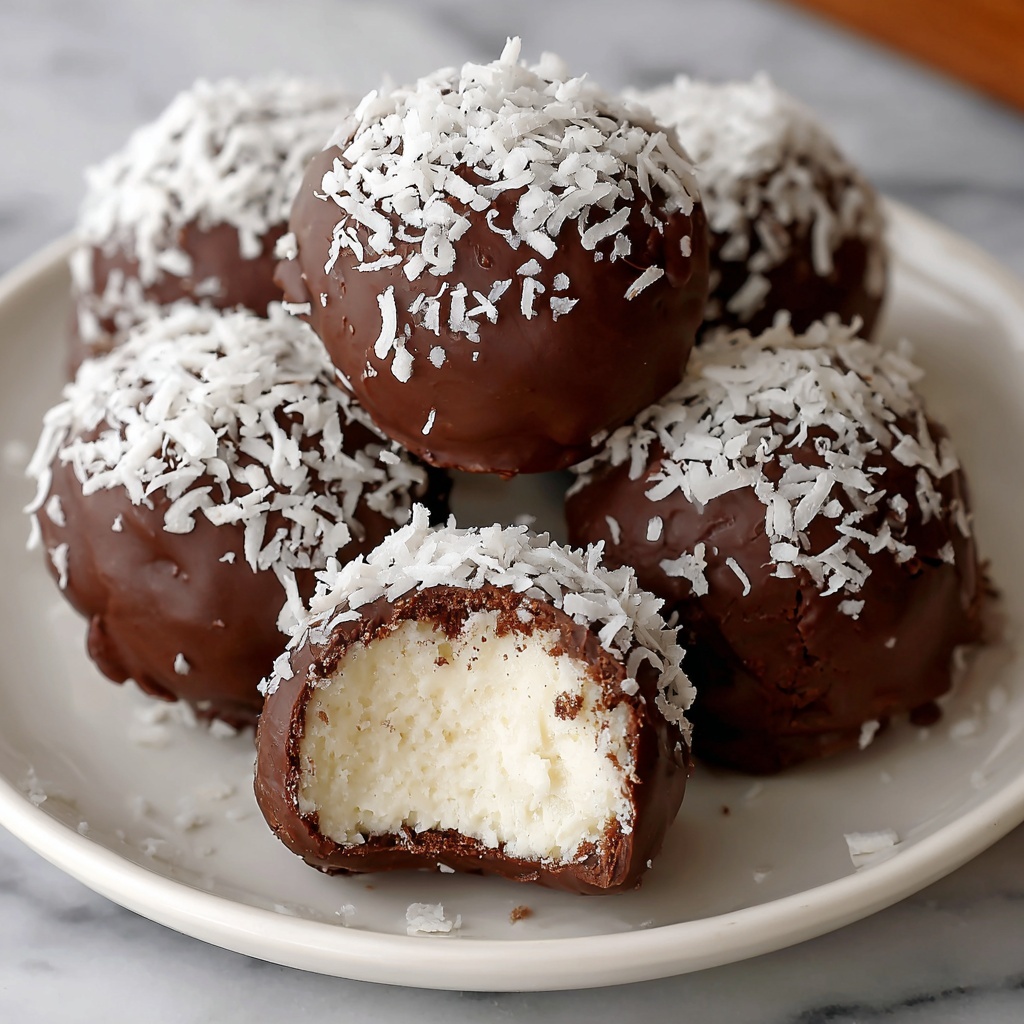
If you have a sweet tooth and love a treat that’s both luscious and effortless, this No-Bake Coconut Cream Balls Recipe is about to become your new favorite. Picture delicate, creamy centers packed with shredded coconut, just the right touch of sweetness from condensed milk, and an optional chocolate coating that makes these little bites utterly irresistible. They come together quickly and don’t require turning on the oven, making them perfect for any time you want a tropical-inspired indulgence without the fuss. Whether for a party, a special dessert, or a quick snack, these coconut cream balls offer a melt-in-your-mouth experience that’s both charming and delicious.
Ingredients You’ll Need
Simple, familiar ingredients are the heart and soul of this recipe, each playing a vital role in texture, flavor, and that perfectly creamy coconut bite you’ll crave. The balance between sweetened coconut and condensed milk brings lush moisture, while vanilla and salt enhance the overall richness. If you want to step it up, melted chocolate adds a luxurious finish that’s pure decadence.
- 2 cups shredded sweetened coconut: Provides the chewy texture and signature coconut flavor, making the base irresistible.
- 1/2 cup sweetened condensed milk: Adds sweetness and binds the coconut together into creamy balls.
- 1 teaspoon vanilla extract (or coconut extract): Gently enhances the flavor notes with warmth and tropical hints.
- 1/4 teaspoon salt: Balances the sweetness and brings out the depth of ingredients.
- 8 oz semi-sweet or dark chocolate, melted (optional): For a smooth, rich coating that ups the wow factor.
- Additional shredded coconut (optional, for rolling): Adds a pretty and textural finish if you prefer to avoid chocolate.
How to Make No-Bake Coconut Cream Balls Recipe
Step 1: Prepare the Coconut Mixture
Start by combining the shredded sweetened coconut, sweetened condensed milk, vanilla extract, and salt in a large mixing bowl. Stir everything together until well blended and the coconut is fully coated. This mixture will be sticky and fragrant, a sure sign that the magic is beginning! Pop it into the fridge for about 30 minutes to firm up — this step is crucial for shaping later.
Step 2: Shape the Balls
Once chilled, scoop out heaping tablespoon-sized portions of the coconut mixture. Roll each portion gently between your palms to form smooth, compact balls. Don’t worry if they aren’t perfect; that homemade charm is part of the appeal. Place these on a parchment-lined baking sheet to keep them neat and ready for the next step.
Step 3: Optional Coating
This is where you can personalize your No-Bake Coconut Cream Balls Recipe. For a tropical twist, roll the balls in extra shredded coconut for a snowy, inviting look. Or go all out and dip them into melted semi-sweet or dark chocolate. Let the excess drip off before returning them to the tray—chocolate adds a delicious contrast and an elegant finish that’ll impress anyone lucky enough to try one.
Step 4: Chill to Set
Transfer your tray of coconut balls to the refrigerator and allow them to chill for at least one hour, or until set firm. This chilling step not only helps them hold their shape but also enhances the flavors as they meld together. Once set, your No-Bake Coconut Cream Balls are perfectly ready for enjoying!
How to Serve No-Bake Coconut Cream Balls Recipe
Garnishes
Adding garnishes can elevate these coconut balls from simple sweets to eye-catching treats. Try sprinkling some toasted coconut flakes on top for a toasty crunch or adding a light drizzle of caramel or raspberry sauce to contrast the creamy centers. A dusting of finely grated lime zest can also add a refreshing citrus brightness that complements the coconut beautifully.
Side Dishes
Though these bites can shine on their own, pairing them with fresh fruit like pineapple slices, mango chunks, or luscious berries creates a balanced plate of tropical flavors and freshness. Serving alongside a cup of chai tea or iced coffee can also balance the sweetness and offer a comforting contrast.
Creative Ways to Present
For an impressive presentation, place your coconut cream balls in mini cupcake liners for an elegant touch. You could also create a dessert platter by arranging them with chocolate-dipped pretzels, candied nuts, or shortbread cookies for variety and texture. Wrapping a few in clear cellophane and tying with a ribbon makes for charming edible gifts, perfect for sharing the love this recipe inspires.
Make Ahead and Storage
Storing Leftovers
Leftovers keep beautifully in an airtight container in the refrigerator for up to 5 days. Because these are chilled treats, it’s essential to keep them cold to maintain their shape and creamy texture. Before storing, ensure they’re fully set and dry to prevent any sogginess.
Freezing
If you want to enjoy your No-Bake Coconut Cream Balls Recipe much later, freezing is a fantastic option. Place them in a single layer on a parchment-lined tray to freeze individually, then transfer to a freezer-safe container or zip-top bag. They will stay fresh for up to 2 months. Thaw in the refrigerator for about an hour before serving.
Reheating
Since these treats are designed to be eaten cold, reheating isn’t recommended. If they’ve been frozen, simply let them thaw naturally in the fridge to preserve their creamy consistency and avoid melting the chocolate coating.
FAQs
Can I use unsweetened coconut instead of sweetened?
Yes, you can use unsweetened shredded coconut, but the overall sweetness of the balls will decrease. You might want to add a little extra sweetened condensed milk or a touch of honey to balance the flavor if you prefer them sweeter.
What if I don’t have condensed milk on hand?
Sweetened condensed milk is key for binding and sweetness, so it’s hard to substitute perfectly. However, you could try making a quick homemade version by simmering milk and sugar, or experiment with cream cheese and a bit of honey for a different texture and taste.
Is it possible to make these gluten-free?
Absolutely! This recipe is naturally gluten-free as it contains no wheat or gluten ingredients. Just double-check the shredded coconut and chocolate for any cross-contamination labels if you are highly sensitive or have celiac disease.
How long do No-Bake Coconut Cream Balls last once made?
Stored properly in the fridge, these coconut cream balls last about 5 days. Their moist nature can decrease over time, so they’re best enjoyed fresh within that window for optimal flavor and texture.
Can I add nuts or dried fruit to the recipe?
Definitely! Adding chopped nuts like almonds, pistachios, or macadamias can add crunch and complexity, while dried fruits such as cranberries or chopped pineapple bring bursts of chewy sweetness. Fold them into the coconut mixture before chilling for a custom twist.
Final Thoughts
There’s something genuinely comforting and joyful about making and sharing this No-Bake Coconut Cream Balls Recipe. It’s simple, creamy, and just the right kind of sweet—plus, no oven time means you can whip it up anytime inspiration strikes. Whether you skip the chocolate or indulge in that glossy coating, these little balls pack a big flavor punch that’s sure to delight friends and family. So go ahead, give them a try, and enjoy every bite of this tropical treasure!
Print
No-Bake Coconut Cream Balls Recipe
- Prep Time: 15 minutes
- Cook Time: 0 minutes
- Total Time: 1 hour 15 minutes
- Yield: 20 servings
- Category: Dessert
- Method: No-Cook
- Cuisine: American
- Diet: Vegetarian
Description
These No-Bake Coconut Cream Balls are a delightful and easy-to-make treat featuring sweetened shredded coconut blended with condensed milk and vanilla, formed into bite-sized balls. Optionally coated with melted chocolate or extra coconut, they’re perfect as a quick, indulgent dessert without any baking required.
Ingredients
Main Ingredients
- 2 cups shredded sweetened coconut
- 1/2 cup sweetened condensed milk
- 1 teaspoon vanilla extract (or coconut extract)
- 1/4 teaspoon salt
Optional Coating
- 8 oz semi-sweet or dark chocolate, melted
- Additional shredded coconut (for rolling)
Instructions
- Prepare the Coconut Mixture: In a mixing bowl, combine the shredded sweetened coconut, sweetened condensed milk, vanilla extract, and salt. Stir thoroughly until all ingredients are well incorporated. Cover and refrigerate the mixture for 30 minutes to firm up the mixture and make it easier to handle.
- Shape the Balls: Using a tablespoon, scoop portions of the chilled coconut mixture and roll them between your palms to form smooth, bite-sized balls. Place the balls on a baking sheet lined with parchment paper to prevent sticking.
- Optional Coating: If desired, you can roll the coconut balls in additional shredded coconut to enhance texture and appearance. Alternatively, dip each ball into melted semi-sweet or dark chocolate, allowing any excess chocolate to drip off before placing the balls back onto the parchment-lined tray.
- Chill: Place the tray with the coconut balls in the refrigerator and chill for 1 hour, or until the balls are fully set and firm to the touch. Once set, they are ready to serve or store for later enjoyment.
Notes
- If you prefer a stronger coconut flavor, use coconut extract instead of vanilla extract.
- The balls can be stored in an airtight container in the refrigerator for up to one week.
- For a dairy-free version, substitute sweetened condensed milk with a vegan condensed milk alternative.
- Rolling the balls in shredded coconut before chilling helps prevent them from sticking together.
- Ensure the chocolate coating is completely set before serving to avoid melting.

