If you have a craving for something sweet, creamy, and utterly delightful without turning on the oven, this No-Bake Cherry Cheesecake Recipe is going to be your new best friend. Imagine a buttery graham cracker crust hugging a velvety cream cheese filling, crowned with a luscious cherry topping that adds the perfect burst of fruity sweetness. It’s an elegant dessert that feels fancy but comes together with surprising ease, making it ideal for any occasion where you want to impress without the fuss.
Ingredients You’ll Need
Every ingredient in this No-Bake Cherry Cheesecake Recipe plays an important role, creating the perfect balance of texture, sweetness, and flavor. These simple staples come together to form a dessert that’s creamy, crunchy, and vibrant all at once.
- Graham crackers: 2 cups crushed to create a crunchy and buttery crust base.
- Butter: 1/2 cup melted to bind the graham cracker crumbs and add richness.
- Sugar (for crust): 2 tablespoons to provide a touch of sweetness and enhance the crust’s flavor.
- Cream cheese: 16 oz softened to ensure a silky and smooth cheesecake filling.
- Heavy cream: 1 cup cold, whipped to light and airy perfection that gives the filling its airy lift.
- Sugar (for filling): 1 cup granulated, balancing the tang of the cream cheese with sweetness.
- Vanilla extract: 1 teaspoon for a warm, comforting aroma and depth of flavor.
- Cherry pie filling: 1 can (21 oz) that delivers a vibrant, jewel-toned topping loaded with juicy cherries.
How to Make No-Bake Cherry Cheesecake Recipe
Step 1: Prepare the Graham Cracker Crust
Start by crushing your graham crackers until they resemble fine crumbs; you can use a food processor or crush them in a ziplock bag with a rolling pin. Then mix the crumbs with the melted butter and sugar—this creates a texture similar to wet sand, perfect for pressing into your pan. Firmly press the mixture into a 9-inch pie pan and pop it into the fridge for about 20 minutes so it can set and hold the filling perfectly.
Step 2: Make the Cheesecake Filling
In a bowl, beat the softened cream cheese until it’s slick and creamy using a hand mixer—it should have no lumps. Add the sugar and vanilla extract and blend those in well. Next, whip the cold heavy cream separately until you see soft peaks forming, then gently fold it into your cream cheese mixture. This step is key; it lightens the filling so your cheesecake ends up delightfully fluffy rather than dense.
Step 3: Assemble the Cheesecake
Pour the luscious cheesecake filling over the chilled crust, then smooth out the top with a spatula for an even surface. Cover the pan either with plastic wrap or aluminum foil and refrigerate it for a minimum of 3 to 4 hours, though keeping it overnight is the secret to that perfect set and deeper flavor.
Step 4: Add the Cherry Topping
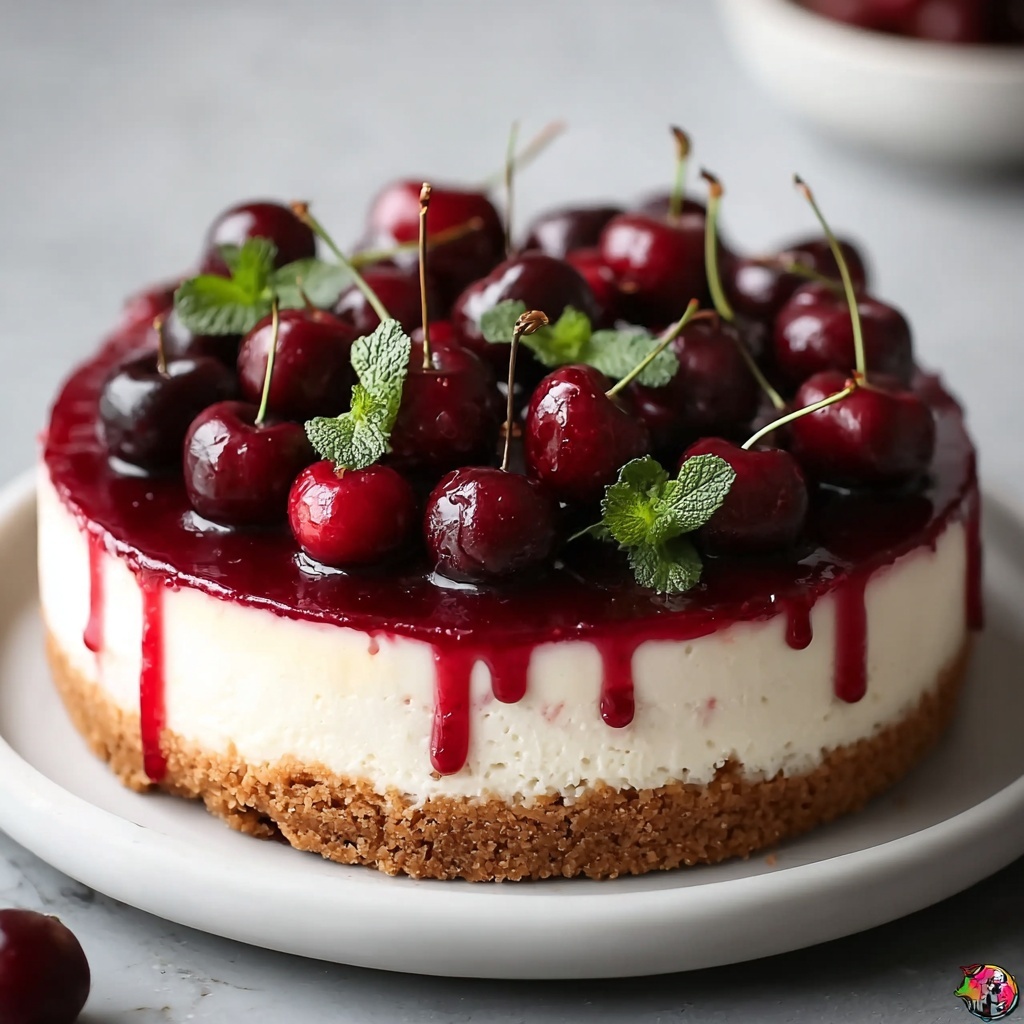
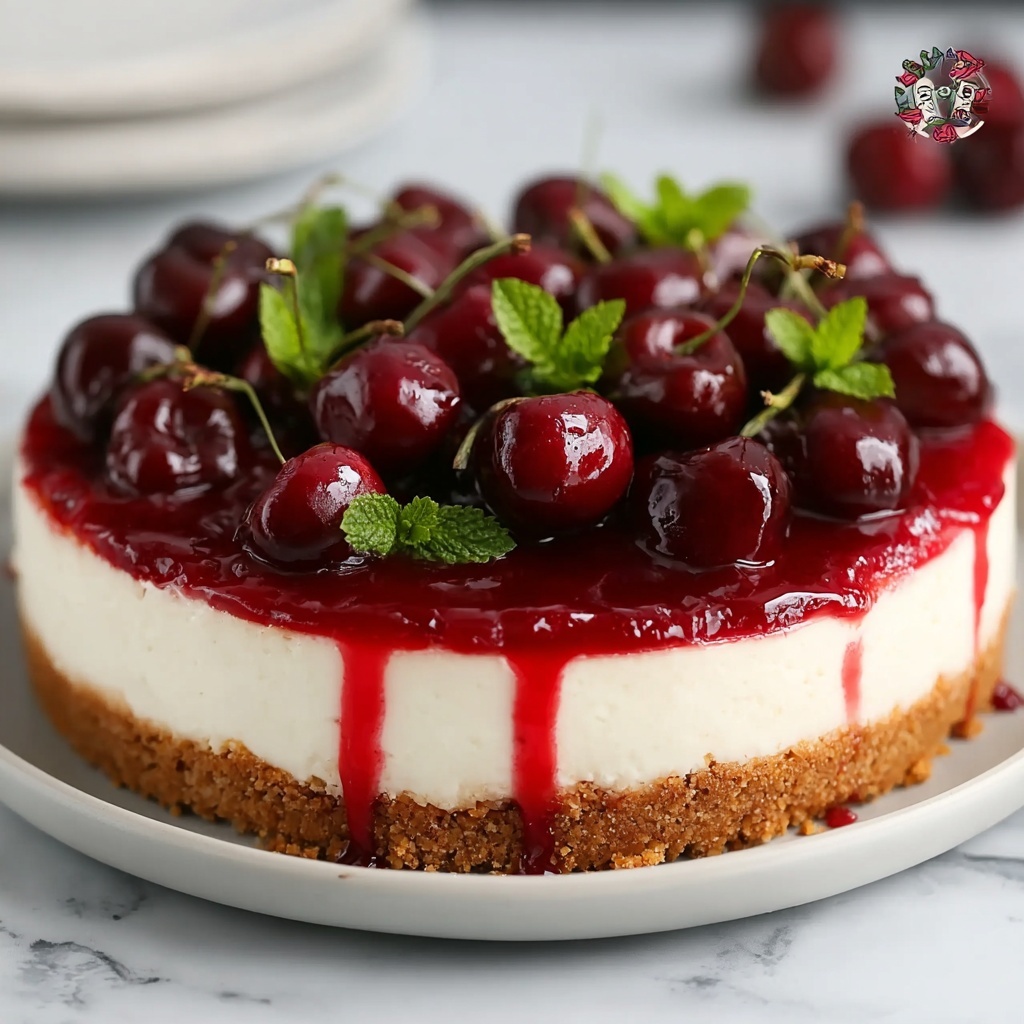
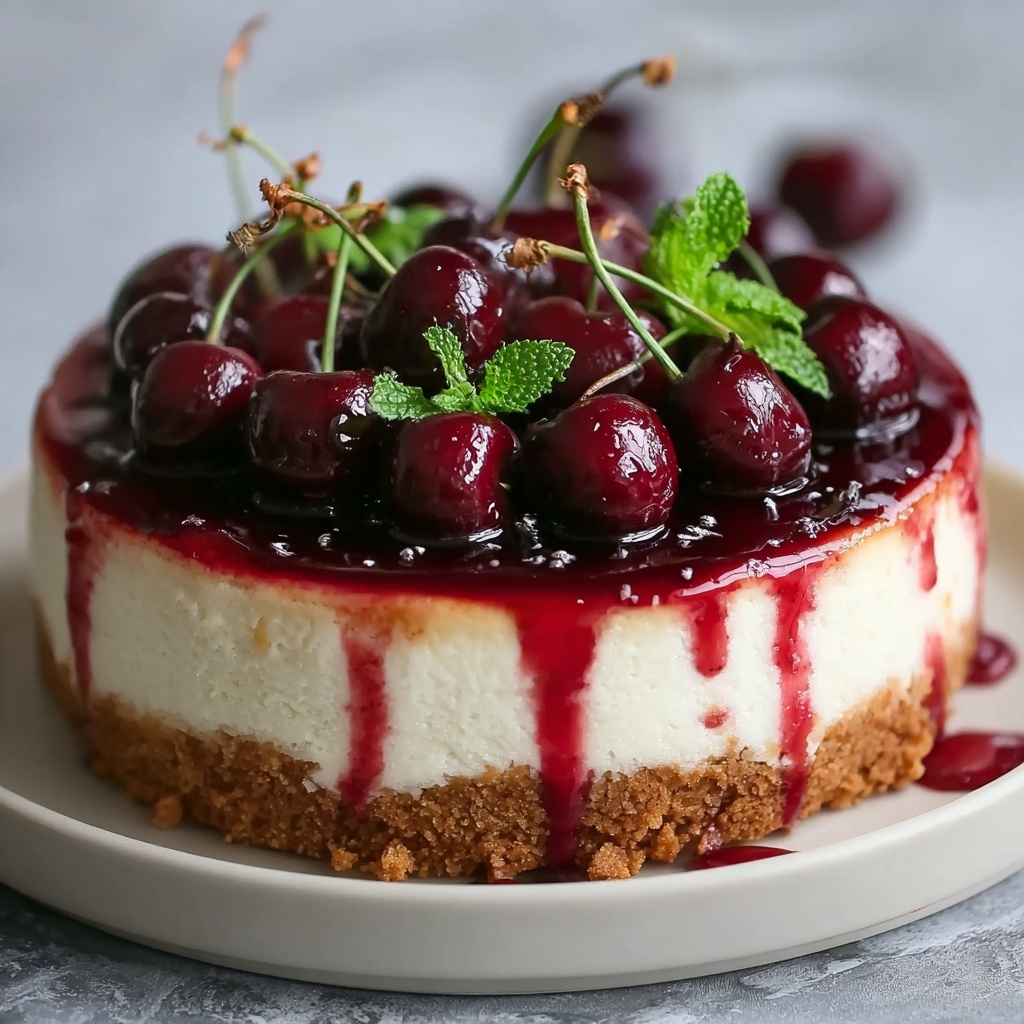
Right before serving, spread the vibrant cherry pie filling evenly across the top of your cheesecake. The glossy red topping adds a stunning color contrast and a burst of sweet-tart flavor that makes every bite irresistible. Optionally, decorate with whipped cream, fresh cherries, or even chocolate shavings to make it look as good as it tastes.
How to Serve No-Bake Cherry Cheesecake Recipe
Garnishes
A dollop of whipped cream, a sprinkle of fresh cherries, or a few chocolate curls can transform your cheesecake from simple to spectacular. These garnishes add fresh texture and color, turning each slice into a little work of art that’s as eye-catching as it is delicious.
Side Dishes
Pair this cheesecake with a light cup of coffee or a refreshing raspberry sorbet for contrast. A crisp green salad with a tangy vinaigrette is a surprisingly nice counterpoint if you’re serving it as part of a larger meal, balancing sweetness with savory and freshness.
Creative Ways to Present
For a fun twist, serve the cheesecake in individual glasses layered with crushed graham crackers, filling, and cherries—a mini parfait style. Alternatively, use a springform pan lined with decorative parchment paper and garnish the edges with fresh mint to elevate presentation for special gatherings.
Make Ahead and Storage
Storing Leftovers
Keep your leftover cheesecake covered tightly with plastic wrap or in an airtight container in the refrigerator. It will stay fresh for up to 4 days, maintaining that creamy texture and bright cherry topping without drying out.
Freezing
If you want to hold onto your cheesecake longer, it can be frozen. Wrap it tightly in plastic wrap and then aluminum foil to prevent freezer burn. It will last up to 2 months this way. When ready to enjoy, thaw overnight in the refrigerator for the best results.
Reheating
This cheesecake tastes best served chilled, so reheating isn’t recommended. If the cheesecake has been frozen, allow it to thaw naturally in the fridge rather than heating it, preserving its creamy texture and fresh cherry topping.
FAQs
Can I use a different fruit topping instead of cherry?
Absolutely! While this recipe is perfect with cherry pie filling, you can substitute with blueberry, strawberry, or raspberry toppings for a twist. Just make sure the topping is thick and glossy to maintain that classic cheesecake look.
How long does the No-Bake Cherry Cheesecake Recipe take to set?
The cheesecake should be refrigerated for at least 3 to 4 hours to properly set. For the best texture and flavor, chilling overnight is ideal.
Can I make this recipe gluten-free?
Yes! Simply substitute the graham crackers with gluten-free crackers or cookies of your choice to make a gluten-free version without compromising taste or texture.
Is it possible to make this cheesecake without a food processor?
Definitely! You can place graham crackers in a resealable bag and crush them with a rolling pin or even a heavy pan until you get fine crumbs. It might take a bit more effort but works just as well.
What’s the secret to a fluffy cheesecake filling in this recipe?
The key is whipping the heavy cream separately and gently folding it into the cream cheese mixture. This technique keeps the filling light and airy instead of dense, giving you that dreamy cheesecake texture.
Final Thoughts
This No-Bake Cherry Cheesecake Recipe is a total game-changer when you want a stunning dessert that requires minimal effort but maximum wow factor. Whether it’s a casual weekend treat or a special celebration, it’s guaranteed to bring smiles and compliments. Give it a try—you just might find yourself making it again and again!
Print
No-Bake Cherry Cheesecake Recipe
- Prep Time: 20 minutes
- Cook Time: 0 minutes
- Total Time: 4 hours 20 minutes
- Yield: 8 servings
- Category: Dessert
- Method: No-Cook
- Cuisine: American
Description
This no-bake cherry cheesecake is a creamy, luscious dessert featuring a buttery graham cracker crust topped with a smooth cream cheese filling and finished with sweet cherry pie filling. Perfect for those who want an easy yet indulgent cheesecake without the need for an oven, this recipe is ideal for warm days or quick dessert preparation.
Ingredients
For the Crust:
- 2 cups graham crackers (crushed)
- 1/2 cup butter (melted)
- 2 tablespoons sugar
For the Cheesecake Filling:
- 16 oz cream cheese (softened)
- 1 cup heavy cream (cold)
- 1 cup granulated sugar
- 1 teaspoon vanilla extract
For the Topping:
- 1 can (21 oz) cherry pie filling
Instructions
- Prepare the Graham Cracker Crust: Crush the graham crackers into fine crumbs either by using a food processor or placing them in a resealable bag and crushing with a rolling pin. Mix the crumbs with melted butter and sugar until the mixture resembles wet sand. Firmly press this mixture into the bottom of a 9-inch pie pan or springform pan and chill it in the refrigerator for 20 minutes to set.
- Make the Cheesecake Filling: In a mixing bowl, beat the softened cream cheese until smooth and creamy using a hand mixer. Add sugar and vanilla extract, mixing well to combine. In a separate chilled bowl, whip the heavy cream until soft peaks form. Gently fold the whipped cream into the cream cheese mixture to maintain a light and airy texture.
- Assemble the Cheesecake: Pour the cheesecake filling over the chilled crust, smoothing the surface with a spatula. Cover the pan with plastic wrap or aluminum foil and refrigerate for at least 3 to 4 hours, or ideally overnight, to allow it to set properly.
- Add the Cherry Topping: Just before serving, spread the cherry pie filling evenly over the top of the chilled cheesecake. Optionally, garnish with whipped cream, fresh cherries, or chocolate shavings for an elegant presentation.
Notes
- Ensure the cream cheese is fully softened at room temperature to avoid lumps in the filling.
- Chilling the crust before adding the filling helps prevent sogginess.
- Use cold heavy cream and a chilled bowl to achieve better whipped cream volume and texture.
- Refrigerate the assembled cheesecake for at least 3-4 hours to allow it to firm up for easier slicing.
- For a lighter version, you can substitute heavy cream with whipped topping or use reduced-fat cream cheese.


