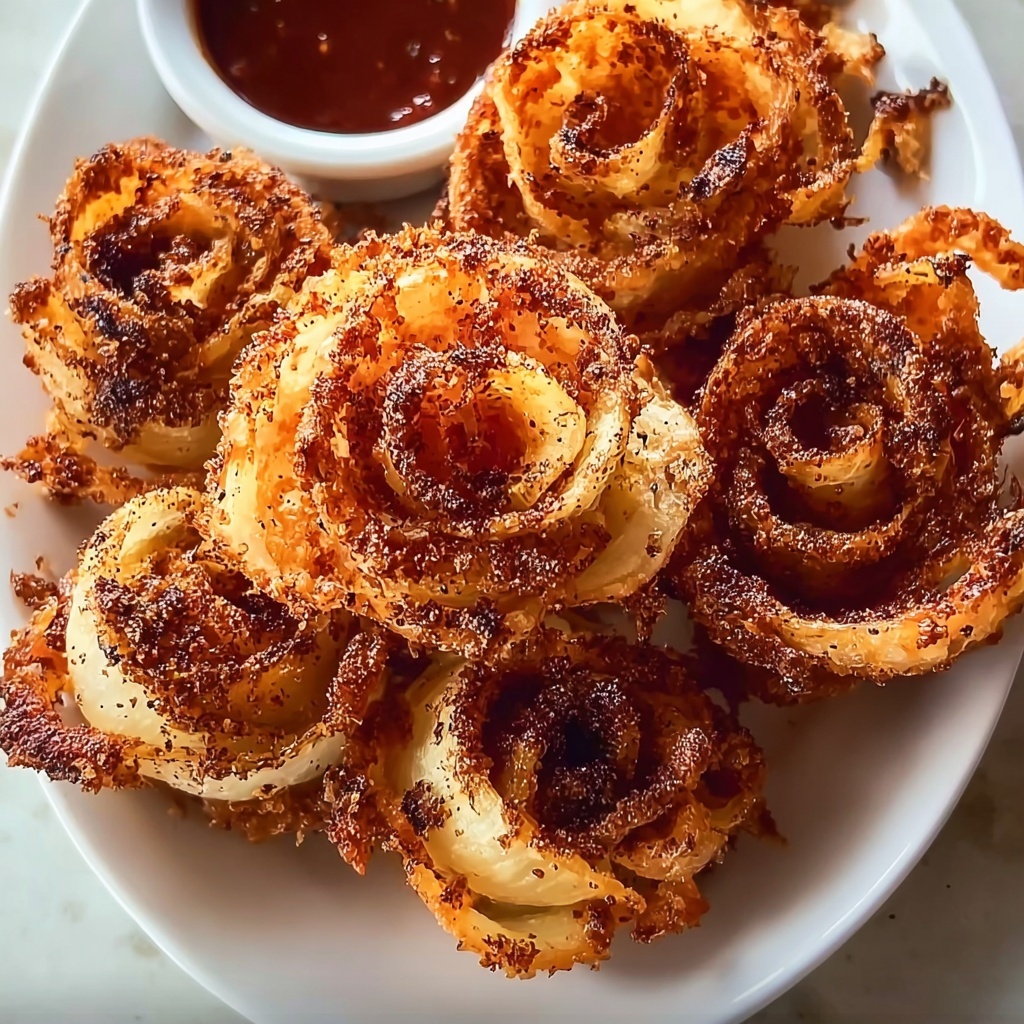
If you’re a fan of crunchy, flavorful appetizers that steal the show every time, then the Mini Blooming Onions: 7 Tips for Perfectly Crispy Bites Recipe might just become your new obsession. This dish takes the classic blooming onion concept and shrinks it down to perfectly bite-sized morsels, delivering all the satisfying crispiness and bold seasoning in a form that’s easier to share and even easier to love. From the tender layering of each onion petal to that irresistible golden crust, every bite bursts with texture and savory depth that’ll leave your taste buds shouting for more.
Ingredients You’ll Need
These ingredients are wonderfully simple yet carefully chosen to build the perfect balance of flavor, tenderness, and crunch in your mini blooming onions. Each one plays a vital role, from the tangy buttermilk that soaks the onions, to the spices that create a crisp, aromatic coating.
- Large onions: Choose firm, well-shaped onions to get those perfect petals for blooming.
- Buttermilk: Soaks the onions to tenderize and impart subtle tanginess that complements the spices.
- All-purpose flour: Creates the crispy coating that clings perfectly to each onion petal.
- Garlic powder: Adds depth with its warm, savory flavor.
- Paprika: Brings smoky sweetness and a gorgeous hue to the crust.
- Salt: Enhances all the other flavors without overpowering.
- Black pepper: Provides just the right amount of gentle heat.
- Oil for frying: Choose a neutral oil with a high smoke point for even, golden crispiness.
How to Make Mini Blooming Onions: 7 Tips for Perfectly Crispy Bites Recipe
Step 1: Prepare Your Onions for Blooming
Start by carefully slicing the tops off your onions and peeling away the outer layer. The key here is to create clean, even cuts so the onion petals can naturally separate, resembling a blooming flower. Patience during this step will really pay off in the final presentation.
Step 2: Soak in Buttermilk for Tenderness
Submerge your onions in buttermilk and let them soak for a full two hours. This soaking process softens the onions’ natural bite and infuses a slight tanginess that elevates the overall flavor profile while helping the coating stick later on.
Step 3: Mix the Coating with Seasoned Flour
Combine your all-purpose flour with garlic powder, paprika, salt, and black pepper. This spice blend is what gives each crispy bite a vibrant, flavorful crust. Feel free to tweak the balance slightly to suit your personal taste—experimenting is part of the fun!
Step 4: Heat Your Frying Oil Correctly
Preheat your oil to a steady 350°F (175°C). Using a thermometer here is crucial for safety and to ensure your onions cook evenly without absorbing excess oil. Too hot, and they’ll burn; too cool, and they’ll be greasy.
Step 5: Dredge Each Onion Thoroughly
Remove the onions from the buttermilk and gently shake off excess liquid. Then dredge them in the seasoned flour mixture, making sure every petal is well coated. This coating will form the glorious, crunchy exterior you’re aiming for.
Step 6: Fry Until Golden Perfection
Carefully lower each onion into the hot oil, frying for about 3 to 4 minutes. Watch closely as the mini blooming onions turn a beautiful golden brown—this is where that perfect crispiness develops while the onion inside stays tender.
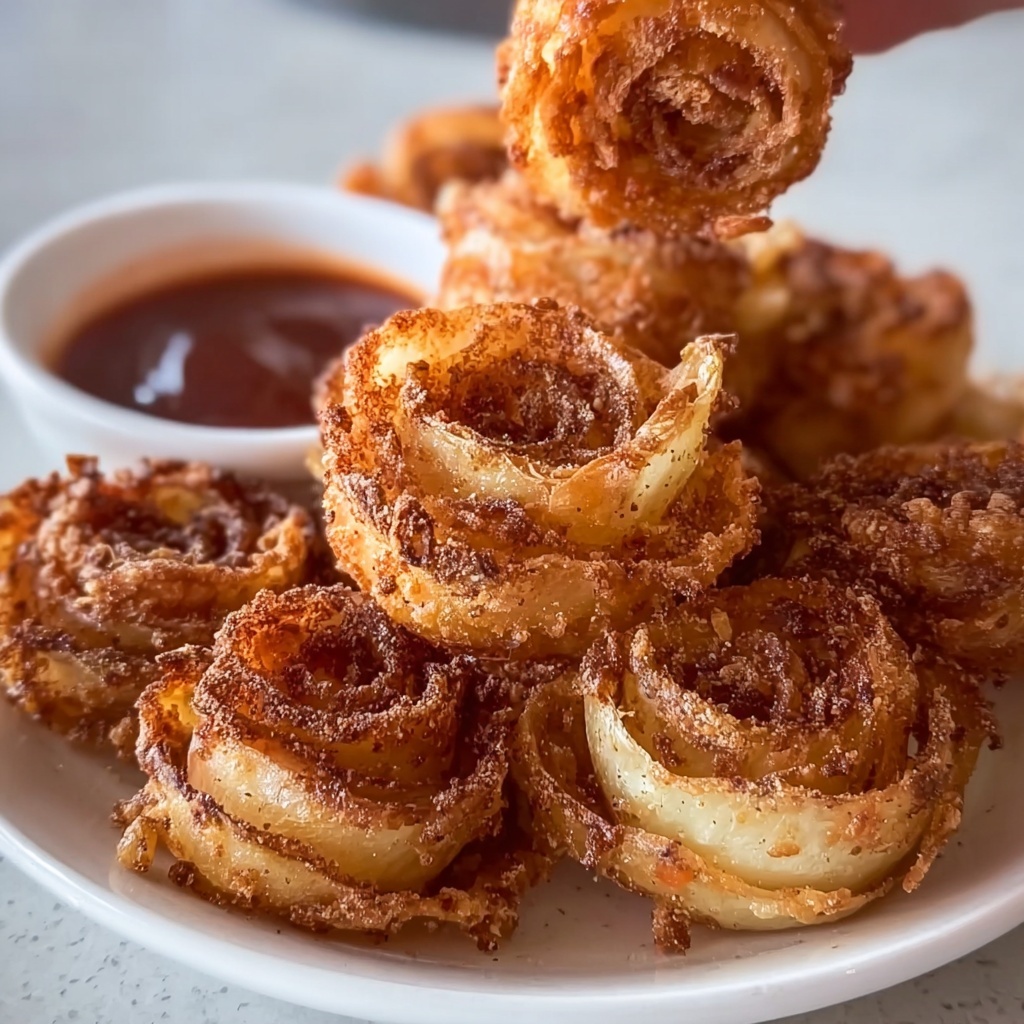
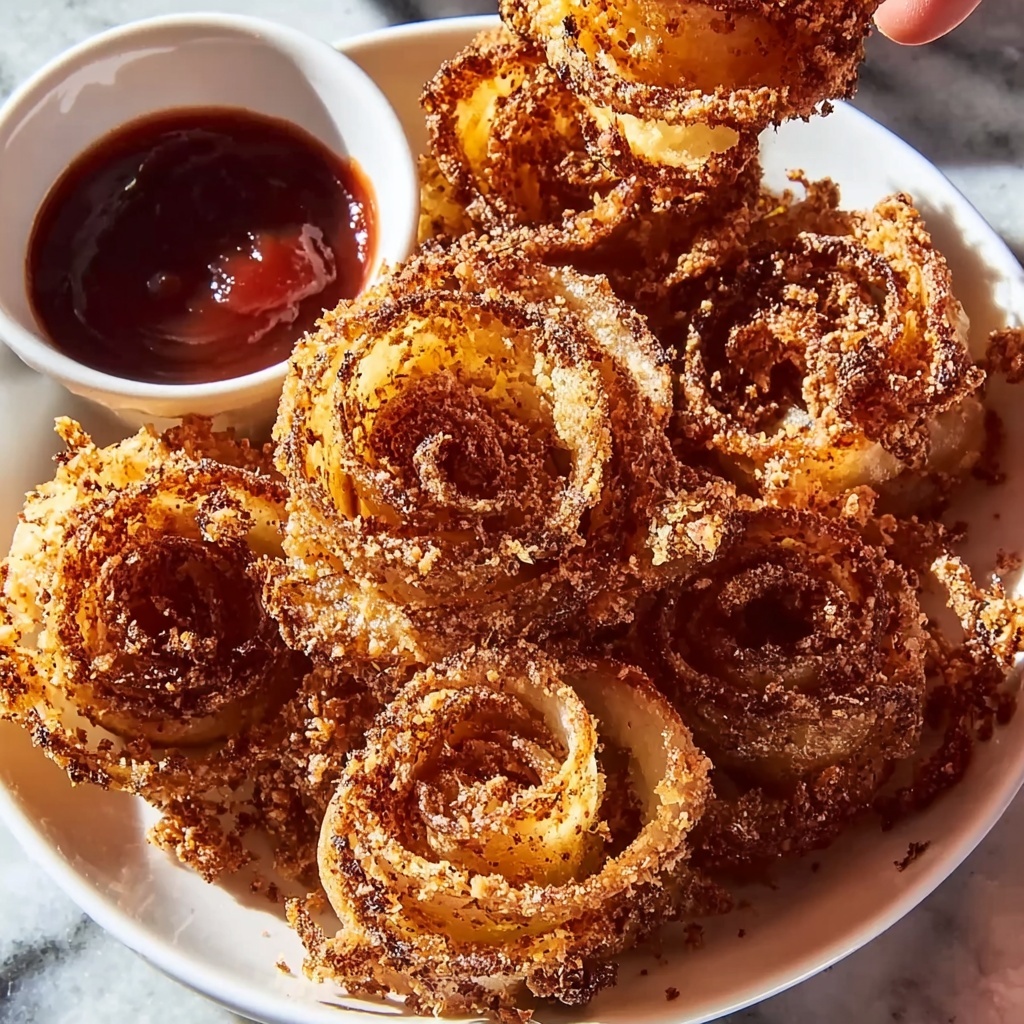
Step 7: Drain and Serve Hot
Use paper towels to drain any excess oil immediately after frying. Serving your mini blooming onions while they’re still hot ensures that satisfying crunch is front and center in every bite.
How to Serve Mini Blooming Onions: 7 Tips for Perfectly Crispy Bites Recipe
Garnishes
Sprinkle freshly chopped parsley or chives over the top for a pop of color and fresh flavor contrast. A light dusting of smoked paprika after frying can also enhance the smoky notes in the crust beautifully.
Side Dishes
Mini blooming onions pair wonderfully with creamy dips like ranch or spicy aioli, adding a cooling element against the crispy, savory onions. For a more substantial meal, serve alongside grilled meats or a fresh salad to balance the indulgence.
Creative Ways to Present
For an unforgettable appetizer spread, arrange your mini blooming onions in a circular flower shape on a platter, placing dip bowls in the center. You can also skewer them for fun finger food or layer them on sliders for added crunch and flavor surprise.
Make Ahead and Storage
Storing Leftovers
If you have any leftover mini blooming onions, place them in an airtight container and refrigerate for up to 2 days. To keep the crunch, avoid stacking them too closely together.
Freezing
While freezing is possible, it’s best to freeze the onions before frying. After dredging in flour, freeze on a baking sheet first, then transfer to a freezer bag. Fry from frozen when ready for best crispiness.
Reheating
To bring back their crispiness, reheat leftovers in a hot oven or air fryer rather than the microwave. This method warms through while keeping that irresistible crunch intact.
FAQs
Can I use different types of onions for this recipe?
Yes! While large yellow onions work best for their sweetness and layering, you can also experiment with white or red onions. Just keep in mind their flavor profiles differ slightly.
Is buttermilk necessary, or can I use a substitute?
Buttermilk is ideal for tenderizing and adding tang, but if you don’t have it, mixing milk with a little lemon juice or vinegar can be a handy substitute. Let it sit for a few minutes before soaking the onions.
Can I bake the mini blooming onions instead of frying?
Baking is an option for a lighter version, but the texture won’t be quite the same. To get close, bake at a high temperature on a wire rack and consider spraying with a bit of oil for crispness.
What oil is best for frying these onions?
Neutral oils with a high smoke point like vegetable, canola, or peanut oil are your best bet. They fry evenly and keep your mini blooming onions tasting clean and crisp.
How do I know when the oil is at the right temperature?
A kitchen thermometer is the most reliable way, but you can also test by dropping a small pinch of flour into the oil—if it sizzles immediately and floats to the top, you’re in the right range.
Final Thoughts
Making these Mini Blooming Onions: 7 Tips for Perfectly Crispy Bites Recipe at home is such a rewarding experience that packs big flavor into every crispy, tender bite. Whether you’re treating yourself or impressing guests, this recipe brings a playful, indulgent spirit to your table that’s hard to resist. So grab those onions, get frying, and prepare for some serious snack-time magic!
Print
Mini Blooming Onions: 7 Tips for Perfectly Crispy Bites Recipe
- Prep Time: 10 minutes
- Cook Time: 5 minutes
- Total Time: 2 hours 15 minutes
- Yield: 4 servings
- Category: Appetizer
- Method: Frying
- Cuisine: American
Description
These Mini Blooming Onions are perfectly crispy and flavorful bites, ideal as an appetizer or snack. With a fragrant coating seasoned with garlic powder, paprika, and spices, these onion blossoms soak in buttermilk for tenderness before being deep-fried to golden perfection.
Ingredients
Onions and Soaking
- 4 large onions
- 1 cup buttermilk
Coating
- 1 cup all-purpose flour
- 1 teaspoon garlic powder
- 1 teaspoon paprika
- 1 teaspoon salt
- 1/2 teaspoon black pepper
Frying
- Oil for frying (enough for deep frying)
Instructions
- Prep the onions: Slice the tops off the onions and peel them carefully to maintain the layers that will bloom apart when fried.
- Soak in buttermilk: Submerge the peeled onions in 1 cup of buttermilk and let them soak for 2 hours to tenderize and infuse moisture.
- Prepare the coating: In a mixing bowl, combine 1 cup of all-purpose flour with 1 teaspoon garlic powder, 1 teaspoon paprika, 1 teaspoon salt, and 1/2 teaspoon black pepper to create a flavorful dredge.
- Heat the oil: Pour sufficient oil into a deep pan or fryer and heat it to 350°F (175°C) to ensure proper frying temperature for crispiness.
- Dredge the onions: Remove each onion from the buttermilk, allowing excess liquid to drip off, then thoroughly coat with the seasoned flour mixture, making sure the petals are well covered.
- Fry the onions: Carefully place the coated onions into the hot oil and fry them until they turn golden brown, approximately 3 to 4 minutes per onion.
- Drain and serve: Remove the fried onions from the oil with a slotted spoon, place them on paper towels to drain excess oil, and serve immediately while hot and crispy.
Notes
- Ensure the oil temperature remains consistent at 350°F to avoid greasy or undercooked onions.
- Do not overcrowd the pan to allow even frying and maintain the oil temperature.
- Use large onions for easier blooming and better presentation.
- Soaking in buttermilk overnight can enhance flavor and tenderness further if time allows.
- Serve with a dipping sauce like spicy mayo or ranch for extra flavor.

