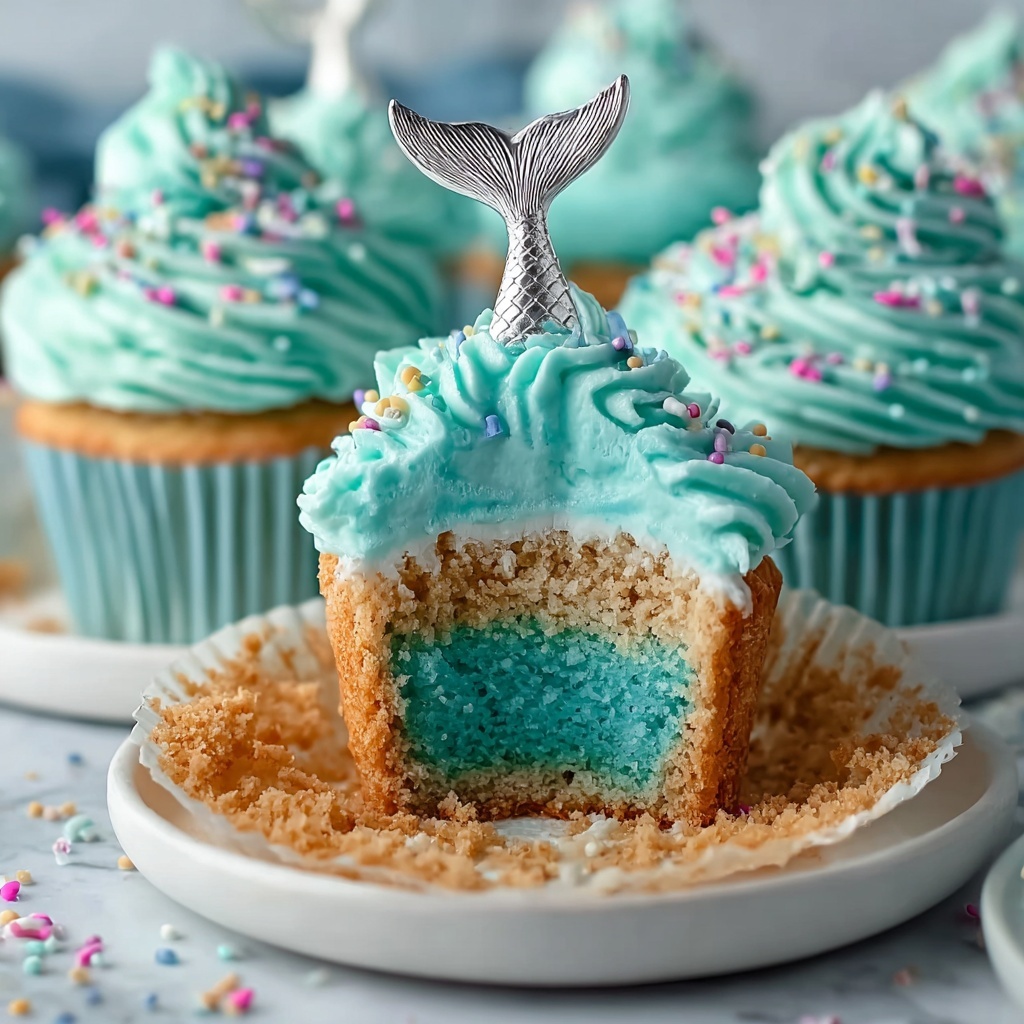
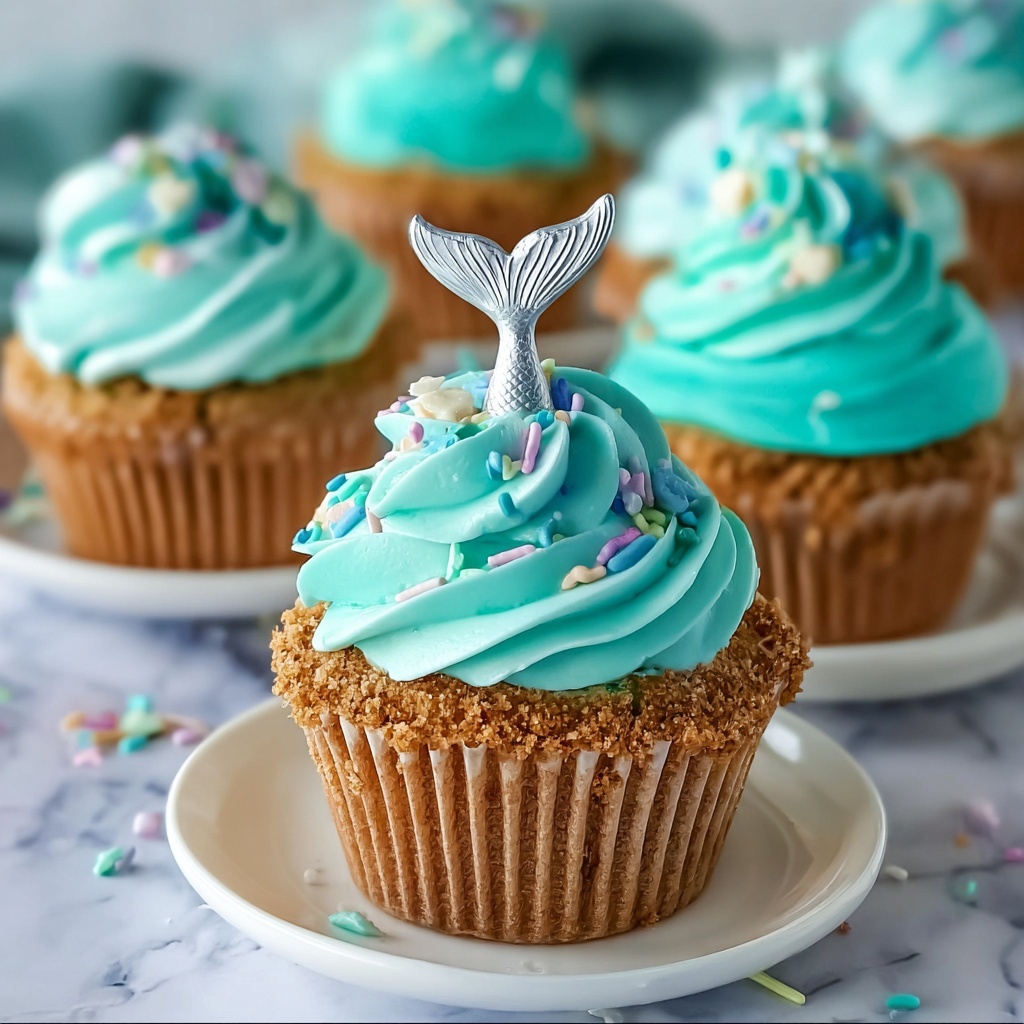
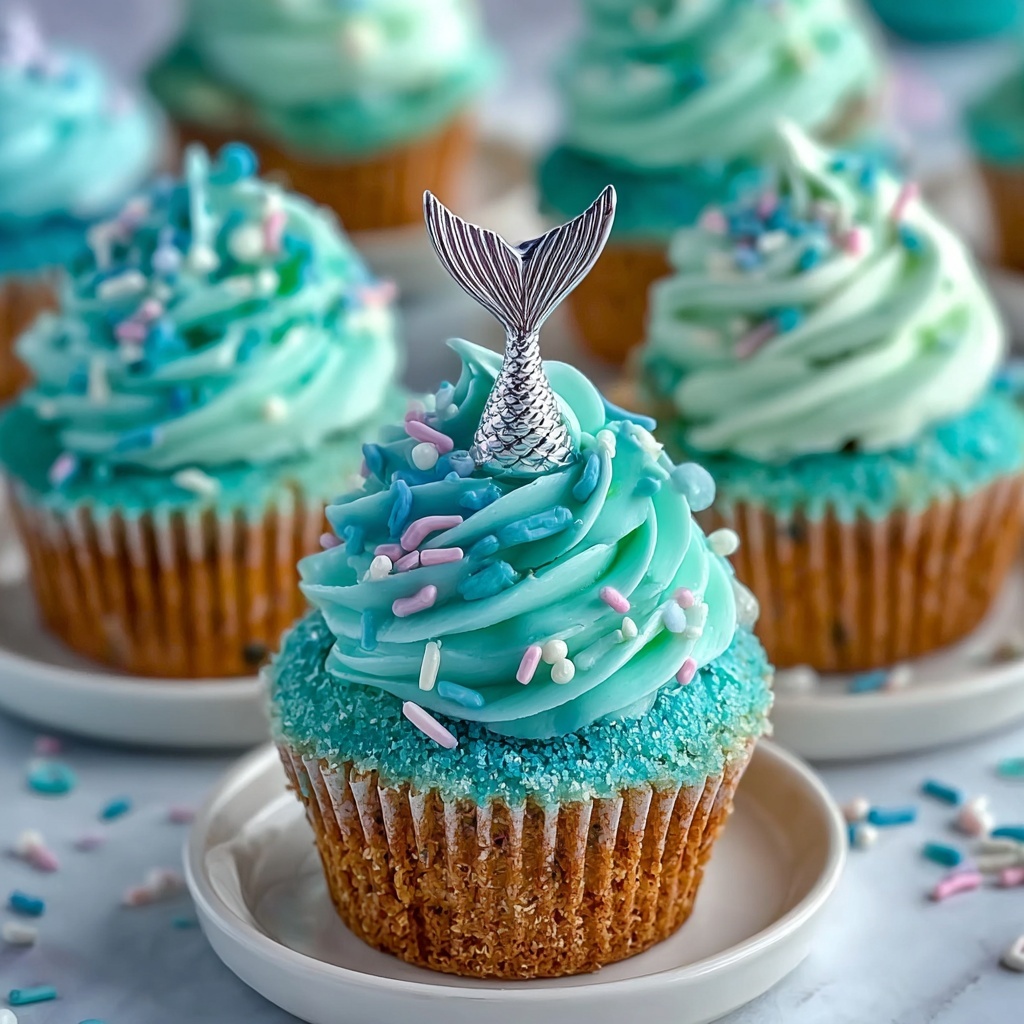
If you’ve ever dreamed of a dessert that combines whimsy, creamy richness, and a dash of ocean-inspired magic, then the Mermaid Tail Cheesecake Cups Recipe is just what you need. These adorable little treats layer a crunchy vanilla wafer crust with a luscious, teal-tinted cheesecake filling, all crowned with delicate edible sugar mermaid tails that instantly transport you underwater. Perfect for parties, special occasions, or any day you want to bring a bit of fantasy to your table, this recipe is as delightful to make as it is to eat. Let’s dive in and create these enchanting cups together!
Ingredients You’ll Need
Each ingredient in this Mermaid Tail Cheesecake Cups Recipe plays an essential role in creating the perfect balance of textures and flavors. From the crisp base to the creamy filling and the magical finishing touches, every component is simple but vital.
- Vanilla wafer cookies: Crushed into fine crumbs, they provide a buttery, sweet crunch for the crust that complements the smooth cheesecake.
- Cream cheese: Softened to perfect creaminess, this base ingredient gives the filling its rich, tangy body.
- Sweetened condensed milk: Adds sweetness and helps create a silky, smooth texture that blends beautifully with the cream cheese.
- Teal food coloring: Just a few drops bring that signature oceanic hue to the cheesecake mixture, turning it into a mesmerizing under-the-sea delight.
- Edible sugar mermaid tail cake toppers: They crown each cup with a splash of fantasy and charm, making every bite visually captivating.
How to Make Mermaid Tail Cheesecake Cups Recipe
Step 1: Create the Vanilla Wafer Crust
Start by crushing the vanilla wafer cookies into fine crumbs, which will form the base of your cheesecake cups. Divide these crumbs evenly into 12 small clear cups, pressing them down firmly with the back of a spoon. This pressing action is key—it ensures the crust stays intact and provides that delightful crunch with every bite.
Step 2: Whip Up the Creamy Cheesecake Filling
Next, grab a large bowl and beat the softened cream cheese with the sweetened condensed milk until you reach a smooth, creamy consistency. This mixing is crucial because it combines tanginess with sweetness and makes sure the filling will set perfectly once refrigerated.
Step 3: Add the Magical Teal Color
Now for the fun part—drip a few drops of teal food coloring into your cheesecake mixture and stir until the color is evenly distributed. This step transforms your filling into a dreamy ocean hue, setting the scene for your Mermaid Tail Cheesecake Cups Recipe.
Step 4: Assemble the Cups
Use a spoon or a piping bag to neatly layer the teal cheesecake filling over each vanilla wafer crust in the cups. Filling each cup generously will make your dessert extra creamy and satisfying in every bite.
Step 5: Add the Enchanting Mermaid Tails
Gently press one edible sugar mermaid tail cake topper into the center of each cup. This decorative touch is not only stunning but also gives the dessert its whimsical character that will instantly wow your guests.
Step 6: Chill and Set
Finally, refrigerate your Mermaid Tail Cheesecake Cups Recipe for at least one hour. This chilling period allows the filling to set and makes sure all the flavors meld beautifully, so when you’re ready to serve, the texture is just right.
How to Serve Mermaid Tail Cheesecake Cups Recipe
Garnishes
To elevate the presentation of your Mermaid Tail Cheesecake Cups Recipe, consider adding fresh mint leaves or a sprinkle of edible glitter to mimic twinkling sea water. These small garnishes add freshness and an extra layer of visual interest without overshadowing the star of the show—the mermaid tails themselves.
Side Dishes
These cheesecake cups are quite rich, so pairing them with light, refreshing sides like a zesty citrus salad or a simple berry compote complements their sweetness beautifully. The contrast in flavors makes for a balanced and satisfying dessert experience.
Creative Ways to Present
For an unforgettable seaside-themed party, serve the Mermaid Tail Cheesecake Cups Recipe on a bed of crushed blue rock candy or edible sand made from crushed graham crackers. Transparent cups enhance the layered look, but you can also use decorative mason jars or miniature trifle bowls to add flair and charm.
Make Ahead and Storage
Storing Leftovers
If you happen to have leftovers (though that’s unlikely!), store them tightly covered in the refrigerator. Proper storage keeps the crust from getting soggy and preserves the creamy texture of the filling for up to three days.
Freezing
While freezing this dessert is possible, it’s best to freeze only the cheesecake filling separately without the crust or mermaid tails, as the texture of these components can change upon thawing. To freeze the filling, transfer it to an airtight container and use within one month.
Reheating
Since this dessert is meant to be enjoyed chilled, reheating is not recommended. Instead, let frozen filling thaw overnight in the refrigerator before assembling with fresh crust and toppers for the best results.
FAQs
Can I use a different cookie for the crust?
Absolutely! While vanilla wafer cookies offer a classic flavor and crisp crunch, crushed graham crackers or digestive biscuits also work wonderfully in the Mermaid Tail Cheesecake Cups Recipe.
Is there a dairy-free alternative for the cream cheese?
You can substitute regular cream cheese with a dairy-free version made from almond or cashew bases. Just be mindful that the texture might change slightly, but the cups will still taste delicious!
How do I make edible sugar mermaid tails?
These unique toppers can often be found at specialty baking stores or online. If you’re feeling crafty, you can use silicone molds to shape fondant or chocolate into mermaid tails and dust them with edible shimmer powder for that magical effect.
Can I make these cups vegan?
Yes! Use vegan cream cheese and sweetened condensed coconut milk. Just ensure your sugar toppers and food coloring are also vegan-friendly. This way, you can enjoy a cruelty-free version of the Mermaid Tail Cheesecake Cups Recipe.
How long should I chill the cheesecake cups before serving?
At least one hour is recommended to allow the filling to set firmly. However, chilling them longer—up to 4 hours or overnight—will make the texture even creamier and the flavors more melded.
Final Thoughts
Making the Mermaid Tail Cheesecake Cups Recipe is like creating a little edible ocean of joy—each cup bursting with creamy, dreamy flavor and a hint of whimsy that’s sure to bring smiles. Whether for a themed party or simply because you want to indulge in something special, this recipe is an absolute winner. Trust me, once you try these, they’ll be a go-to dessert for many happy occasions ahead!
Print
Mermaid Tail Cheesecake Cups Recipe
- Prep Time: 15 minutes
- Cook Time: 0 minutes
- Total Time: 1 hour 15 minutes
- Yield: 12 servings
- Category: Dessert
- Method: No-Cook
- Cuisine: American
Description
These Mermaid Tail Cheesecake Cups are a delightful no-bake dessert featuring a crunchy vanilla wafer crust topped with a creamy teal-colored cheesecake filling, finished with adorable edible sugar mermaid tail toppers. Perfect for summer parties or themed celebrations, these individual servings are both visually charming and deliciously smooth.
Ingredients
Crust
- 1 (11 oz) box vanilla wafer cookies, crushed
Filling
- 1 (8 oz) cream cheese, softened
- 1 (14 oz) can sweetened condensed milk
- Teal food coloring (a few drops)
Topping
- 12 edible sugar mermaid tail cake toppers
Instructions
- Prepare the Crust: Crush the vanilla wafer cookies into fine crumbs, then divide the crumbs evenly into 12 small clear cups. Press the crumbs down firmly to create an even crust base in each cup.
- Make the Cheesecake Filling: In a large mixing bowl, beat the softened cream cheese together with the sweetened condensed milk until the mixture becomes smooth and creamy, ensuring no lumps remain.
- Add Color: Add a few drops of teal food coloring into the cheesecake mixture and mix thoroughly until the color is uniformly distributed throughout.
- Assemble the Cups: Spoon or pipe the teal cheesecake mixture over the cookie crust layer in each cup, filling them nearly to the top.
- Add Decorations: Gently press one edible sugar mermaid tail cake topper into the center of each cheesecake cup to create a whimsical appearance.
- Chill to Set: Place the assembled cups in the refrigerator and chill for at least 1 hour to allow the cheesecake filling to set properly before serving.
Notes
- Crushing the vanilla wafers finely ensures a better crust texture and easier pressing.
- Use softened cream cheese at room temperature to avoid lumps in the filling.
- Adjust food coloring quantity to achieve your desired shade of teal.
- These cheesecake cups can be prepared a day in advance and stored covered in the refrigerator.
- For a gluten-free option, substitute gluten-free vanilla cookies in place of the vanilla wafers.
