If you adore that irresistible caramelized spice and buttery charm of Biscoff cookies, then you have to try this Homemade Biscoff Ice Cream Recipe. It perfectly captures the rich, creamy decadence of cookie butter in frozen form, turning every spoonful into a dreamy blend of smooth texture and crunchy cookie bits. Whether you’re a seasoned ice cream maker or a curious beginner, this recipe offers a delightful way to bring a unique twist to your dessert repertoire that’s sure to impress family and friends alike.

Ingredients You’ll Need
This Homemade Biscoff Ice Cream Recipe keeps things wonderfully simple, relying on just a handful of ingredients that come together to create a luscious, velvety texture and a deeply satisfying flavor. Each ingredient plays a vital role, from the richness of heavy cream to the warm spices in the Biscoff cookie butter.
- 2 cups heavy whipping cream: Adds richness and a smooth, creamy mouthfeel that defines the ice cream.
- 1 cup whole milk: Lightens the mixture slightly while maintaining creaminess and balance.
- 3/4 cup granulated sugar: Sweetens perfectly without overpowering the unique Biscoff flavor.
- 1/2 cup creamy Biscoff cookie butter: The heart of the recipe, lending that signature spicy, caramel flavor.
- 1 teaspoon vanilla extract: Enhances the overall flavor with a subtle, fragrant note.
- 1/4 teaspoon salt: Balances sweetness and amplifies depth in the ice cream.
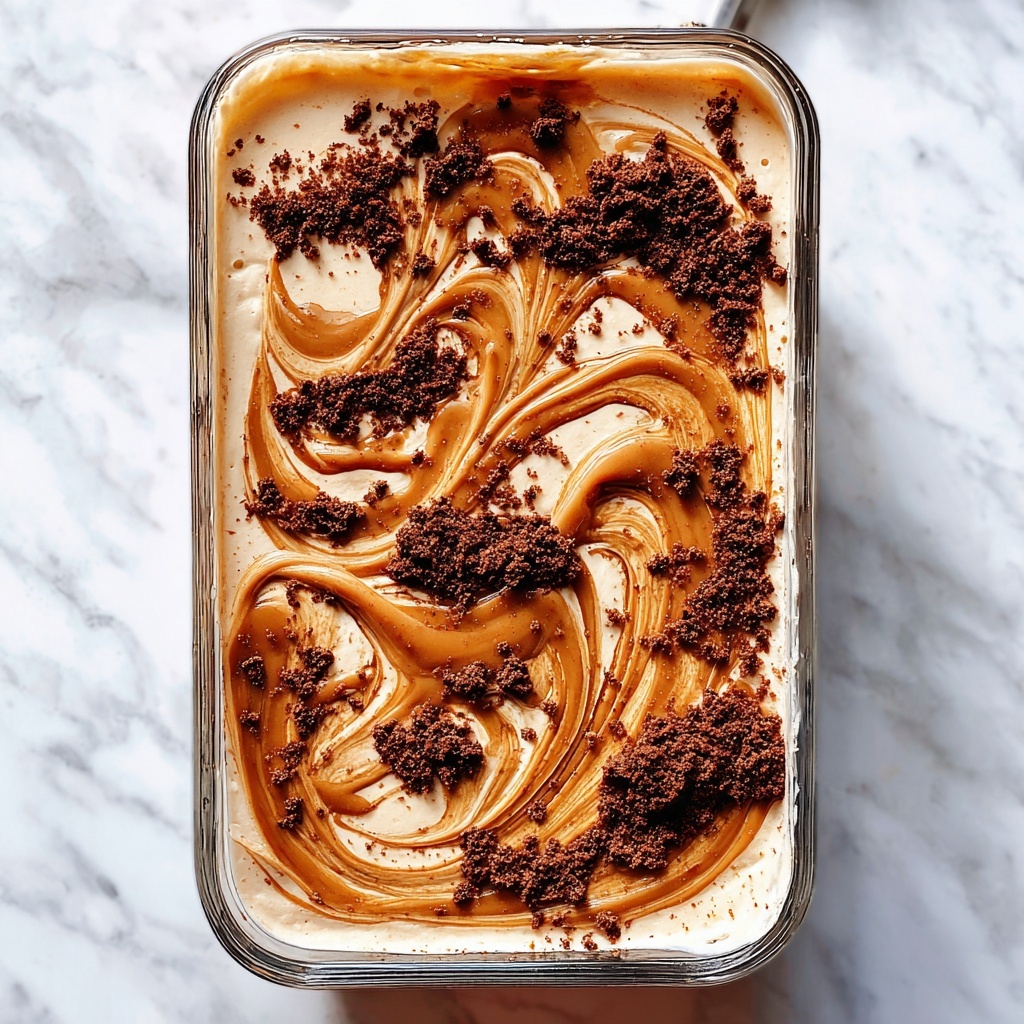
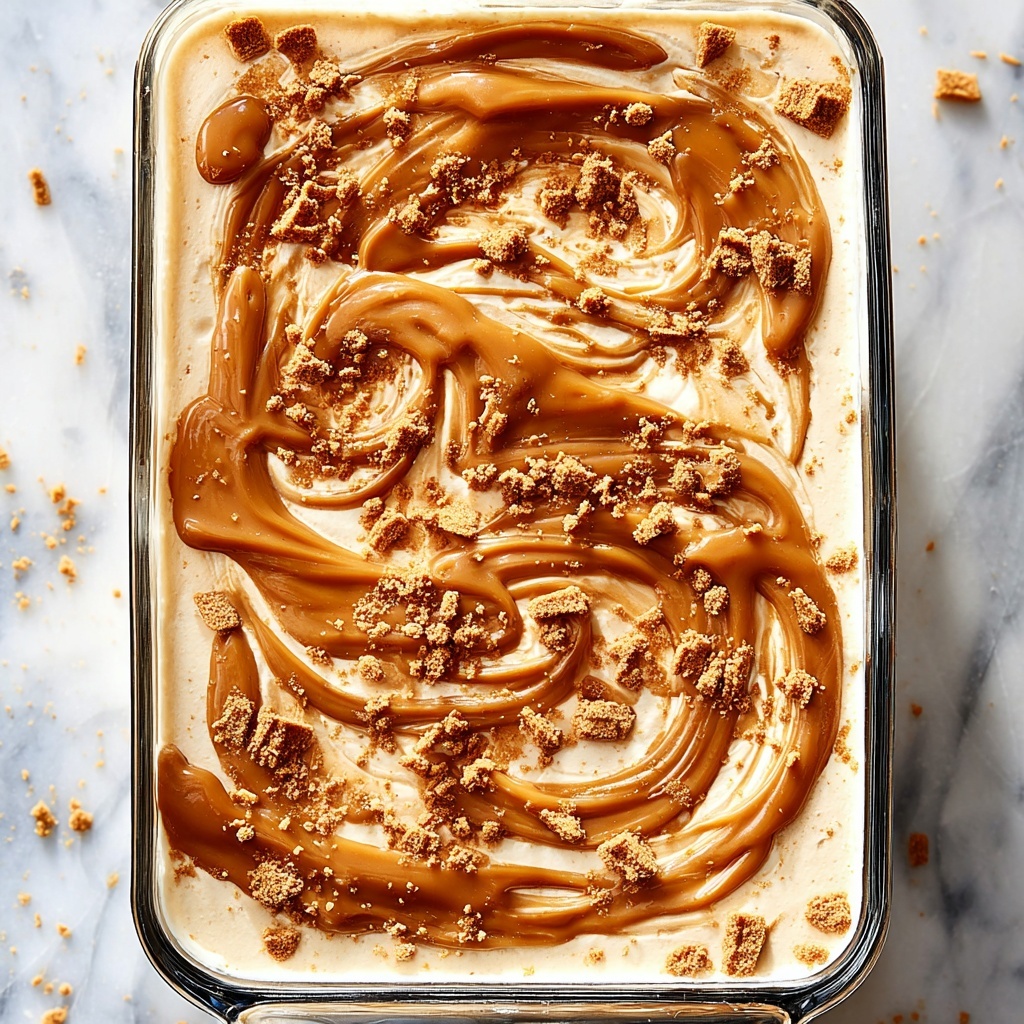
- 1/2 cup crushed Biscoff cookies: Adds delightful texture and extra bursts of cookie goodness.
How to Make Homemade Biscoff Ice Cream Recipe
Step 1: Prepare the Base Mixture
Start by whisking together the whole milk and granulated sugar in a medium bowl until the sugar is completely dissolved. This ensures your ice cream is perfectly sweetened with no gritty texture. Next, add the Biscoff cookie butter and whisk until the mixture is smooth and fully combined, giving you that signature flavor that makes this ice cream so special.
Step 2: Combine Cream and Flavorings
Once your cookie butter is fully incorporated, stir in the heavy whipping cream along with vanilla extract and a pinch of salt. The salt might be a small amount, but it’s key to balancing the sweetness and boosting the spice notes in the Biscoff spread, making every bite more flavorful. Mix until everything is evenly combined.
Step 3: Churn the Ice Cream
Pour your luscious mixture into an ice cream maker and set it to churn according to the manufacturer’s instructions, typically around 20 to 25 minutes. Churning introduces air and thickens the mixture, creating that irresistible soft-serve consistency. In the last two minutes of churning, gently fold in the crushed Biscoff cookies to add pleasant texture and surprise bites.
Step 4: Freeze and Firm Up
Transfer the churned ice cream to an airtight container and pop it in the freezer for at least four hours to firm up. This essential step gives the ice cream the perfect scoopable texture. Before serving, let it sit at room temperature for a few minutes to soften slightly, making it easier to scoop and even more enjoyable to eat.
How to Serve Homemade Biscoff Ice Cream Recipe
Garnishes
Enhance your homemade Biscoff ice cream by sprinkling extra crushed Biscoff cookies on top or drizzling some warm cookie butter for a glossy, irresistible finish. A dusting of cinnamon or a few caramel shards can add extra layers of flavor and visual appeal, turning a simple scoop into a show-stopping treat.
Side Dishes
This ice cream pairs beautifully with warm desserts like apple pie or brownies, creating a comforting contrast of temperatures and textures. It’s also amazing alongside freshly brewed coffee or espresso, bringing out the deep caramel tones of the Biscoff. For a lighter option, serve with fresh berries to add vibrant color and a tart counterpoint.
Creative Ways to Present
For a fun twist, try serving your Homemade Biscoff Ice Cream Recipe inside an edible Biscoff cookie bowl or layered between thin waffles for an indulgent ice cream sandwich. Another creative idea is to use small dessert glasses to make parfaits, layering ice cream with crushed cookies, caramel sauce, and whipped cream for an elegant presentation perfect for dinner parties.
Make Ahead and Storage
Storing Leftovers
Store any leftover ice cream in an airtight container to maintain its creamy texture and prevent freezer burn. Make sure to press a piece of parchment paper directly onto the surface before sealing tightly, which helps keep ice crystals at bay and preserves that fresh homemade flavor.
Freezing
The Homemade Biscoff Ice Cream Recipe freezes beautifully, but if it becomes too hard, simply let it thaw at room temperature for about 10 to 15 minutes before scooping. This resting time softens the ice cream perfectly without losing its smooth texture or rich taste.
Reheating
Unlike baked desserts, ice cream doesn’t need reheating. The goal is to enjoy it cold and creamy. However, warming a drizzle of cookie butter to pour over the ice cream adds a lovely contrast and intensifies the flavor. Just avoid melting the ice cream itself by keeping it chilled until ready to serve.
FAQs
Can I make this Homemade Biscoff Ice Cream Recipe without an ice cream maker?
Absolutely! Whip the heavy cream to stiff peaks, fold it gently into the milk and cookie butter mixture, and freeze in a loaf pan. Stir midway to break up ice crystals for a smoother texture. It’s a great no-churn alternative that still delivers creamy results.
Is it possible to make this recipe dairy-free?
Yes, you can substitute the heavy cream and whole milk with full-fat coconut milk or another plant-based cream alternative. Keep in mind this will slightly change the flavor and texture, but the cookie butter flavor will still shine through beautifully.
How long does the ice cream keep in the freezer?
When stored properly in an airtight container, the ice cream maintains its best quality for up to two weeks. Beyond that, it may develop ice crystals or lose some creaminess but will still be enjoyable.
Can I increase the amount of Biscoff cookie butter?
Definitely! For a stronger cookie butter flavor, swirl in an extra 1/4 cup of warmed Biscoff spread before the final freeze. This adds an intense boost of that beloved flavor and creates delicious pockets of molten cookie butter.
What’s the best way to crush Biscoff cookies for this recipe?
Place the cookies in a sealed plastic bag and gently crush with a rolling pin or pulse a few times in a food processor. You want small pieces that add texture but aren’t too fine, so you still get a satisfying crunch in every bite.
Final Thoughts
This Homemade Biscoff Ice Cream Recipe has quickly become one of my go-to desserts for its perfect combination of creamy indulgence and warm cookie flavors. It’s genuinely a crowd-pleaser that’s fun to make and even more fun to eat. I encourage you to give it a try—you might just find your new favorite frozen treat!
Print
Homemade Biscoff Ice Cream Recipe
- Prep Time: 15 minutes
- Cook Time: 0 minutes
- Total Time: 4 hours 15 minutes
- Yield: 6 servings
- Category: Dessert
- Method: Churning
- Cuisine: American
- Diet: Vegetarian
Description
This Homemade Biscoff Ice Cream recipe offers a rich and creamy frozen treat infused with the unique, spicy sweetness of Biscoff cookie butter. Made from a smooth blend of heavy cream, whole milk, and crushed Biscoff cookies, it delivers a delightful texture and irresistible flavor that’s perfect for dessert lovers seeking a homemade twist on a classic favorite.
Ingredients
Ice Cream Base
- 2 cups heavy whipping cream
- 1 cup whole milk
- 3/4 cup granulated sugar
- 1/2 cup creamy Biscoff cookie butter
- 1 teaspoon vanilla extract
- 1/4 teaspoon salt
Add-ins
- 1/2 cup crushed Biscoff cookies
Instructions
- Prepare the Milk Mixture: In a medium mixing bowl, whisk together the whole milk and granulated sugar until the sugar is fully dissolved, creating a smooth base.
- Incorporate Biscoff Cookie Butter: Add the creamy Biscoff cookie butter to the milk mixture and whisk until it is fully smooth and incorporated, ensuring even flavor distribution.
- Add Remaining Ingredients: Stir in the heavy whipping cream, vanilla extract, and salt until the mixture is well combined and creamy.
- Churn the Ice Cream: Pour the prepared mixture into an ice cream maker and churn following the manufacturer’s instructions, usually about 20 to 25 minutes, until the mixture reaches a soft-serve consistency.
- Add Crushed Cookies: During the last 2 minutes of churning, add the crushed Biscoff cookies to incorporate texture and bursts of cookie flavor throughout.
- Freeze to Firm Up: Transfer the churned ice cream to an airtight container and freeze for at least 4 hours or until firm enough to scoop.
- Serve: Before serving, allow the ice cream to sit at room temperature for a few minutes to soften slightly for easier scooping and optimal creaminess.
Notes
- For a stronger cookie butter flavor, swirl in an extra 1/4 cup of warmed Biscoff spread before the final freeze.
- If an ice cream maker is unavailable, whip the heavy cream to stiff peaks separately, fold it into the sweetened milk and Biscoff mixture, then freeze in a loaf pan, stirring once halfway through to improve texture.


