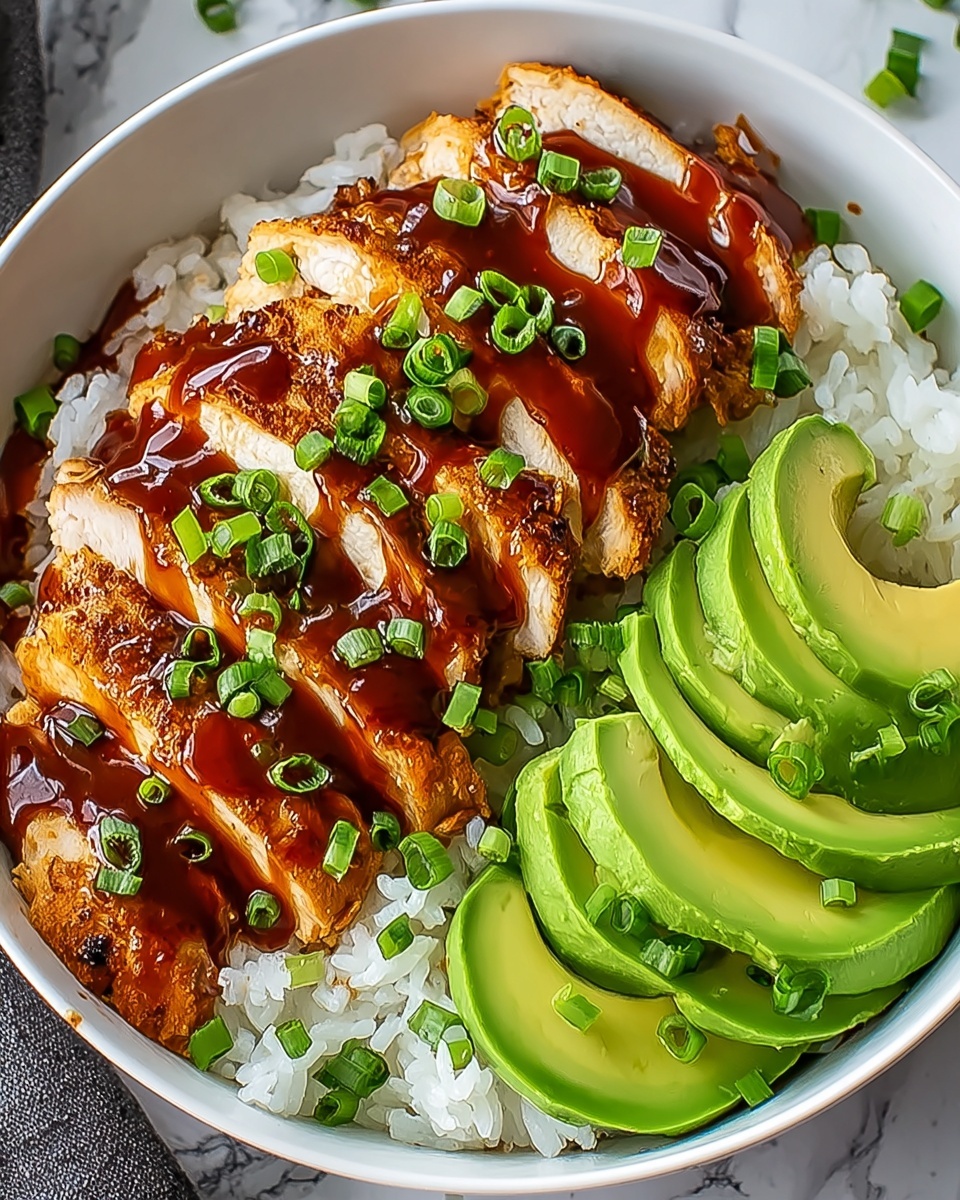
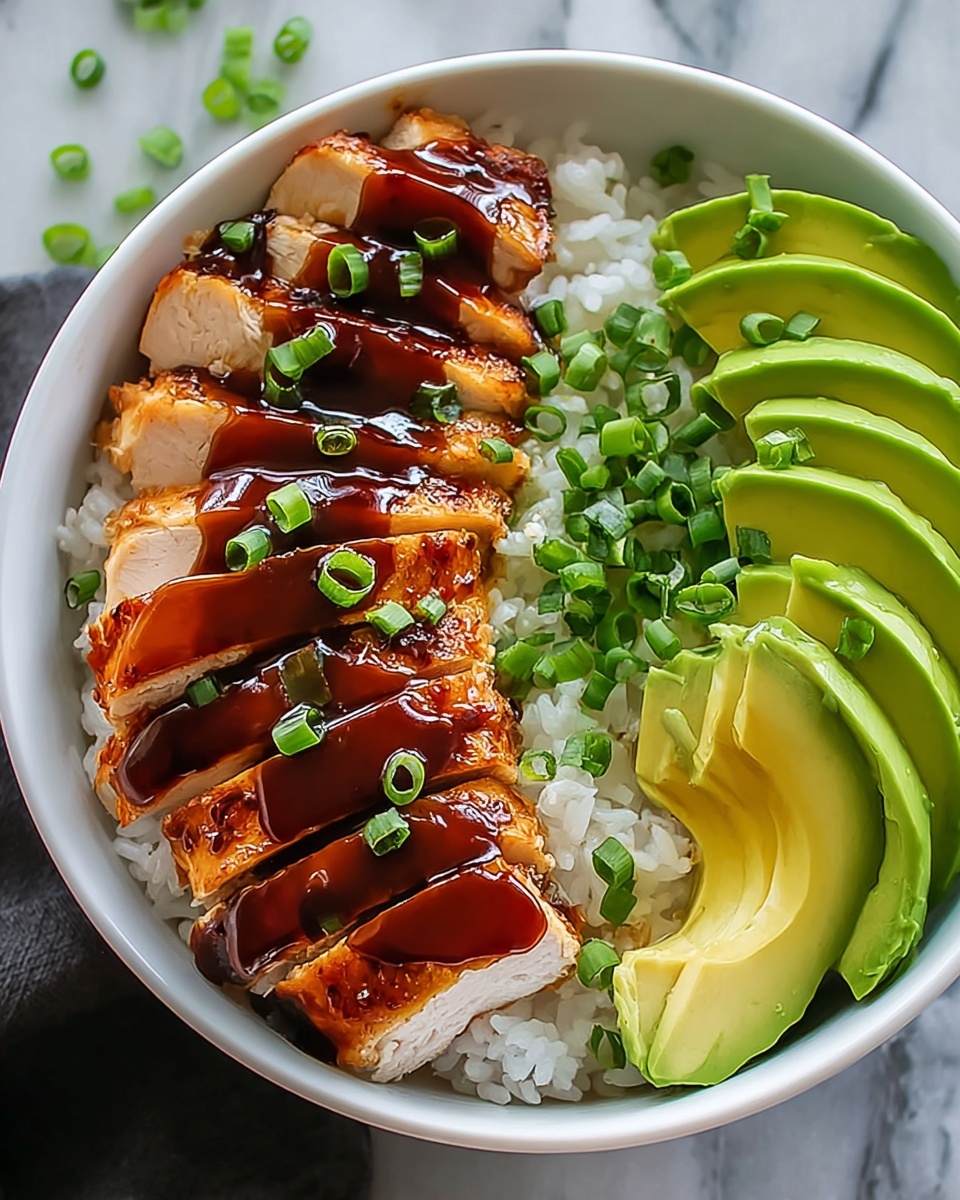
If you are craving a delightful meal that combines comforting flavors with an irresistible texture, this Easy Sticky Chicken Rice Bowl Recipe is your new best friend in the kitchen. It’s the perfect balance of tender chicken coated in a luscious sticky sauce served over fluffy rice, creating a satisfying dish that feels like a warm hug on a plate. Whether you are cooking for yourself or sharing with loved ones, this recipe brings simple ingredients together in a way that’s both exciting and incredibly approachable.

Ingredients You’ll Need
The magic of this Easy Sticky Chicken Rice Bowl Recipe lies in its straightforward and carefully chosen ingredients, each adding a distinct layer to the final flavor and texture. You don’t need fancy components to make an extraordinary meal; just a handful of staples that brighten the dish with every bite.
- Chicken thighs: Juicy and tender, they hold the sauce beautifully and stay moist during cooking.
- Soy sauce: Provides that deep umami flavor essential for sticky sauces.
- Honey: Adds natural sweetness and helps create the glossy, sticky texture.
- Garlic: Infuses the sauce with a punch of savory aroma and flavor.
- Rice vinegar: A little acidity to balance sweetness and deepen the sauce complexity.
- Ginger: Fresh ginger brightens and adds a subtle zing to the sauce.
- Sesame oil: Boosts the nutty, toasted flavor that lingers delightfully.
- Scallions: Tender green onions add freshness and a crisp contrast in texture.
- White or jasmine rice: The perfect fluffy base that soaks up every bit of sticky sauce.
How to Make Easy Sticky Chicken Rice Bowl Recipe
Step 1: Prepare the Rice
Start by rinsing your rice under cold water until the water runs clear to remove extra starch and prevent clumping. Cook the rice according to package instructions, choosing the right water-to-rice ratio to achieve fluffy, perfectly separate grains that act as a delicious canvas for your chicken.
Step 2: Marinate the Chicken
While the rice cooks, mix together soy sauce, honey, minced garlic, grated ginger, rice vinegar, and a splash of sesame oil. Coat the chicken thighs thoroughly in this mixture and let them marinate for at least 15 minutes to soak in all the punchy flavors that will make this Easy Sticky Chicken Rice Bowl Recipe stand out.
Step 3: Cook the Chicken
Heat a skillet over medium-high heat and add a little oil. Once hot, sear the chicken thighs skin-side down until beautifully browned and caramelized, then flip and cook the other side. Pour the remaining marinade into the pan, letting it reduce and thicken into that irresistible sticky glaze that coats your chicken perfectly.
Step 4: Assemble the Rice Bowl
Once the chicken is cooked and the sauce is bubbling with that lovely glossy finish, slice the thighs into bite-sized pieces. Spoon a generous amount of fluffy rice into a bowl, then top with your sticky chicken pieces. Drizzle any remaining sauce over the top to ensure every mouthful is bursting with flavor.
Step 5: Add Fresh Toppings
Sprinkle with chopped scallions and, if you like, a few sesame seeds for crunch and a pop of color. These little finishing touches elevate the presentation and add refreshing brightness that perfectly balances the sticky richness of the chicken.
How to Serve Easy Sticky Chicken Rice Bowl Recipe
Garnishes
The beauty of this Easy Sticky Chicken Rice Bowl Recipe is how well it welcomes fresh, simple garnishes. Think sliced scallions, toasted sesame seeds, or even a few sprigs of cilantro. These add pops of color and texture while enhancing the dish’s vibrant, fresh taste.
Side Dishes
Complement your rice bowl with crisp steamed or roasted vegetables like broccoli, snap peas, or carrots. A light cucumber salad with a tangy dressing can provide a refreshing counterpoint to the rich, sticky chicken sauce, making your meal even more balanced and satisfying.
Creative Ways to Present
Try serving this dish in a bamboo bowl for a fun, authentic touch or on a large platter with various toppings on the side to let everyone customize their bowl. Layer the chicken and rice with pickled vegetables or sliced avocados for an extra burst of flavor and texture, impressing both family and friends.
Make Ahead and Storage
Storing Leftovers
Store any leftover chicken and rice separately in airtight containers in the refrigerator. This will keep the textures intact and prevent the rice from becoming too sticky or clumped. Both components should stay fresh for up to 3 days, making great next-day lunches.
Freezing
While the chicken freezes well, rice tends to lose its ideal texture after thawing. It’s best to freeze the cooked chicken coated in sauce in a freezer-safe container or bag for up to 2 months. When ready, thaw overnight in the fridge for best results before reheating.
Reheating
To reheat, warm the chicken gently in a pan over medium heat to preserve the sticky glaze, adding a splash of water or broth if it feels too thick. Reheat the rice separately in the microwave or on the stovetop with a splash of water to revive its fluffiness before combining them again for a delicious meal.
FAQs
Can I use chicken breasts instead of thighs?
Absolutely! Chicken breasts can work, but they tend to be leaner and may dry out faster. To keep them juicy, consider slicing them thinner and reducing cooking time when making this Easy Sticky Chicken Rice Bowl Recipe.
Is this recipe spicy?
The base Easy Sticky Chicken Rice Bowl Recipe is sweet and savory without heat, but you can easily add chili flakes or sriracha sauce to spice things up according to your taste.
What type of rice works best?
Jasmine or long-grain white rice is ideal because of its fluffy texture and fragrant aroma, but brown rice or even cauliflower rice can be healthy alternatives depending on your preference.
Can I make the sauce ahead of time?
Yes! The sticky sauce can be made ahead and stored in the fridge for up to a week. Just reheat it gently when cooking the chicken to ensure all the flavors meld perfectly.
Is there a vegetarian version of this recipe?
For a vegetarian take, swap the chicken with tofu or tempeh, and follow the same sauce and cooking method. The sticky glaze works wonderfully with plant-based proteins too!
Final Thoughts
This Easy Sticky Chicken Rice Bowl Recipe is one of those dishes that instantly feels like home while being exciting enough to shake up your usual dinner routine. It’s approachable, flexible, and absolutely delicious—a true crowd-pleaser. I can’t wait for you to try it and enjoy every sticky, flavorful bite!
Print
Easy Sticky Chicken Rice Bowl Recipe
- Prep Time: 30 minutes
- Cook Time: 30 minutes
- Total Time: 2 hours 15 minutes
- Yield: 1 circular braided loaf, serves 8
- Category: Bread
- Method: Baking
- Cuisine: American
- Diet: Vegetarian
Description
This festive braided bread with dyed hard-boiled eggs is a delightful and visually appealing treat perfect for Easter or any special occasion. The sweet, soft dough is enriched with butter, eggs, vanilla, and optional orange zest, braided into a circular loaf that encases colorful eggs. The bread is brushed with an egg wash for a shiny golden crust and baked until perfectly tender and aromatic.
Ingredients
Dough Ingredients
- 4 cups all-purpose flour, plus extra for kneading
- 1/2 cup granulated sugar
- 1 packet (2 1/4 teaspoons) active dry yeast
- 1 teaspoon salt
- 1/2 cup milk, warmed to 110°F
- 1/2 cup water, warmed to 110°F
- 1/4 cup unsalted butter, softened
- 2 large eggs
- 1 teaspoon vanilla extract
- 1 teaspoon orange zest (optional, for flavor)
For Assembly
- 1/4 cup sugar (for sprinkling)
- 4–6 hard-boiled eggs (dyed in pastel colors for Easter)
- 1 egg yolk (for egg wash)
- 1 tablespoon water (for egg wash)
Instructions
- Prepare the Dough: In a large bowl, combine the warm milk, warm water, and 1 tablespoon of sugar. Sprinkle the active dry yeast over the mixture and let it sit for 5-10 minutes until frothy, activating the yeast.
- Mix the Ingredients: In a separate large bowl, whisk together the flour, remaining sugar, and salt. Add the frothy yeast mixture, softened butter, eggs, vanilla extract, and optional orange zest. Mix until the dough just begins to come together.
- Knead the Dough: Turn the dough onto a floured surface and knead vigorously for 5-8 minutes until smooth and elastic. Add flour if the dough is too sticky. Place the dough in a greased bowl, cover with a clean towel, and let rise in a warm spot for 1 to 1.5 hours, or until doubled in size.
- Shape the Bread: Punch down the risen dough and divide it into three equal pieces. Roll each piece into a long 12-15 inch rope. Braid the three ropes together and form into a circular loaf, pinching the ends together securely.
- Add the Dyed Eggs: Gently press the pastel-colored hard-boiled eggs into the braided dough in a symmetrical or preferred pattern, ensuring the eggs are nestled securely.
- Second Rise: Cover the braided loaf with a clean towel and allow it to rise again for 30-45 minutes until puffed up.
- Prepare the Egg Wash: In a small bowl, whisk the egg yolk with 1 tablespoon of water. Brush this mixture evenly over the entire loaf to promote a golden, shiny crust during baking.
- Bake the Bread: Preheat the oven to 350°F (175°C). Place the bread on a parchment-lined baking sheet and bake for 25-30 minutes, until golden brown and the bottom sounds hollow when tapped.
- Cool and Serve: Transfer the bread to a wire rack and allow to cool completely before slicing. The dyed eggs can be eaten with the bread or kept as decorative keepsakes.
Notes
- Warming the milk and water to 110°F helps activate the yeast for proper rising.
- Optional orange zest adds a subtle citrus flavor enhancing the bread’s aroma.
- Use a gentle hand when pressing the dyed eggs into the dough to avoid cracking them.
- If the dough is sticky during kneading, add small amounts of flour gradually to avoid a dense loaf.
- Make sure the loaf is fully cooled before slicing to maintain its structure.
- Store leftover bread in an airtight container at room temperature for up to 3 days.
- Freezing the bread after baking is possible; thaw and warm slightly before serving.


