If you have a sweet tooth and love the perfect balance of rich, buttery sweetness with a hint of sea salt, this Easy Salted Caramels Recipe is about to become your new obsession. These luscious, chewy caramels melt in your mouth with just the right amount of saltiness to brighten every bite, and the best part? You’ll be amazed at how simple it is to make them at home, transforming just a handful of basic ingredients into little squares of pure joy.
Ingredients You’ll Need
Making caramel that’s irresistibly smooth and flavorful all starts with the right ingredients. Each one plays a crucial role, from the sweetness and creaminess to the subtle salty finish that makes this treat unforgettable.
- 1 cup granulated sugar: The magic of caramel starts with sugar, providing the sweet base that caramelizes beautifully.
- 1/2 cup light corn syrup: This keeps the texture smooth and prevents crystallization, ensuring your caramels are silky and perfect.
- 1/2 cup unsalted butter, cut into pieces: Adds richness and a creamy dimension, balancing the sweetness perfectly.
- 1 cup heavy cream: Infuses the caramel with a luscious, velvety texture and deep dairy flavor.
- 1 teaspoon pure vanilla extract: Brings warmth and complexity, elevating the overall taste.
- 1 teaspoon flaky sea salt (for topping): Adds that signature salty crunch that contrasts beautifully with the sweet caramel.
How to Make Easy Salted Caramels Recipe
Step 1: Prepare Your Pan
Begin by lining an 8×8-inch baking pan with parchment paper, leaving some overhang on the edges. This makes it easy to lift out the caramel once it’s set, so you can cut it neatly without any sticky mess.
Step 2: Combine and Heat Ingredients
In a heavy-bottomed saucepan, combine the granulated sugar, light corn syrup, butter, and heavy cream. Use medium heat and stir gently as the butter melts and the sugar dissolves, blending all those flavors together smoothly.
Step 3: Bring to a Boil and Monitor Temperature
Let the mixture come to a gentle boil. Attach a candy thermometer to the pan and allow the caramel to cook, stirring occasionally to prevent burning, until it reaches 245°F—the firm ball stage, where the caramel will set just right. Patience here really pays off!
Step 4: Remove from Heat and Add Vanilla
Take the pan off the heat immediately once it hits the right temperature. Stir in the vanilla extract thoroughly. The fragrance that wafts up now is absolutely irresistible and signals the caramel is just about ready.
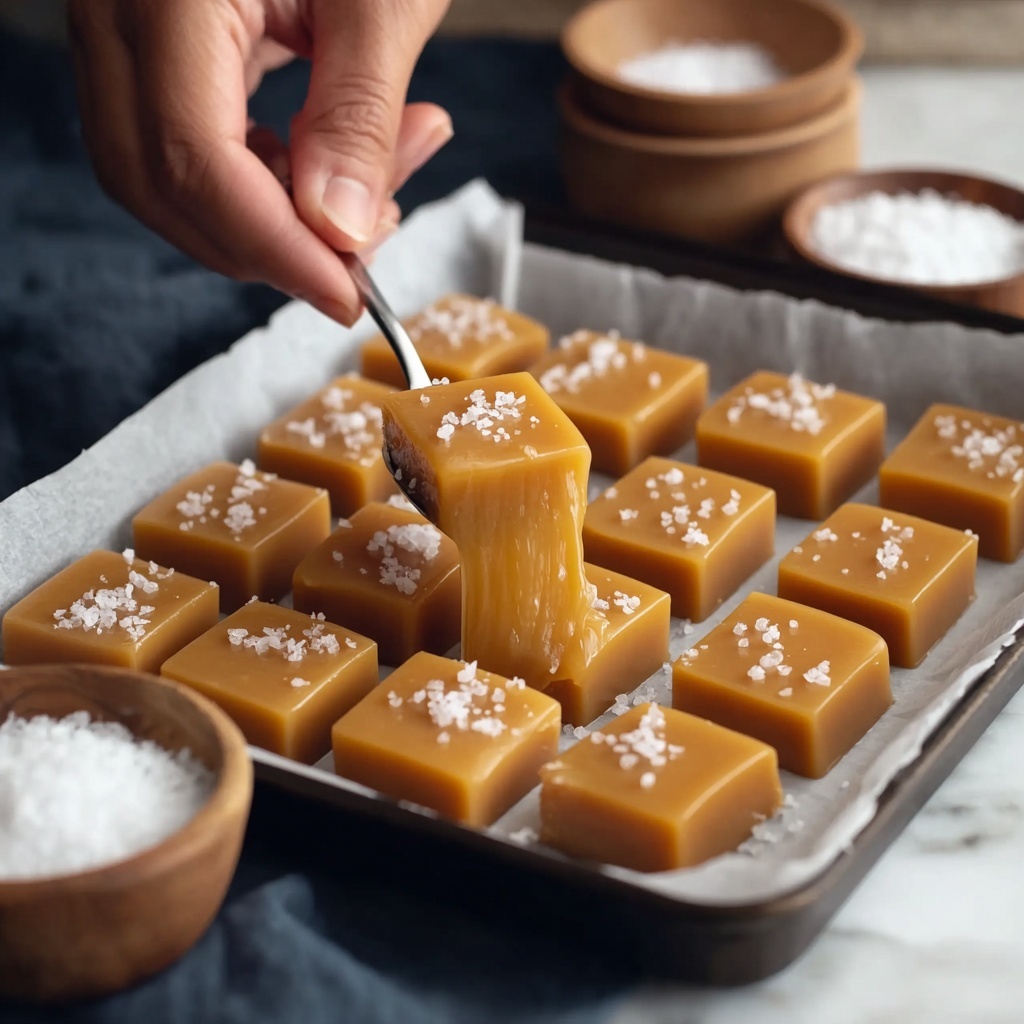
Step 5: Pour and Cool
Pour the hot caramel mixture into your prepared pan and smooth out the surface with a spatula. Leave it to cool at room temperature for about 2 hours until it firms up to that perfect chewy texture you’re craving.
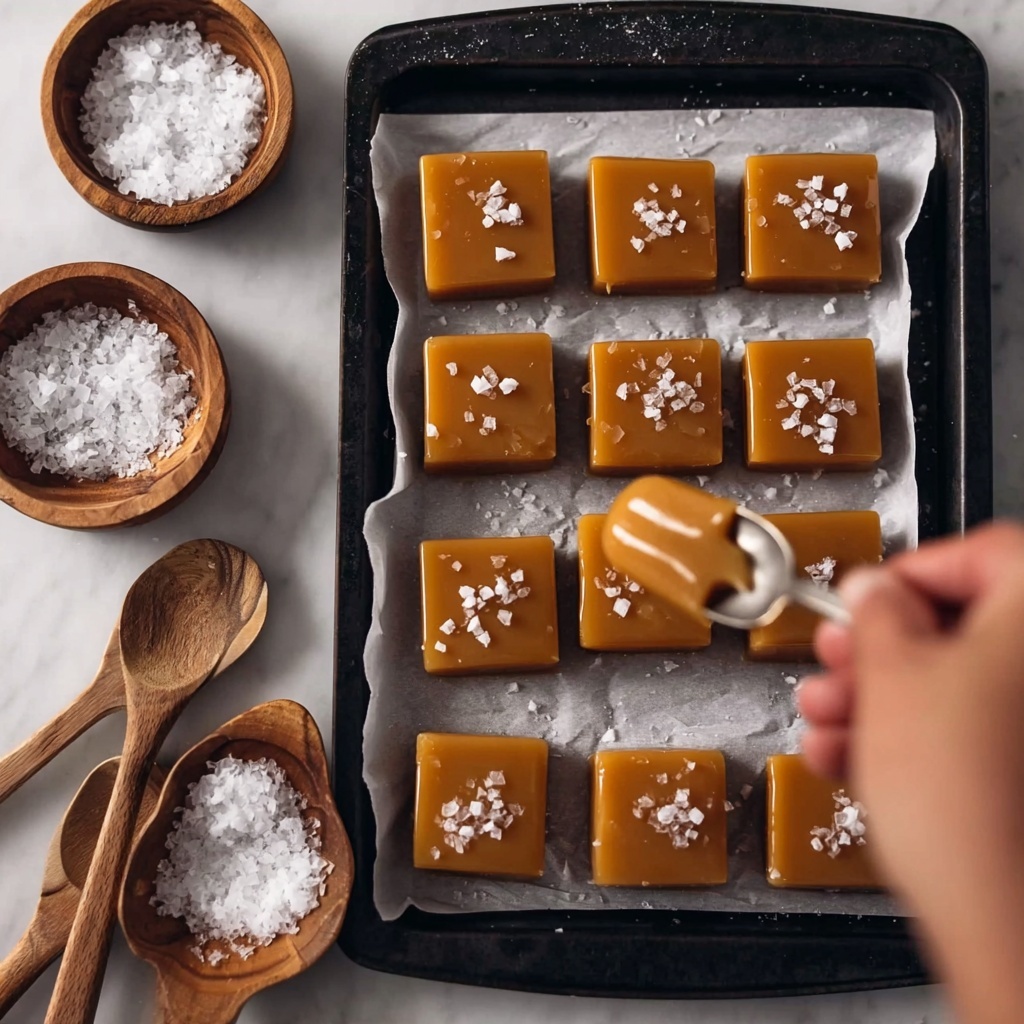
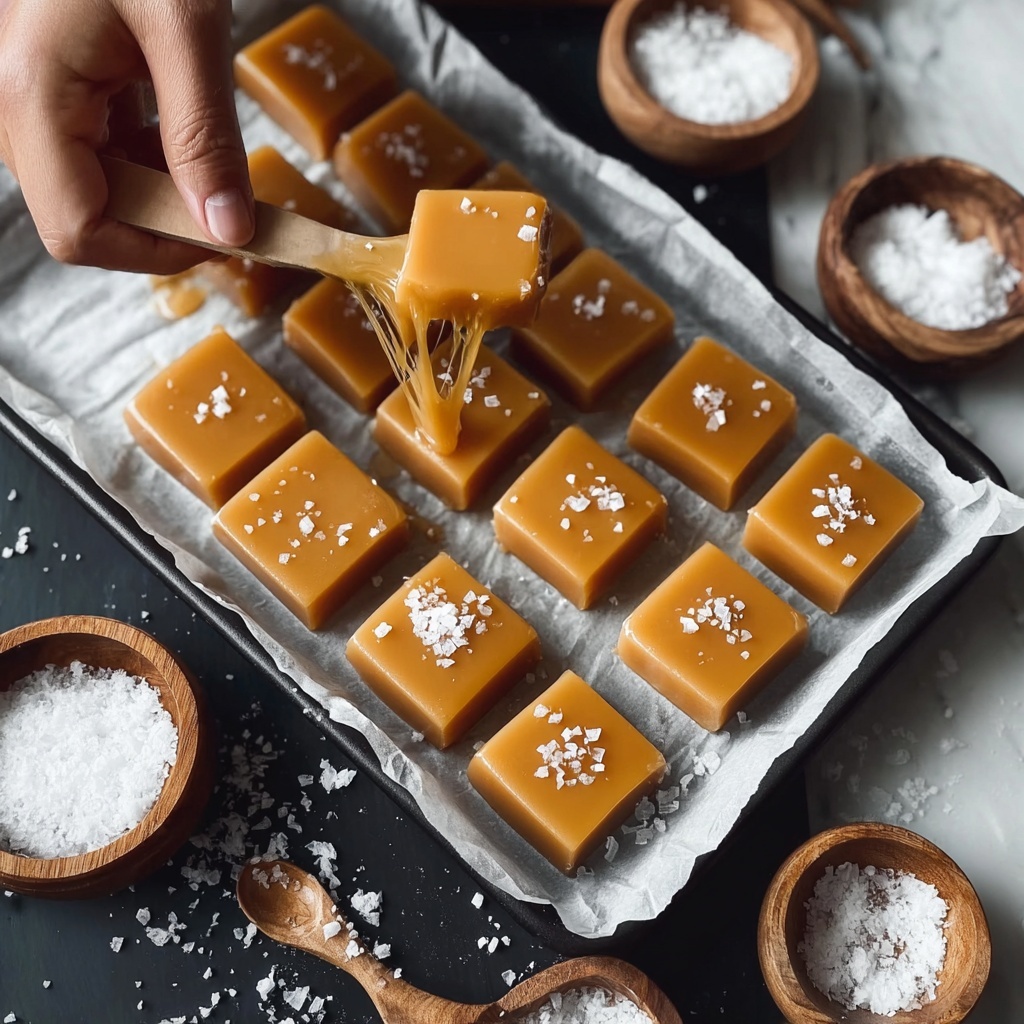
Step 6: Salt and Slice
Once cooled, sprinkle the caramel with flaky sea salt for that beautiful balance of sweet and savory. Use the parchment overhang to lift it out and slice into squares or rectangles. Wrapping each piece individually in parchment or wax paper keeps your caramels fresh and ready to share.
How to Serve Easy Salted Caramels Recipe
Garnishes
Sprinkling a little extra flaky sea salt right before serving can really enhance the flavor punch. For a festive touch, consider a light dusting of cocoa powder or a drizzle of melted dark chocolate for some elegant contrast.
Side Dishes
Caramels pair wonderfully with warm drinks like coffee, hot chocolate, or tea. Serving your Easy Salted Caramels Recipe alongside a rich cup of espresso or a creamy chai latte can turn any moment into a tiny celebration.
Creative Ways to Present
Wrap your caramels in colorful parchment for gifts, place them in decorative tins, or serve them on a beautiful board with nuts and dried fruits for a charming homemade treat platter. They also make fantastic party favors or stocking stuffers during the holidays.
Make Ahead and Storage
Storing Leftovers
Leftover caramels are best stored in an airtight container at room temperature. Keep them out of direct sunlight and heat to prevent melting—they should stay perfectly chewy and fresh for up to two weeks.
Freezing
If you want to keep these delicious treats longer, freezing is a great option. Wrap each caramel individually in parchment, place them in a freezer-safe bag or container, and freeze for up to 3 months. Thaw at room temperature when you’re ready to indulge.
Reheating
If your caramels become too firm, a short stint in a warm room or a few seconds in the microwave can soften them slightly. Just be careful not to overheat, or they may lose that perfect chewy texture.
FAQs
Can I use salted butter instead of unsalted?
While unsalted butter gives you more control over the saltiness, you can use salted butter if that’s what you have on hand. Just reduce or skip the additional flaky sea salt topping to avoid making the caramels too salty.
What does the light corn syrup do in the recipe?
Light corn syrup helps prevent the sugar from crystallizing, resulting in a smooth, creamy caramel without any gritty texture. It’s a key player in getting that perfect chewy bite.
Do I need a candy thermometer to make these caramels?
Using a candy thermometer is highly recommended to achieve the ideal 245°F temperature. It ensures your caramel sets properly without being too soft or hard, but with experience, you can also rely on visual cues and the firm ball test if you prefer.
Can I add flavors like coffee or bourbon?
Absolutely! Adding a teaspoon of instant coffee powder or a splash of bourbon when you add the vanilla can add an exciting twist to this Easy Salted Caramels Recipe. Just be sure to stir well and enjoy experimenting.
How do I prevent my caramels from sticking together?
Wrapping each caramel piece individually in parchment or wax paper is the best way to keep them from sticking. You can also lightly dust your storage container with a bit of cornstarch or powdered sugar if you need an extra layer of protection.
Final Thoughts
There’s something truly special about homemade caramels, and this Easy Salted Caramels Recipe brings that homemade magic right to your kitchen with minimal fuss. Once you taste these buttery, salty-sweet morsels, you’ll never want store-bought again. Dive in, have fun making them, and share the love—your sweet tooth will thank you a million times over!
Print
Easy Salted Caramels Recipe
- Prep Time: 15 minutes
- Cook Time: 10 minutes
- Total Time: 2 hours 25 minutes
- Yield: 25 servings
- Category: Candy
- Method: Stovetop
- Cuisine: American
Description
This recipe for Easy Salted Caramels delivers rich, buttery homemade caramels with a perfect balance of sweet and salty flavors. Made with simple ingredients like sugar, corn syrup, butter, and cream, these caramels are cooked to the ideal firm ball stage for a chewy yet tender texture. Finished with a sprinkle of flaky sea salt, these candies are perfect for gifting or enjoying as a special treat.
Ingredients
Caramel Ingredients
- 1 cup granulated sugar
- 1/2 cup light corn syrup
- 1/2 cup unsalted butter, cut into pieces
- 1 cup heavy cream
- 1 teaspoon pure vanilla extract
Topping
- 1 teaspoon flaky sea salt (for topping)
Instructions
- Prepare the pan: Line an 8×8-inch baking pan with parchment paper, ensuring there is an overhang on the sides to make removal of the caramel easier later.
- Combine ingredients: In a heavy-bottomed saucepan over medium heat, add granulated sugar, light corn syrup, butter pieces, and heavy cream. Stir continuously until the butter has fully melted and the sugar has dissolved into the mixture.
- Cook the caramel: Bring the mixture to a gentle boil. Attach a candy thermometer to the saucepan and cook the mixture, stirring occasionally, until it reaches 245°F, which is the firm ball stage. This ensures the caramel has the ideal chewiness once cooled.
- Add vanilla: Remove the saucepan from heat and stir in the pure vanilla extract thoroughly to incorporate flavor evenly.
- Pour and cool: Immediately pour the hot caramel into the prepared baking pan, smoothing the surface evenly with a spatula. Allow the caramel to cool at room temperature undisturbed for about 2 hours until it firms up.
- Finish and cut: Once cooled and set, sprinkle the top evenly with flaky sea salt for a salty contrast to the sweetness. Using the parchment overhang, lift the caramel slab out of the pan and cut it into squares or rectangles. Wrap each piece individually in parchment or wax paper for storage or gifting.
Notes
- Use a heavy-bottomed saucepan to prevent burning the caramel during cooking.
- Ensure the candy thermometer is clipped securely and does not touch the bottom of the pan for accurate temperature reading.
- If you prefer softer caramels, you can remove the caramel at a slightly lower temperature (around 240°F).
- Stored in an airtight container at room temperature, these caramels last up to two weeks.
- Be cautious when handling hot caramel as it can cause severe burns.

