
If you’ve ever dreamed of mastering homemade bread without the fuss of intense kneading or complicated steps, this Easy No-Knead Artisan Bread Recipe is your new best friend in the kitchen. This recipe transforms just a handful of simple ingredients into a rustic loaf with a perfectly crisp crust and soft, airy crumb. Whether you’re an experienced baker or a complete novice, you’ll find comfort and joy in the effortless process and truly delicious results that will wow your family and friends.
Ingredients You’ll Need
With just four basic ingredients, this recipe is a beautiful example of simplicity delivering spectacular flavor and texture. Each component plays a star role, contributing to the bread’s crust, rise, and tender crumb.
- 3 cups all-purpose flour: The foundation of your bread, providing structure and that classic texture we all adore.
- 2 teaspoons kosher salt: Enhances the dough’s flavor and helps control yeast activity for an even rise.
- ½ teaspoon instant yeast (or active dry yeast): The magic agent that makes the dough rise without any kneading.
- 1 ⅓ cups warm water (about 110 degrees F): Hydrates the flour and activates the yeast, creating that sticky, easy-to-handle dough.
How to Make Easy No-Knead Artisan Bread Recipe
Step 1: Mix Your Ingredients
Start by whisking together the flour, kosher salt, and yeast in a large mixing bowl. This even distribution of dry ingredients is key for developing flavor and proper rise. Next, add the warm water and stir vigorously with a rubber spatula or wooden spoon until you get a sticky, shaggy dough. No kneading required — just trust the process!
Step 2: Let the Dough Rise
Cover your bowl loosely with plastic wrap or a kitchen towel and leave it to rise at room temperature for about 4 hours. This slow fermentation is what imparts that incredible depth of flavor and chewy texture. If your schedule demands, you can refrigerate the dough for up to 14 hours, which actually improves flavor even more by allowing an extended fermentation.
Step 3: Shape and Rest the Dough
Once the dough has risen and is bubbly, gently scrape it onto a floured surface. No roughhandling here — just shape it delicately into a round loaf. Dust the top lightly with flour and place the dough on parchment paper. Cover loosely and let it rest for 30 minutes. This final rise helps develop the crust beautifully during baking.
Step 4: Preheat Your Dutch Oven
While your dough rests, place your Dutch oven or a heavy cast-iron pot with its lid on into the oven and preheat it to 440°F. Preheating is crucial as it creates a steamy environment inside the pot, giving you that signature artisan crust with a golden, crisp exterior.
Step 5: Bake Your Bread
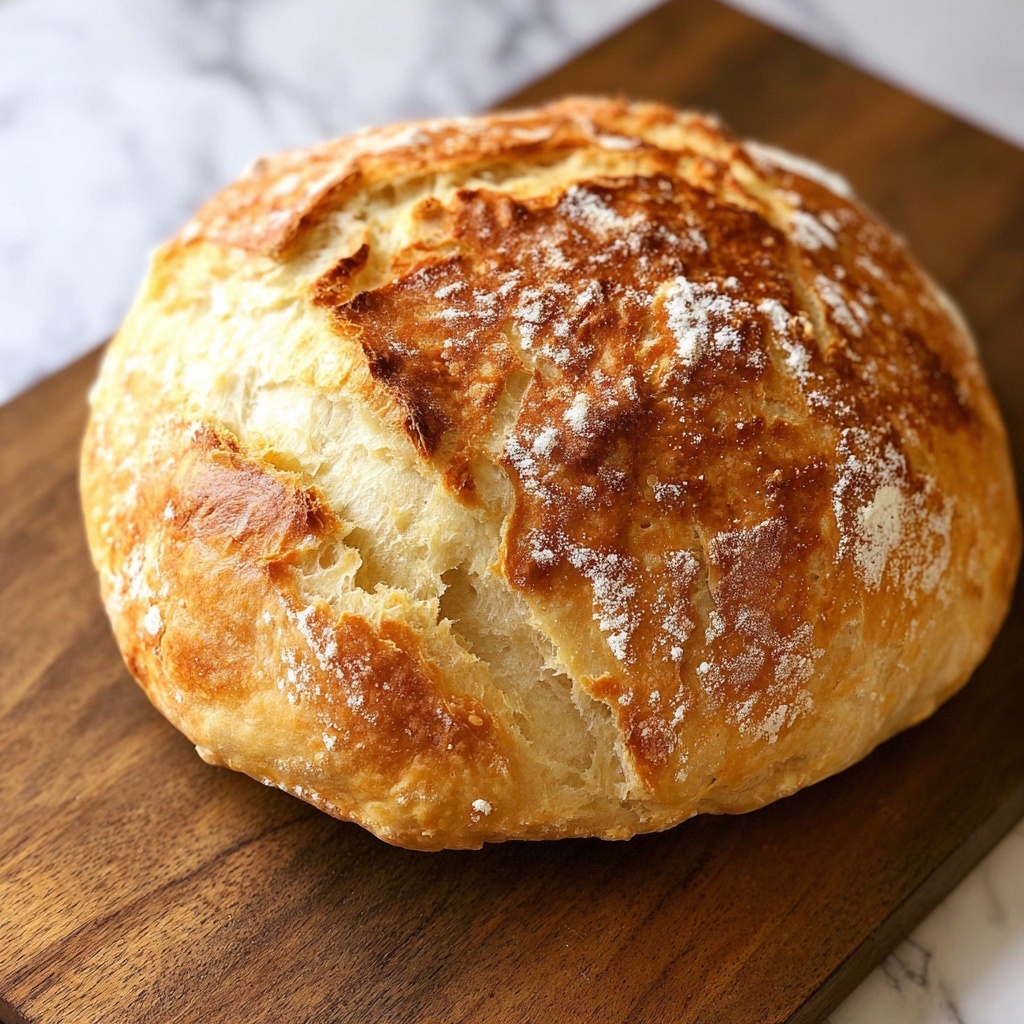
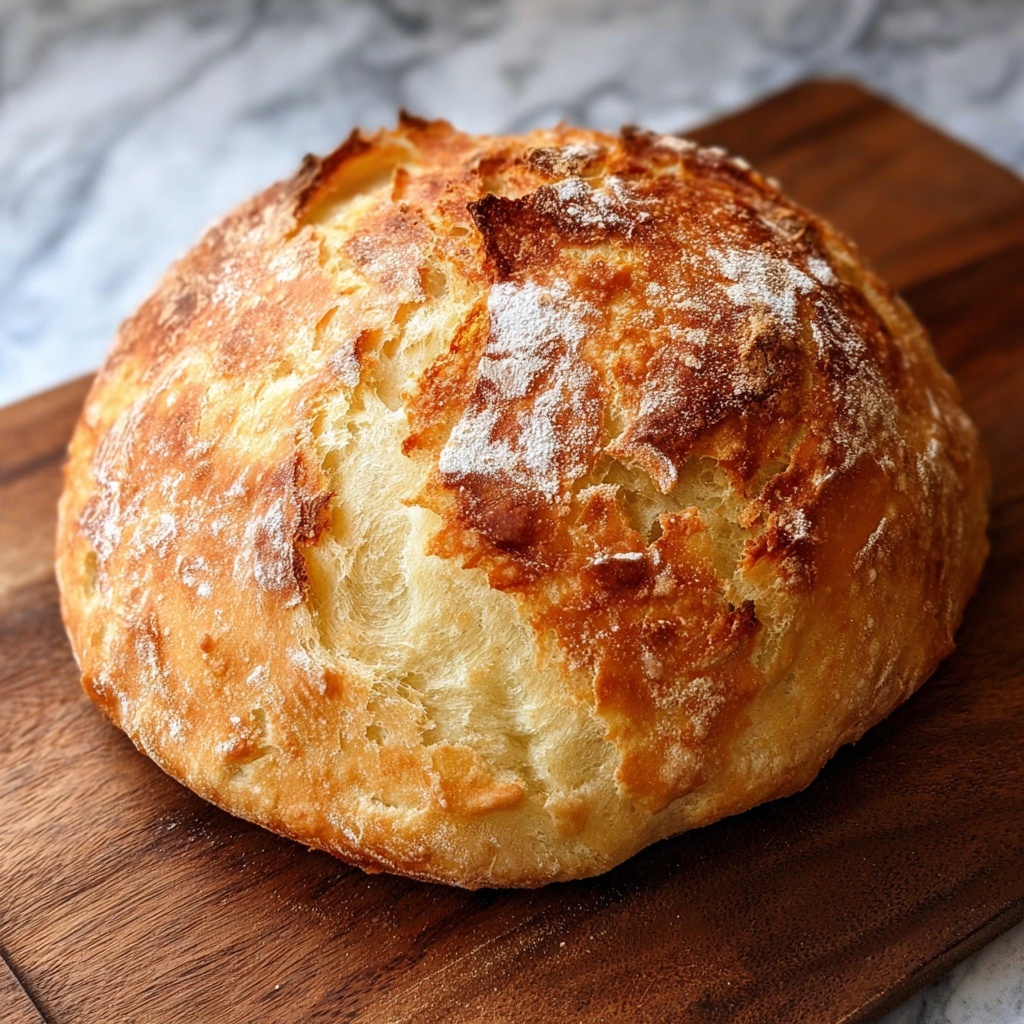
Carefully lift the parchment paper with the dough and place it directly into the scorching hot pot. Cover it with the lid and bake for 30 minutes. This traps the steam for that perfect crust formation. After half an hour, remove the lid and bake uncovered for an additional few minutes until the crust turns a gorgeous golden brown. Once done, transfer the loaf to a wire rack to cool completely before slicing — patience here ensures the crumb sets just right.
How to Serve Easy No-Knead Artisan Bread Recipe
Garnishes
Enhance your bread with rustic touches like a sprinkle of flaky sea salt or a light brush of melted butter right after baking. A quick dusting of fresh herbs such as rosemary or thyme can elevate the bread’s aroma and flavor, making it perfect for sharing at your next gathering.
Side Dishes
This bread is the ideal companion to a variety of dishes. Serve it alongside rich soups like tomato basil or creamy mushroom, or use it to soak up vibrant olive oil and balsamic vinegar dip. It also pairs beautifully with cheese platters, fresh salads, or hearty stews for a satisfying meal.
Creative Ways to Present
For a charming presentation, slice the bread into thick wedges and arrange them in a woven basket lined with a linen napkin. You can also hollow out the loaf partially to create an edible bread bowl filled with chili or spinach artichoke dip. Another fun idea is to turn slices into bruschetta topped with fresh tomatoes and basil for a colorful appetizer.
Make Ahead and Storage
Storing Leftovers
Leftover bread stays fresh when stored at room temperature in a paper bag or loosely wrapped in a kitchen towel to preserve the crust’s crunchiness. Avoid plastic wrap as it can trap moisture and soften the crust. Consume within 2 days for best texture and flavor.
Freezing
To keep your bread longer, freeze it by wrapping tightly in plastic wrap then foil, or placing slices in a freezer-safe bag. This method locks in freshness without compromising taste, allowing you to enjoy your Easy No-Knead Artisan Bread Recipe weeks later with ease.
Reheating
Reheat frozen slices or a whole loaf in a preheated oven at 350°F for about 10-15 minutes, which revives the crust’s crispness and warms the crumb. Alternatively, a quick toast on each side works well for slices you want to enjoy immediately.
FAQs
Do I really not have to knead the dough?
Yes, this recipe’s genius lies in eliminating kneading! The long, slow rise allows gluten to develop naturally, resulting in a chewy, airy bread without the elbow grease.
Can I use whole wheat flour in this recipe?
Whole wheat can be substituted, but it may make the bread denser. You can try a half-and-half mix with all-purpose flour for a balanced texture and a nuttier flavor.
Why does the recipe call for such a high oven temperature?
The high heat mimics bakery ovens, helping to develop a thick, crispy crust and a tender, well-cooked interior, which is essential for that artisan bread feel.
Is instant yeast different from active dry yeast for this bread?
Instant yeast can be mixed directly with the dry ingredients, while active dry yeast usually requires proofing in warm water first. Both work here, but instant yeast makes the process even simpler.
Can I make smaller loaves instead of one big one?
Absolutely! Shaping smaller loaves will reduce baking time slightly, and you can adjust accordingly. Just keep an eye on the crust color and internal temperature to ensure it’s fully baked.
Final Thoughts
There’s something truly special about pulling a warm, crusty loaf from your oven that you made with so little effort. This Easy No-Knead Artisan Bread Recipe isn’t just a recipe; it’s an invitation to slow down and savor simple pleasures. I encourage you to give it a try and discover for yourself how satisfying and delicious homemade bread can be. Happy baking!
Print
Easy No-Knead Artisan Bread Recipe
- Prep Time: 15 minutes
- Cook Time: 35 minutes
- Total Time: 4 hours 50 minutes
- Yield: 1 loaf (about 1.5 pounds)
- Category: Bread
- Method: Baking
- Cuisine: American
- Diet: Vegetarian
Description
This Easy No-Knead Artisan Bread recipe is a simple, hands-off approach to baking a crusty, flavorful loaf at home. Using minimal ingredients and no kneading, the dough rises slowly and is then baked in a hot Dutch oven or cast-iron pot to create a perfect artisan crust and airy crumb. Perfect for beginner bakers or anyone craving fresh, homemade bread without the fuss.
Ingredients
Ingredients
- 3 cups all-purpose flour
- 2 teaspoons kosher salt
- ½ teaspoon instant yeast (or active dry yeast)
- 1 ⅓ cups warm water (about 110°F)
Instructions
- Mix Dry Ingredients and Add Water: In a large mixing bowl, whisk together the flour, kosher salt, and yeast until evenly combined. Pour in the warm water and stir thoroughly with a rubber spatula or wooden spoon until a sticky dough forms.
- First Rise: Cover the bowl tightly with plastic wrap or a lid and let the dough rise at room temperature for 4 hours. Alternatively, refrigerate for up to 14 hours for a slower fermentation that will enhance flavor.
- Shape Dough: Turn the risen dough out onto a floured surface. Gently shape it into a round ball without kneading. Dust the top lightly with flour and place it on a sheet of parchment paper. Cover it loosely with a kitchen towel and let it rest for 30 minutes to relax before baking.
- Preheat Dutch Oven: During the dough’s resting period, place a Dutch oven or heavy cast-iron pot with the lid on in the oven. Preheat the oven to 440°F (about 227°C) with the pot inside to get it very hot.
- Bake Bread Covered: After the 30-minute rest, carefully remove the hot pot from the oven. Using the parchment paper, lift and transfer the dough ball into the preheated pot. Cover with the lid and bake for 30 minutes to trap steam and create a crusty exterior.
- Bake Bread Uncovered: Remove the lid carefully using oven mitts to avoid steam burns. Continue baking for an additional few minutes until the crust is golden brown and crisp.
- Cool and Serve: Transfer the baked bread onto a wire rack and allow it to cool completely for at least 30 minutes before slicing to ensure the interior sets properly. Serve fresh and enjoy your homemade artisan bread.
Notes
- You can use either instant yeast or active dry yeast; if using active dry yeast, proof it in warm water for 5-10 minutes prior to mixing.
- Letting the dough rise in the refrigerator overnight enhances flavor complexity through slow fermentation.
- Use a Dutch oven or heavy cast-iron pot with a lid to create steam which is essential for developing a crispy crust.
- Be very careful when handling the hot pot from the oven to avoid burns.
- Allowing the bread to cool before slicing prevents a gummy texture inside.


