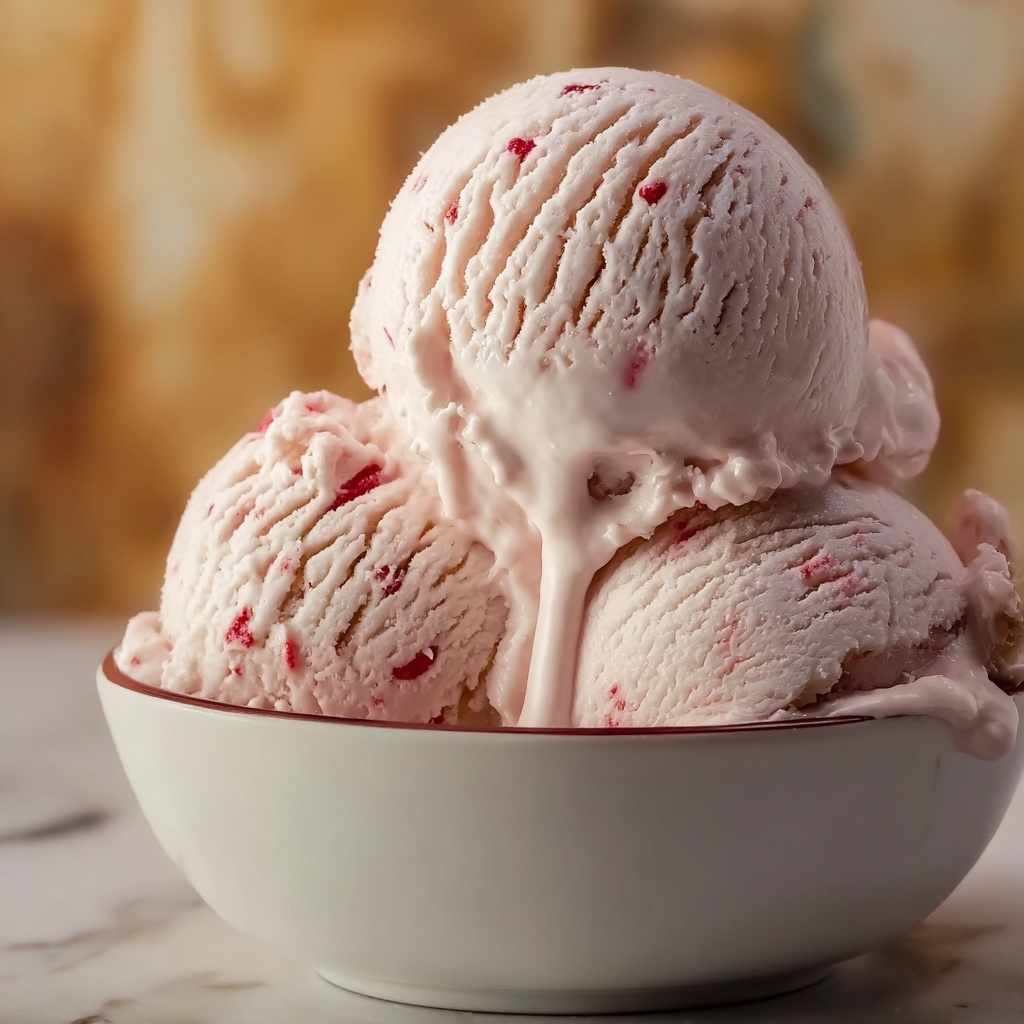
If you love nostalgic flavors with a fun twist, then this Dr. Pepper Ice Cream Recipe is an absolute must-try. It brings the unique, bold taste of Dr. Pepper soda into a smooth, creamy ice cream that’s both surprising and delightful. The balance of fizzy caramel undertones and rich vanilla custard creates an unforgettable frozen treat that will quickly become a family favorite. Whether you’re looking for a creative dessert or wanting to impress guests with something different, this recipe is simple enough for home cooks but delivers that wow factor every time.
Ingredients You’ll Need
This recipe calls for simple, everyday ingredients, each playing a crucial role in building that perfectly creamy and flavorful Dr. Pepper ice cream. From the fizz of the soda to the rich texture provided by cream and egg yolks, every element works in harmony to create this delightful dessert.
- 1 cup Dr. Pepper: The star of the show, adding its unique cherry and caramel notes.
- 2 cups heavy cream: Provides the luscious, thick mouthfeel essential for ice cream.
- 1 cup whole milk: Balances the creaminess and helps achieve the right texture.
- 3/4 cup granulated sugar: Sweetens and enhances flavors.
- 1 tablespoon vanilla extract: Adds warmth and depth to the custard base.
- 1/2 teaspoon salt: Enhances all the flavors without being salty.
- 5 large egg yolks: The magic ingredient that thickens the custard and makes it rich and silky.
How to Make Dr. Pepper Ice Cream Recipe
Step 1: Warm the Base Mixture
Start by combining the Dr. Pepper, heavy cream, whole milk, sugar, vanilla extract, and salt in a medium saucepan. Gently heat this mixture over medium heat, stirring every now and then, until it’s warm but not boiling. This step allows the soda to begin infusing its flavor into the creamy base.
Step 2: Whisk the Egg Yolks
While your base heats, take a separate bowl and whisk the five egg yolks until they lighten in color and become slightly creamy. This is key to ensuring your custard gets that desirable smooth texture without any lumps.
Step 3: Temper the Eggs
Slowly pour a small amount of the warm cream mixture into the yolks while whisking constantly. This gentle introduction of heat prevents the eggs from cooking too fast or scrambling, a technique called tempering.
Step 4: Combine and Cook the Custard
Gradually add the tempered egg yolks back into the saucepan with the remaining cream mixture, whisking constantly. Now cook this combined mixture over low heat, stirring continuously until it thickens just enough to coat the back of a spoon. Be careful here — patience is key as letting it boil could spoil the texture.
Step 5: Chill the Custard
Once thickened, remove the saucepan from heat and allow the custard base to cool at room temperature. Then cover and refrigerate it for at least 4 hours or overnight. This chilling step is crucial to enhance flavor development and achieve the right texture for churning.
Step 6: Churn Your Dr. Pepper Ice Cream Recipe
After the custard has chilled, pour it into your ice cream maker and churn according to the manufacturer’s instructions, usually around 20 to 25 minutes. Watching the mixture transform into creamy ice cream is always a fun and rewarding moment!
Step 7: Freeze Until Firm
Transfer the freshly churned ice cream to an airtight container and freeze for an additional 2 to 4 hours to let it firm up perfectly. Then your homemade Dr. Pepper Ice Cream is ready to be enjoyed!
How to Serve Dr. Pepper Ice Cream Recipe
Garnishes
To add an extra touch, sprinkle some crushed chocolate-covered cherries or a drizzle of caramel syrup over your scoops. These toppings complement the soda’s hints of cherry and caramel, elevating every spoonful.
Side Dishes
This ice cream shines when paired with warm chocolate cake or freshly baked cookies. The contrast between hot and cold, crispy and creamy, makes for a truly indulgent dessert experience.
Creative Ways to Present
Try serving your Dr. Pepper Ice Cream Recipe in a waffle cone mixed with mini chocolate chips or layer it in a parfait glass with brownie chunks and whipped cream. These presentations turn a simple dessert into a delightful centerpiece for any gathering.
Make Ahead and Storage
Storing Leftovers
If you have leftovers, keep your Dr. Pepper ice cream tightly covered in an airtight container in the freezer. This will preserve both flavor and texture for up to a week, so you can enjoy it leisurely.
Freezing
Make sure to freeze the ice cream in a flat, shallow container for faster freezing and easier scooping later. Avoid frequent temperature changes by minimizing how often you open the freezer.
Reheating
Ice cream is best enjoyed cold, so if it becomes too hard after freezing, simply let it sit at room temperature for 5-10 minutes before serving. This short thaw softens it to the perfect scoopable consistency without melting it.
FAQs
Can I use diet Dr. Pepper in this recipe?
Using diet Dr. Pepper is not recommended because it lacks the sugar content that helps balance the custard’s sweetness and affects texture. For best results, stick with regular Dr. Pepper.
Do I need an ice cream maker for this recipe?
Yes, an ice cream maker helps churn the custard evenly while freezing, ensuring a smooth, creamy texture. However, if you don’t have one, you can try freezing the mixture and stirring every 30 minutes until firm, but the texture may be less consistent.
How long does the Dr. Pepper flavor last in the ice cream?
The unique soda flavor remains quite prominent after freezing but can mellow slightly over time. Freshly churned and properly stored ice cream will deliver the best taste experience.
Can I add mix-ins to this ice cream?
Absolutely! Consider adding mini chocolate chips, crushed candies, or chopped nuts during the last few minutes of churning for added texture and flavor surprises.
Is this ice cream recipe kid-friendly?
This recipe does include egg yolks that are cooked in a custard base, making it safe for most kids. However, Dr. Pepper contains caffeine, so you may want to consider that based on your child’s tolerance.
Final Thoughts
Trust me, once you make this Dr. Pepper Ice Cream Recipe, it will quickly become your go-to dessert when you want something unexpected but delicious. It’s a fun twist on a classic treat that brings together all those nostalgic flavors in a silky, creamy frozen delight you’ll want to share with friends and family. So grab your ingredients and start churning — this creation is sure to brighten any day!
Print
Dr. Pepper Ice Cream Recipe
- Prep Time: 15 minutes
- Cook Time: 15 minutes
- Total Time: 4 hours 30 minutes
- Yield: 6 servings
- Category: Dessert
- Method: Stovetop
- Cuisine: American
Description
Enjoy a creamy, unique twist on classic ice cream with this Dr. Pepper Ice Cream recipe. Infused with the rich, spicy flavor of Dr. Pepper soda, combined with a smooth custard base made from heavy cream, milk, and egg yolks, this homemade treat is perfect for soda lovers looking for a refreshing dessert with a fizzy kick.
Ingredients
Ice Cream Base
- 1 cup Dr. Pepper (preferably regular, not diet)
- 2 cups heavy cream
- 1 cup whole milk
- 3/4 cup granulated sugar
- 1 tablespoon vanilla extract
- 1/2 teaspoon salt
Custard
- 5 large egg yolks
Instructions
- Warm the base mixture: In a medium saucepan, combine the Dr. Pepper, heavy cream, milk, sugar, vanilla extract, and salt. Heat over medium heat, stirring occasionally, until the mixture is warm but not boiling.
- Whisk the egg yolks: In a separate bowl, whisk the egg yolks until they become slightly pale and creamy, preparing them for tempering.
- Temper the eggs: Slowly pour a small amount of the warm cream mixture into the egg yolks while whisking constantly to gently warm the eggs and prevent scrambling.
- Combine egg mixture and base: Pour the tempered egg yolk mixture back into the saucepan with the remaining warm cream mixture, whisking constantly to combine.
- Cook to thicken: Continue cooking over low heat, stirring constantly, until the custard thickens slightly and coats the back of a spoon, taking care not to let it boil.
- Cool the custard: Remove the saucepan from the heat and allow the custard to cool to room temperature. Then cover and refrigerate for at least 4 hours or overnight to chill thoroughly.
- Churn the ice cream: Once chilled, pour the custard into an ice cream maker and churn according to the manufacturer’s instructions, usually about 20-25 minutes, until the ice cream is soft and creamy.
- Freeze until firm: Transfer the churned ice cream to a container and freeze for an additional 2-4 hours until it firms up to scoopable consistency.
- Serve and enjoy: Serve the Dr. Pepper Ice Cream on its own or paired with chocolate cake or cookies for a delightful treat.
Notes
- Be sure not to use diet Dr. Pepper as it will affect the flavor and texture of the ice cream.
- Tempering the eggs is crucial to avoid curdling and achieve a smooth custard base.
- If you don’t have an ice cream maker, you can place the mixture in a shallow container and stir every 30 minutes while freezing to mimic churning.
- For softer ice cream, serve immediately after churning without additional freezing.
- Store leftover ice cream in an airtight container to prevent freezer burn.
