
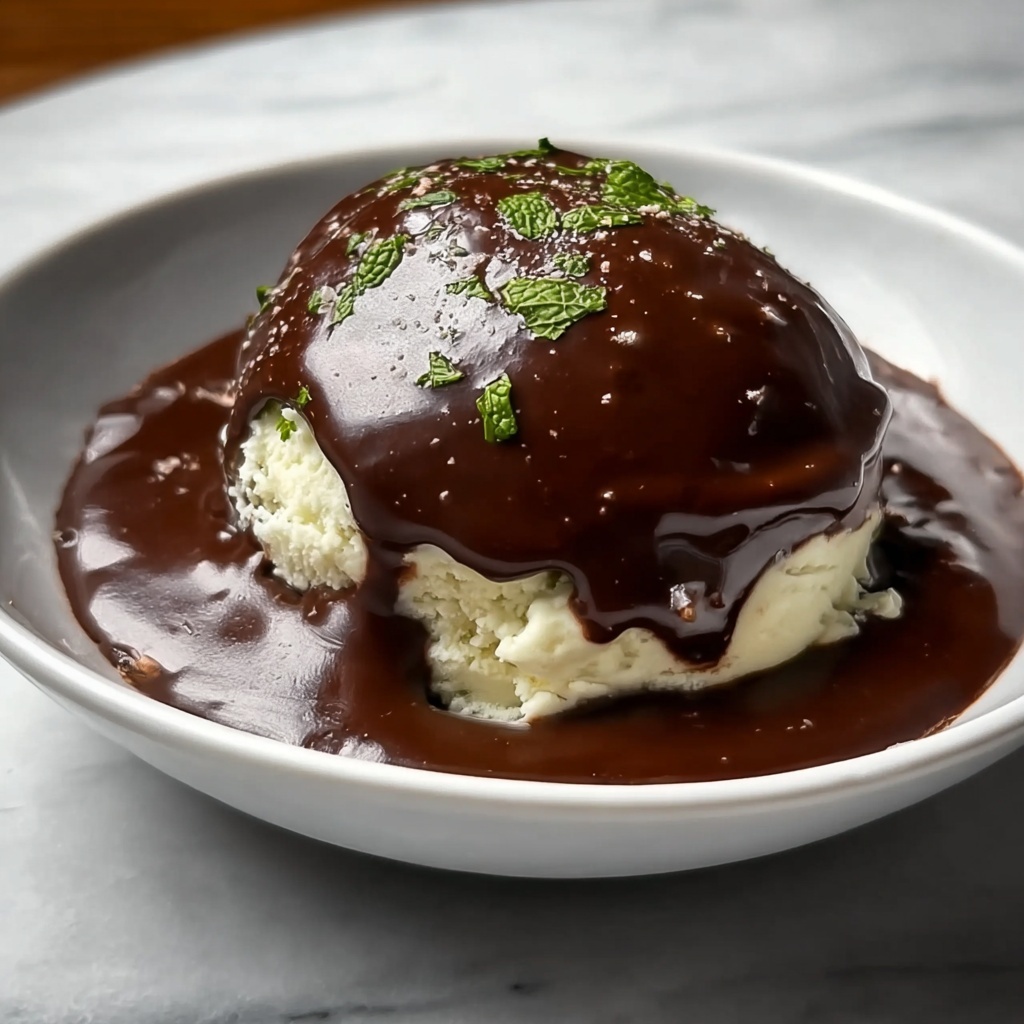
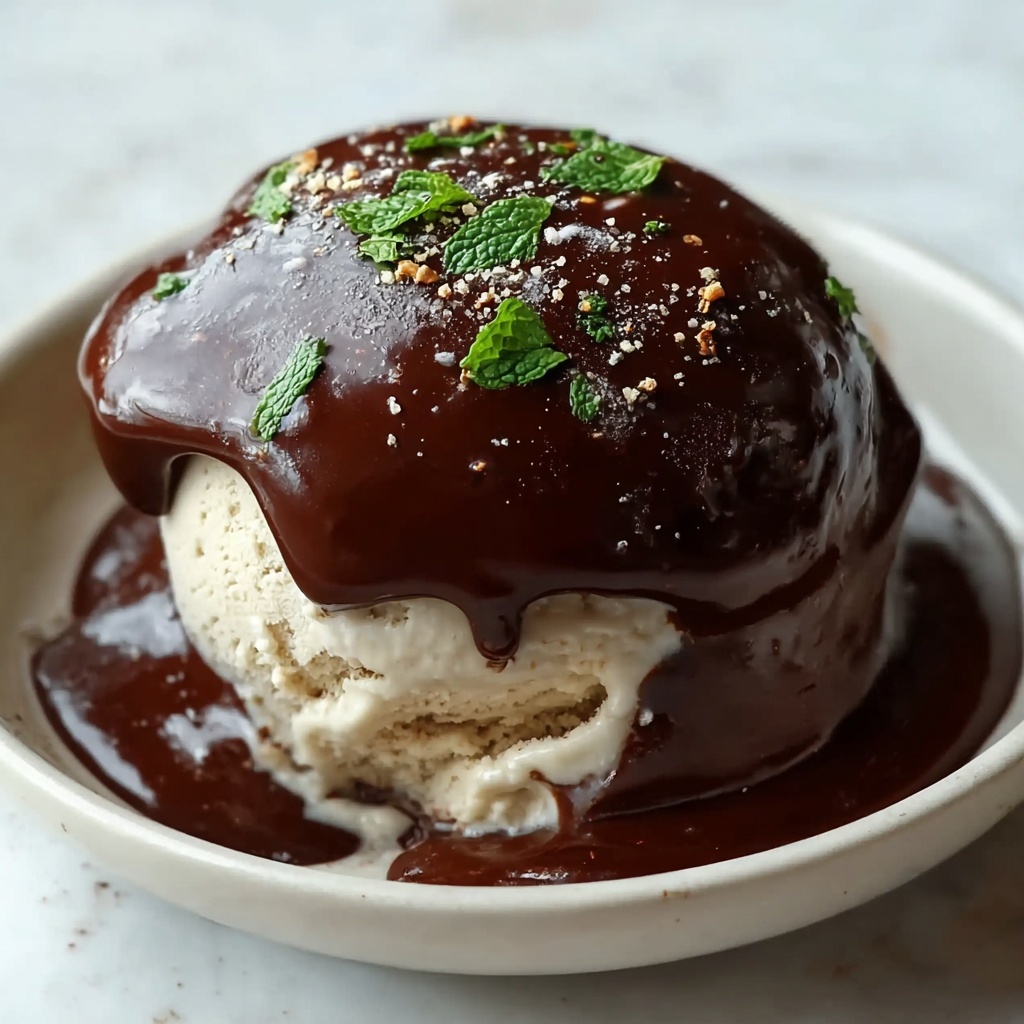
If you have a sweet tooth and love trying delightful Southern comfort foods, this Chocolate Gravy Recipe is about to become your new favorite indulgence. This luscious sauce combines the rich essence of cocoa with the comforting creaminess of warm milk and butter, creating a velvety treat that’s perfect drizzled over fluffy biscuits or even ice cream. It’s simple to prepare but delivers so much personality with every bite, making it a nostalgic dessert that’s both fun and irresistibly delicious.
Ingredients You’ll Need
Gathering these straightforward ingredients is the first step toward making a perfectly rich and smooth chocolate gravy. Each element plays a crucial role, whether it’s building flavor, adding thickness, or balancing sweetness.
- Unsweetened cocoa powder: This brings the deep, authentic chocolate flavor without any added sweetness to keep the balance just right.
- Granulated sugar: Sweetens the sauce evenly and enhances the cocoa’s natural richness.
- All-purpose flour: Acts as the thickening agent to give your gravy that perfect, silky texture.
- Salt: Just a pinch to round out the flavors and make the chocolate taste more vibrant.
- Whole milk: The creamy base that makes the gravy smooth and luscious.
- Vanilla extract: Adds a subtle warmth and depth that complements the chocolate beautifully.
- Unsalted butter: Enriches the gravy with a velvety finish and a touch of indulgence.
How to Make Chocolate Gravy Recipe
Step 1: Combine the Dry Ingredients
In a medium saucepan, whisk together the cocoa powder, sugar, flour, and salt. Mixing these dry components first ensures that everything is evenly distributed, which will help you avoid any clumps once the milk is added.
Step 2: Gradually Add Milk
Slowly pour the whole milk into the saucepan, whisking constantly. This gradual incorporation is key because it allows the flour to dissolve properly, resulting in a smooth gravy without lumps.
Step 3: Cook and Stir Over Medium Heat
Place the saucepan over medium heat and continue whisking as the mixture warms. As it heats, it will start to thicken. Stir frequently, making sure the gravy doesn’t stick to the bottom or sides of the pan.
Step 4: Add Butter and Vanilla
Once the gravy has thickened and reached a creamy consistency, remove it from the heat. Stir in the unsalted butter and vanilla extract. This final touch makes the sauce rich and glossy with a wonderful aroma.
Step 5: Serve Warm
Your chocolate gravy is now ready to enjoy! It’s best served right away to appreciate its perfect texture and flavor, but there are tips for storage if you have leftovers.
How to Serve Chocolate Gravy Recipe
Garnishes
Elevate your chocolate gravy with a sprinkle of powdered sugar or a few fresh berries. A dollop of whipped cream or a handful of chopped nuts also add great texture contrasts and a touch of elegance.
Side Dishes
Traditional Southern biscuits are the quintessential side for this gravy, soaking up every drop of that heavenly chocolate flavor. For something different, try it over pancakes, waffles, or even vanilla ice cream for a dreamy dessert experience.
Creative Ways to Present
Get playful by serving your chocolate gravy in small ramekins as a dipping sauce at brunch, or drizzle it over sliced bananas and strawberries for a quick and easy fruit dessert. You can also layer it between cake slices or turn it into a decadent chocolate sauce topping for bread pudding.
Make Ahead and Storage
Storing Leftovers
Chocolate gravy can be stored in an airtight container in the refrigerator for up to 3 days. Just make sure to cover it well to prevent it from absorbing any fridge odors.
Freezing
While it’s best enjoyed fresh, you can freeze chocolate gravy in a freezer-safe container for up to a month. Thaw it overnight in the refrigerator before reheating.
Reheating
To bring leftover gravy back to life, warm it gently in a saucepan over low heat, stirring frequently. If it seems too thick, add a splash of milk to loosen it up and achieve that silky finish again.
FAQs
Can I use milk substitutes in this Chocolate Gravy Recipe?
Absolutely! Whole milk is traditional for creaminess, but you can substitute almond, oat, or soy milk. Just be mindful that the flavor and texture might vary slightly.
Is this Chocolate Gravy Recipe suitable for a dessert topping?
Definitely! It’s a versatile sauce that can dress up desserts like ice cream, cakes, or even fresh fruit, adding a rich, chocolatey boost.
How thick should chocolate gravy be?
The ideal chocolate gravy should be thick enough to coat the back of a spoon but still pourable, making it perfect for drizzling over your favorite breakfast or dessert.
Can I make this Chocolate Gravy Recipe ahead of time?
You can prepare it in advance and store it chilled. Just reheat gently before serving and add a little milk if necessary to regain the perfect consistency.
What’s the best way to avoid lumps when making chocolate gravy?
Whisk the dry ingredients together thoroughly before adding the milk gradually while continuously whisking. This helps the flour dissolve smoothly, preventing lumps.
Final Thoughts
This Chocolate Gravy Recipe is such a fantastic way to bring some sweet comfort into your kitchen with just a handful of simple ingredients. Whether drizzled over biscuits or used as a decadent dessert sauce, it’s a deliciously unique treat that’s sure to become a cherished classic in your home. Give it a try—you’ll love how easy and rewarding it is to make!
Print
Chocolate Gravy Recipe
- Prep Time: 5 minutes
- Cook Time: 10 minutes
- Total Time: 15 minutes
- Yield: 4 servings
- Category: Sauce
- Method: Stovetop
- Cuisine: Southern American
Description
This rich and creamy Chocolate Gravy recipe is a Southern classic perfect for drizzling over warm biscuits or pancakes. Made with simple pantry staples, this luscious, chocolatey sauce is quick to prepare and guaranteed to satisfy your sweet tooth with its smooth texture and deep cocoa flavor.
Ingredients
Dry Ingredients
- 1/4 cup unsweetened cocoa powder
- 1/2 cup granulated sugar
- 2 tbsp all-purpose flour
- 1/4 tsp salt
Wet Ingredients
- 2 cups whole milk
- 1 tsp vanilla extract
- 2 tbsp unsalted butter
Instructions
- Mix Dry Ingredients: In a medium saucepan, combine the unsweetened cocoa powder, granulated sugar, all-purpose flour, and salt. Whisk these dry ingredients together to ensure they are well blended and lump-free.
- Add Milk and Stir: Slowly add the whole milk to the dry ingredients in the saucepan, whisking continuously to create a smooth mixture without lumps. This helps prevent the cocoa and flour from clumping as it heats.
- Cook and Thicken: Place the saucepan over medium heat and cook the mixture, stirring constantly. Continue cooking until the mixture thickens to a gravy-like consistency, which should take about 7-10 minutes. Make sure to scrape the bottom and sides to avoid burning.
- Remove from Heat and Add Flavors: Once thickened, remove the saucepan from heat. Stir in the unsalted butter and vanilla extract until the butter is fully melted and the gravy is glossy and smooth.
- Serve Warm: Serve the chocolate gravy warm over freshly baked biscuits, pancakes, or even ice cream for a decadent treat. Enjoy immediately for the best flavor and texture.
Notes
- Use whole milk for a richer and creamier gravy; you can substitute with 2% milk for a lighter version but the gravy may be slightly less rich.
- Constant stirring while cooking is crucial to prevent lumps and ensure a smooth gravy.
- The gravy will thicken more as it cools, so serve it warm and reheat gently if needed.
- For a dairy-free version, use a plant-based milk and vegan butter substitute.
- Adjust sugar quantity to taste if you prefer it sweeter or less sweet.


