There is something so delightfully satisfying about this Easy Cheese Ball Recipe that keeps guests coming back for more whenever it’s served. Creamy, sharp cheddar mingles with the smooth richness of cream cheese, while garlic and onion powders bring in bursts of flavorful depth. Rolled in crunchy nuts for the perfect contrast, this cheese ball is quick to whip up and guaranteed to steal the spotlight at any gathering. Whether you’re a seasoned appetizer pro or just dipping your toes into entertaining, this recipe is a fantastic way to make your party spread shine with minimal effort.
Ingredients You’ll Need
Every ingredient in this cheese ball recipe plays an important role, coming together to create layers of flavor, texture, and irresistible appeal. From the creamy base to the zesty seasoning and crunchy coating, each element is simple yet essential.
- Cream cheese (16 oz, softened): The rich, smooth foundation that brings everything together with its luscious texture.
- Shredded sharp cheddar cheese (2 cups): Adds a bold, tangy flavor that shines through in every bite.
- Garlic powder (1 teaspoon): Infuses a subtle, savory punch without overpowering the mix.
- Onion powder (1/2 teaspoon): Enhances the depth of flavor with gentle sweetness and earthiness.
- Worcestershire sauce (1 teaspoon): A secret umami booster that adds complexity and balance.
- Black pepper (1/4 teaspoon): Provides a mild kick for a nuanced finish.
- Chopped green onions (1/4 cup, optional): Fresh, crisp bits that brighten the overall taste and add lovely color.
- Chopped pecans or walnuts (3/4 cup, for coating): The perfect crunchy exterior that contrasts beautifully with the creamy interior.
How to Make Easy Cheese Ball Recipe
Step 1: Mix the Cheeses and Seasonings
Start by placing your softened cream cheese in a large mixing bowl. Add shredded sharp cheddar, garlic powder, onion powder, Worcestershire sauce, black pepper, and the optional green onions. Use a sturdy spoon or a hand mixer to blend everything together until the mixture is completely smooth and evenly combined. This step is key to ensuring each scoop bursts with balanced flavor.
Step 2: Shape into a Ball
Once your mixture is perfectly blended, it’s time to shape it. Using clean hands or plastic wrap, roll the cheese mixture gently into a tight ball. The shaping helps the cheese ball hold its form and makes it easy to coat with the nutty exterior.
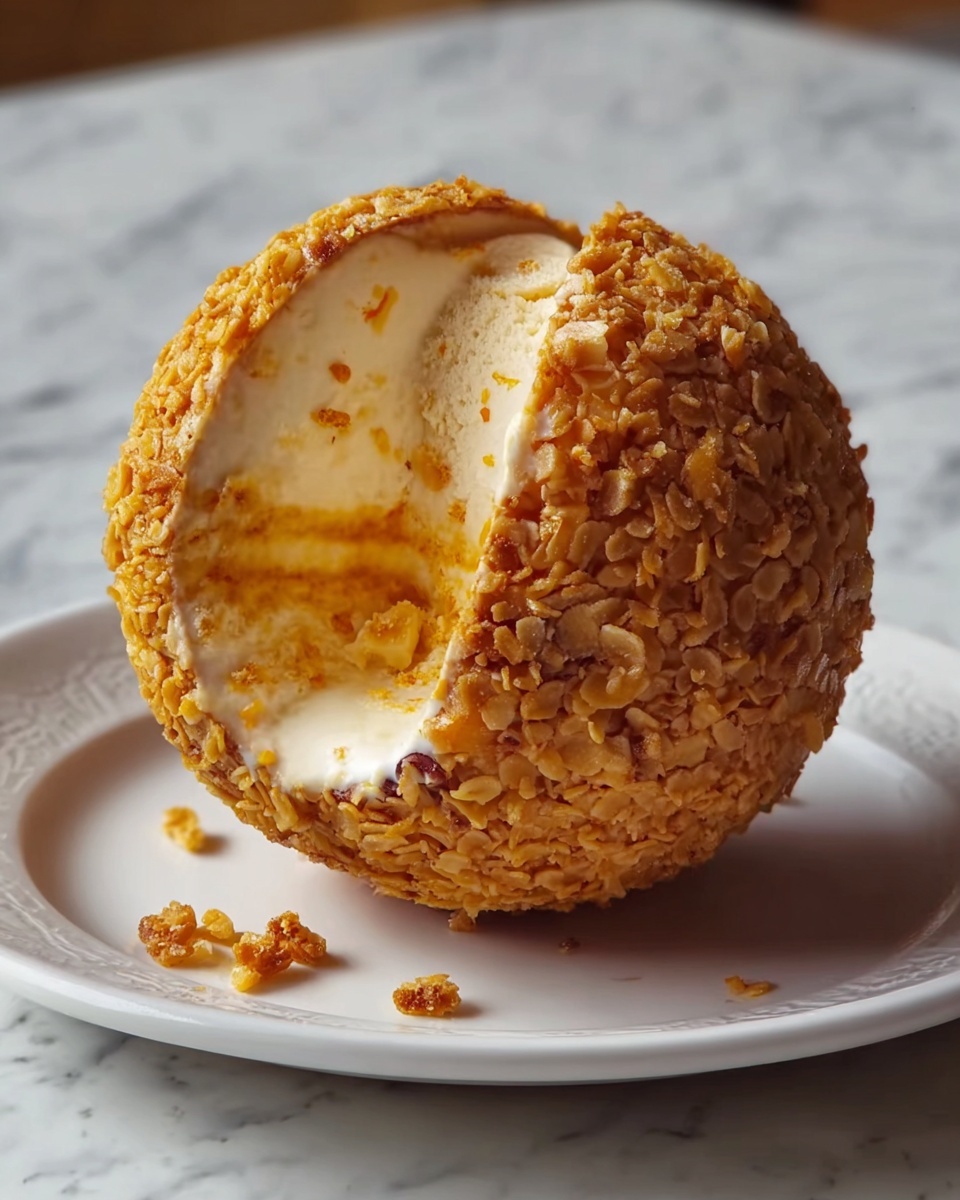
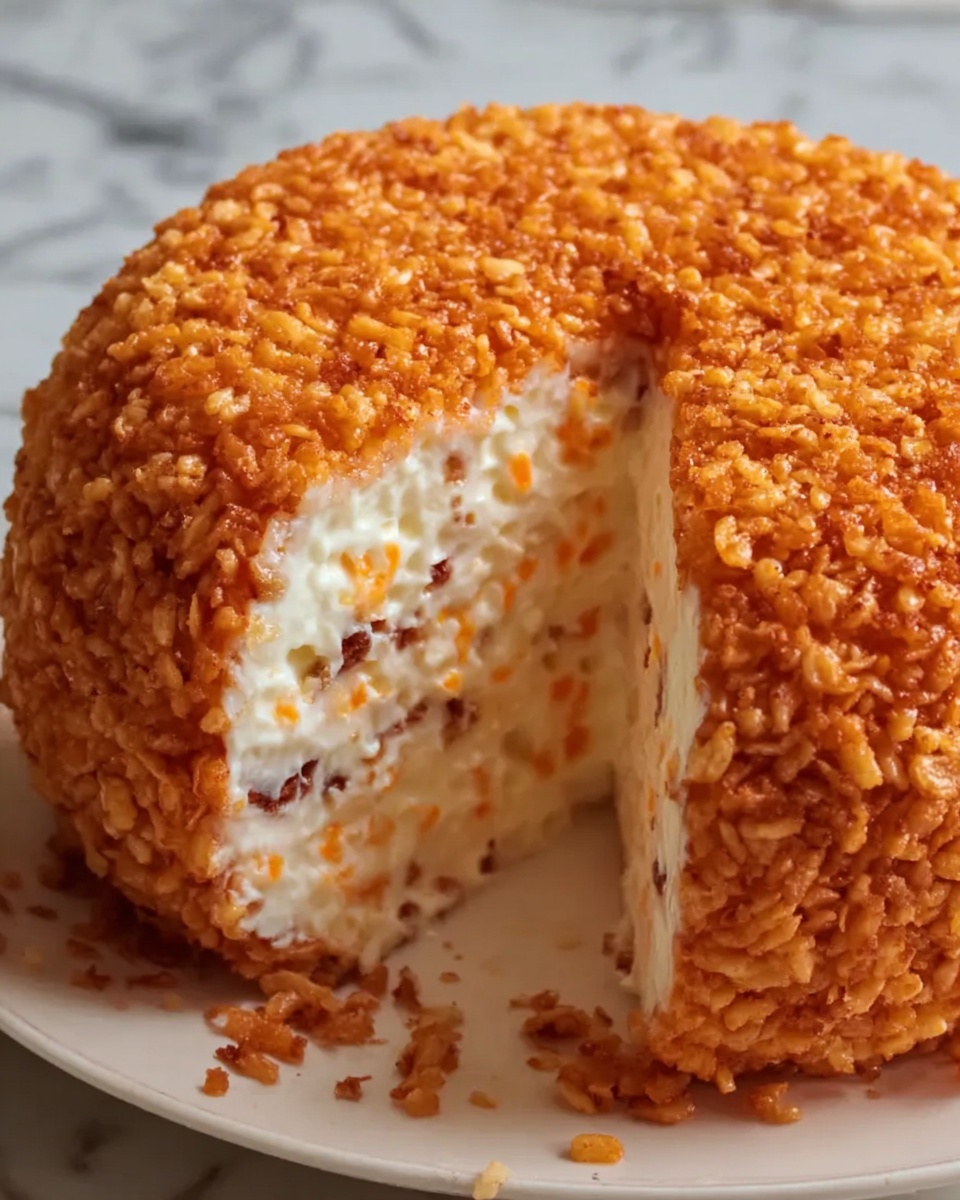
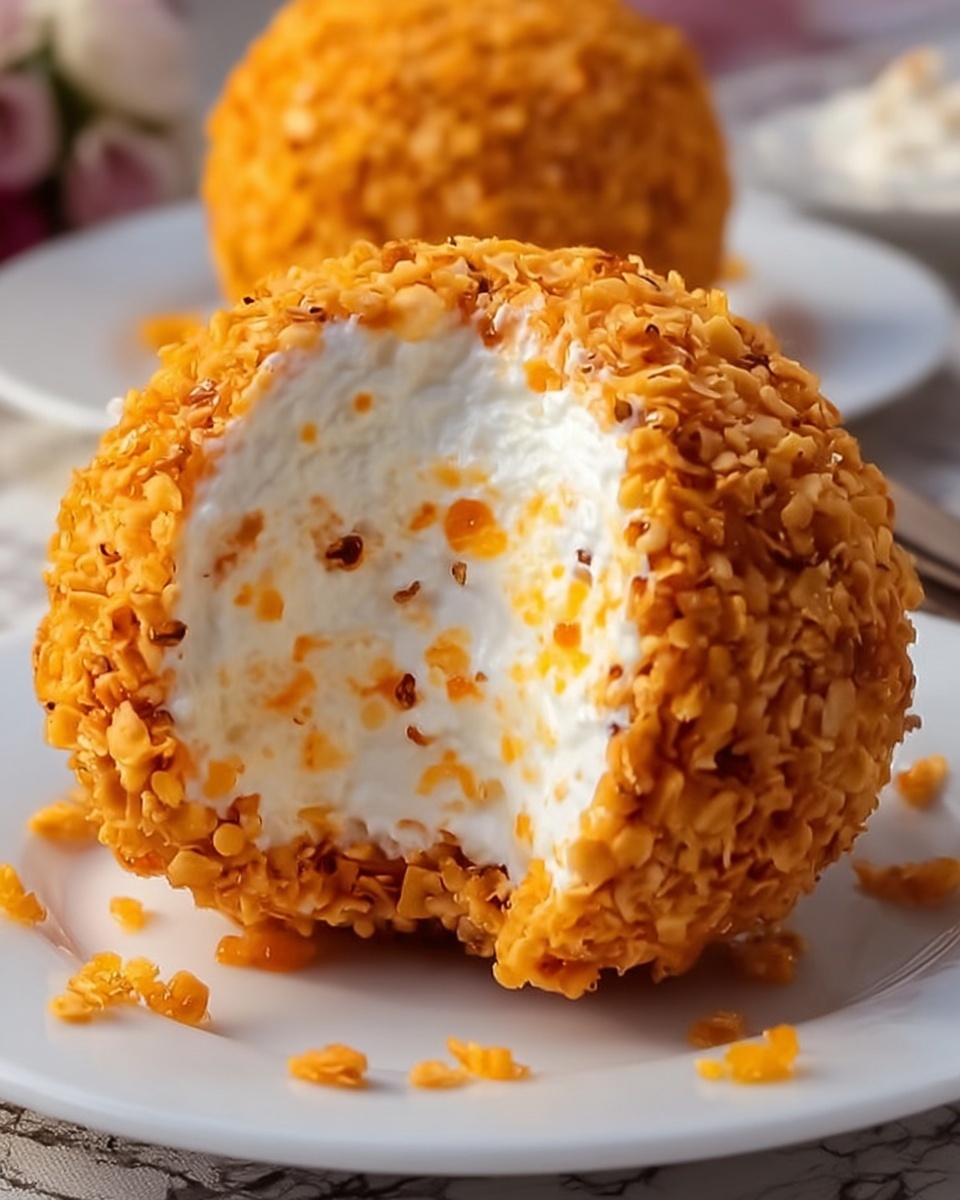
Step 3: Coat with Nuts
Pour your chopped pecans or walnuts onto a plate. Roll the cheese ball around, pressing just enough to make the nuts stick, covering every side evenly. The nuts not only add an inviting crunch but also create a beautiful presentation that’s begging to be devoured.
Step 4: Chill Before Serving
Wrap the coated cheese ball snugly with plastic wrap and pop it into the refrigerator for at least one hour. Chilling firm ups the texture, allowing the flavors to marry perfectly and making it easier to slice or scoop when you’re ready to serve.
How to Serve Easy Cheese Ball Recipe
Garnishes
To give your cheese ball a little extra pizzazz, consider finishing it off with additional garnishes such as sprigs of fresh parsley or finely chopped chives. These touches add freshness and color, making your appetizer look as inviting as it tastes.
Side Dishes
The best part about this cheese ball is how well it pairs with a variety of simple sides. Crisp crackers, crunchy pretzels, or freshly sliced vegetables like carrots and bell peppers create a delightful textural contrast and make perfect vehicles for scooping up that luscious cheese.
Creative Ways to Present
If you want to wow your guests, try serving the cheese ball on a wooden board surrounded by an assortment of crackers and fresh herbs. For a themed party, shape it into fun molds or add a colorful topping like dried cranberries or a drizzle of honey for a sweet-salty twist. The possibilities are as endless as your imagination!
Make Ahead and Storage
Storing Leftovers
Keep any leftover cheese ball tightly wrapped in plastic in the refrigerator. It should stay fresh for up to 3 days, making it perfect for prepping a day ahead or enjoying the next day with minimal fuss.
Freezing
If you want to prepare your cheese ball well in advance, it can be frozen using an airtight container or freezer-safe wrap. Freeze it for up to one month, and when you’re ready, thaw it overnight in the fridge before serving to maintain its creamy texture.
Reheating
This cheese ball is best enjoyed cold, so reheating isn’t recommended. Instead, simply allow the frozen or refrigerated cheese ball to come to a perfect chilled temperature for optimum flavor and texture.
FAQs
Can I use different types of cheese in this recipe?
Absolutely! While sharp cheddar is classic here, mixing in varieties like pepper jack or smoked gouda adds a fun twist. Just be mindful of how each cheese’s texture and flavor might affect the final taste.
Is this Easy Cheese Ball Recipe gluten-free?
The cheese ball itself naturally contains no gluten, but be sure to serve it with gluten-free crackers or veggies if you need to keep the entire appetizer gluten-free.
Can I make a nut-free version?
Yes, for those with nut allergies or preferences, rolling the cheese ball in chopped fresh herbs such as parsley or chives, or even crushed pretzels, works beautifully as a tasty substitute.
How far in advance can I prepare it?
You can make this cheese ball up to two days before serving, just keep it well wrapped and refrigerated to preserve freshness and flavor.
What is the best way to serve the cheese ball?
Serve the cheese ball chilled with an array of crunchy dippers like crackers, vegetable sticks, or pretzels to provide a variety of textures everyone will love.
Final Thoughts
This Easy Cheese Ball Recipe is a delicious crowd-pleaser that’s as simple to make as it is flavorful. Its creamy, tangy, and crunchy elements come together in perfect harmony, making it a staple you’ll want to whip up again and again. Trust me, once you try this recipe at your next get-together, it will quickly become a beloved classic in your hosting repertoire!
Print
Easy Cheese Ball Recipe
- Prep Time: 10 minutes
- Cook Time: 0 minutes
- Total Time: 10 minutes (plus 1 hour chill time)
- Yield: 12 servings
- Category: Appetizer
- Method: No-Cook
- Cuisine: American
- Diet: Vegetarian
Description
This easy cheese ball recipe is a crowd-pleasing appetizer perfect for parties and gatherings. Made with creamy softened cream cheese, sharp shredded cheddar, and flavorful spices, it’s shaped into a ball and coated with crunchy chopped nuts for an irresistible texture. Ready in just 10 minutes with no cooking required, it’s best served chilled alongside crackers, pretzels, or fresh vegetables. A versatile and make-ahead snack that can be customized with different cheeses or coatings!
Ingredients
Cheese Ball Mixture
- 16 oz cream cheese, softened
- 2 cups shredded sharp cheddar cheese
- 1 teaspoon garlic powder
- 1/2 teaspoon onion powder
- 1 teaspoon Worcestershire sauce
- 1/4 teaspoon black pepper
- 1/4 cup chopped green onions (optional)
Coating
- 3/4 cup chopped pecans or walnuts
Instructions
- Combine Ingredients: In a large mixing bowl, combine the softened cream cheese, shredded cheddar cheese, garlic powder, onion powder, Worcestershire sauce, black pepper, and green onions if using. Mix thoroughly until the mixture is smooth and well blended.
- Shape the Cheese Ball: Using clean hands or plastic wrap, shape the cheese mixture into a firm ball, ensuring it holds together well.
- Coat with Nuts: Spread the chopped pecans or walnuts on a plate. Roll the cheese ball over the nuts, pressing gently to coat all sides evenly for a crunchy exterior.
- Chill: Wrap the finished cheese ball tightly in plastic wrap and refrigerate for at least 1 hour before serving. This chilling time allows the flavors to meld and the ball to firm up.
- Serve: Serve the cheese ball chilled with an assortment of crackers, pretzels, or fresh vegetables for dipping.
Notes
- Substitute cheddar with pepper jack or smoked gouda for a flavor twist.
- For a nut-free option, roll the cheese ball in chopped fresh herbs or crushed pretzels instead of nuts.
- Make ahead and refrigerate up to 24 hours before serving for convenience.
