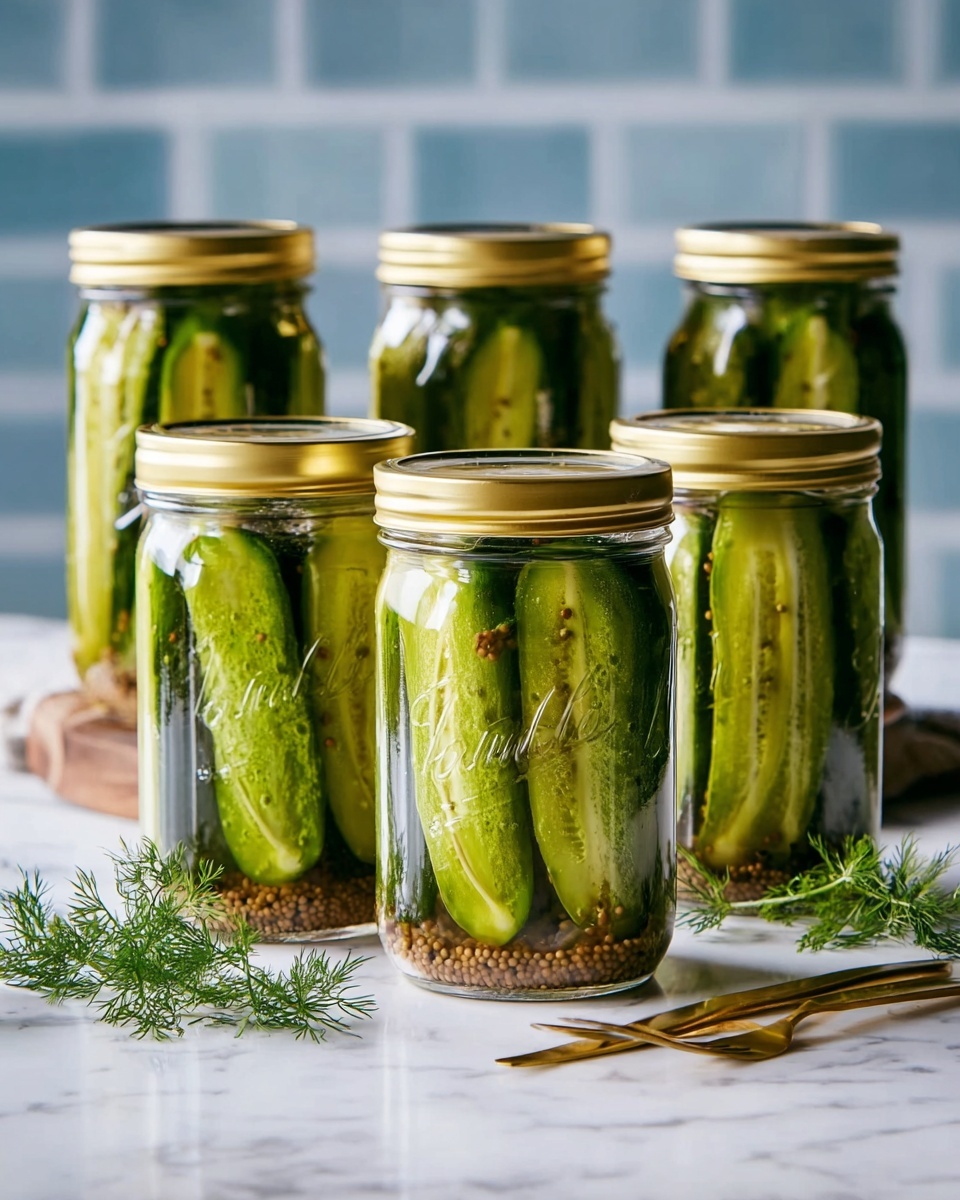
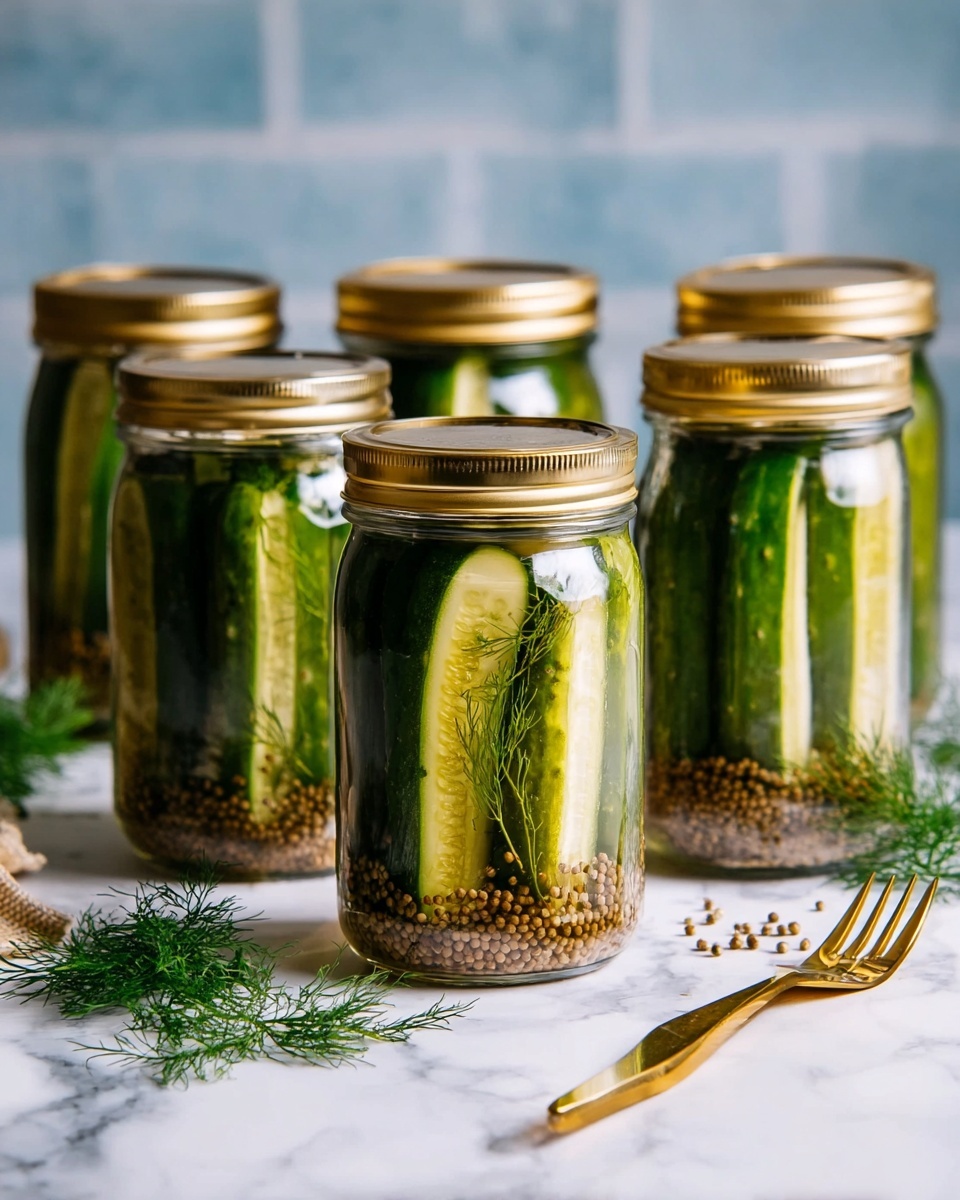
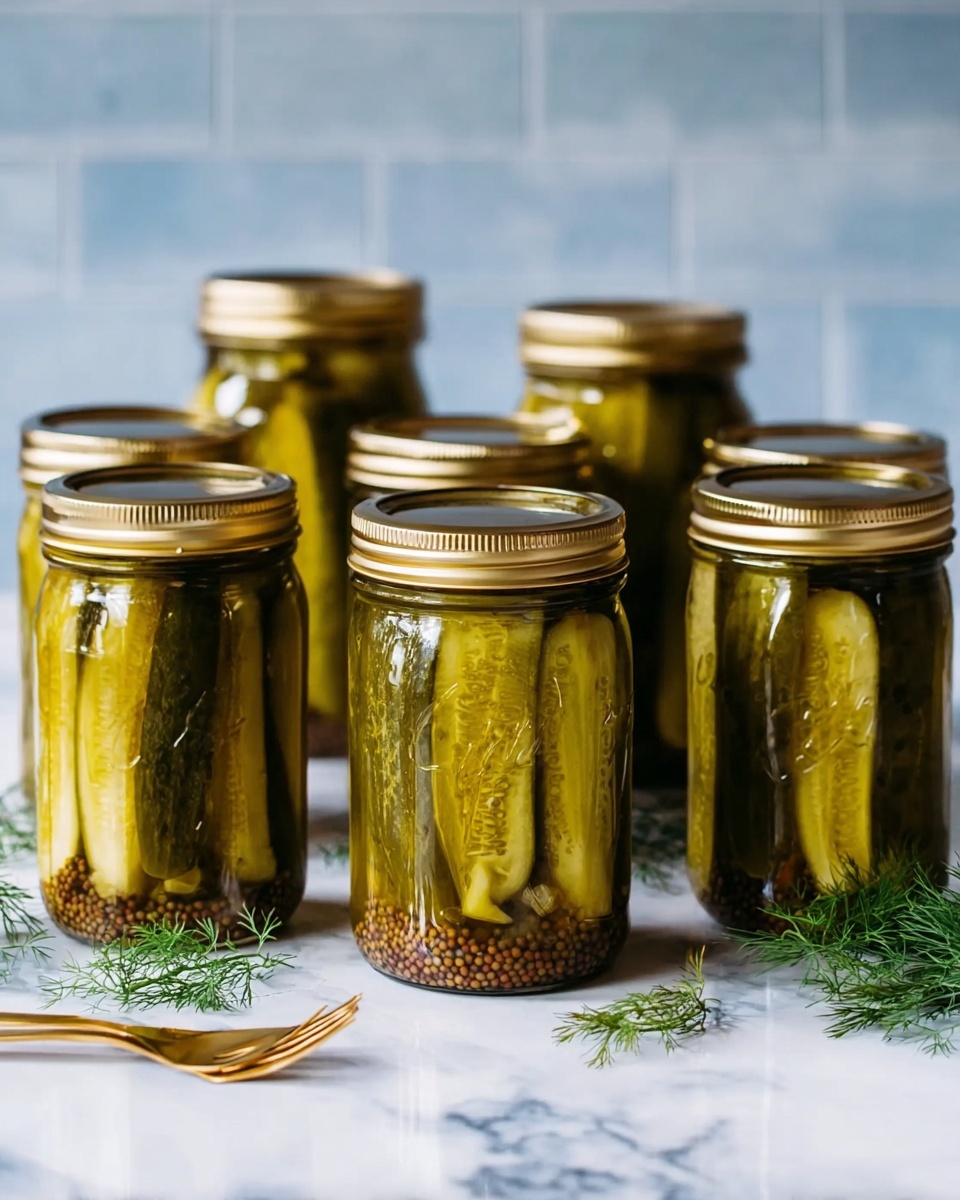
If you’re ready to take your snack game to a new level, let me introduce you to The Ultimate Dill Pickle Recipe for Bold, Crunchy Flavor Recipe. This is not just any pickle recipe; it’s a sensational blend of tangy, spicy, and herbaceous notes with that unbeatable crispy crunch everyone loves. Perfect for enlivening sandwiches, accompanying charcuterie boards, or simply enjoying straight from the jar, this recipe delivers pickles that are bursting with character and fresh flavor. Trust me, once you make these pickles, store-bought versions will feel like a distant memory.
Ingredients You’ll Need
The magic of The Ultimate Dill Pickle Recipe for Bold, Crunchy Flavor Recipe lies in its straightforward yet thoughtfully chosen ingredients. Each one plays a vital role in building the perfect balance between tang, spice, and crunch, making this an easy recipe that yields truly spectacular results.
- 8–10 small pickling cucumbers (about 4 inches each): Choose firm cucumbers for maximum crunch and freshness.
- 4 cups water: The base for the brine, balancing acidity and preserving flavor.
- 2 cups white vinegar: Provides the essential tang that defines classic dill pickles.
- 3 tablespoons kosher salt: Critical for seasoning and drawing out moisture to create that perfect pickle texture.
- 1 tablespoon sugar (optional): Adds a subtle sweetness to round out the sharpness of the vinegar.
- 6 cloves garlic, smashed: Garlic brings a savory warmth that infuses every bite.
- 1 tablespoon black peppercorns: Introduce a mild heat that complements the dill and vinegar.
- 1 teaspoon mustard seeds: Adds a gentle pop of mustard flavor and texture.
- 1/2 teaspoon red pepper flakes (optional): For those who like a little kick, these add subtle spicy notes.
- 4–6 fresh dill sprigs: The hero herb that gives these pickles their signature bright and fragrant dill flavor.
How to Make The Ultimate Dill Pickle Recipe for Bold, Crunchy Flavor Recipe
Step 1: Prepare Your Cucumbers
Start by washing your pickling cucumbers thoroughly under cold water. The key here is to remove any dirt and gently trim off the blossom ends; this small step helps keep your pickles irresistibly crisp once they’re brined.
Step 2: Craft the Brine
In a medium saucepan, combine the water, white vinegar, kosher salt, and sugar if you’re using it. Bring this mixture to a boil while stirring occasionally until the salt dissolves completely. Then, remove the saucepan from heat and let the brine cool just a bit – it should be warm, not piping hot, when it touches your cucumbers to maintain their crunch.
Step 3: Layer Ingredients in Jars
Use sterilized jars to ensure your pickles last beautifully. Start by layering cucumbers at the bottom, then add smashed garlic cloves, peppercorns, mustard seeds, red pepper flakes if desired, and fresh dill sprigs. This layering allows the flavors to mingle in each bite.
Step 4: Pour the Brine Over
Carefully pour the warm brine over the layered cucumbers and spices, filling the jars but leaving about 1/2 inch of headspace at the top. This space helps during sealing and allows the pickles to develop flavor evenly throughout.
Step 5: Seal and Refrigerate
Seal your jars tightly and place them in the refrigerator. Patience is a virtue here; give the pickles at least 24 to 48 hours to develop that bold, crunchy flavor. The waiting is worth it when you bite into that first crisp pickle!
Step 6: Enjoy and Store
Your pickles will keep wonderfully in the fridge for up to two months, maintaining their crunch and flavor if stored properly. Just remember to keep those lids tight and enjoy your homemade creation whenever the craving strikes.
How to Serve The Ultimate Dill Pickle Recipe for Bold, Crunchy Flavor Recipe
Garnishes
Sprinkle freshly chopped dill or a few black peppercorns on top of your plated pickles for a pretty presentation and an extra punch of flavor. Some like to add a thin slice of onion or a dash of smoked paprika to highlight the pickles’ zestiness.
Side Dishes
These pickles are divine with classic deli sandwiches, burgers, and BBQ plates. They also pair beautifully with rich, creamy dishes like potato salad or deviled eggs, cutting through the richness with their bright acidity and crunch.
Creative Ways to Present
For a fun twist, try chopping pickles finely and mixing them into homemade tartar sauce or potato salad. You can also thread pickle spears onto appetizer skewers with cheese and cured meats for a charming finger food option that bursts with flavor.
Make Ahead and Storage
Storing Leftovers
Once sealed and refrigerated, your pickles can safely last up to two months. Always use clean utensils when reaching into the jar to avoid contamination and keep those pickles fresh and tasty for longer.
Freezing
Freezing pickles is not recommended, as it can ruin their crisp texture and cause watery, mushy results. Instead, focus on proper refrigeration and enjoying within the suggested timeframe.
Reheating
Reheating is typically not necessary for pickles, as they’re best enjoyed cold or at room temperature. However, if you’re using them in cooked dishes, add them at the end to preserve their texture and flavor.
FAQs
Can I use regular cucumbers instead of pickling cucumbers?
While regular cucumbers can work in a pinch, pickling cucumbers are preferred because they have thinner skins and are crisper, which helps achieve that signature crunch you want in The Ultimate Dill Pickle Recipe for Bold, Crunchy Flavor Recipe.
How long should I wait before eating my pickles?
For the best flavor and crunch, allow your pickles to sit in the brine in the refrigerator for at least 24 to 48 hours. Though they’ll taste good sooner, those two days bring out the full boldness and depth of flavor.
Can I make these pickles spicy?
Absolutely! The recipe already includes optional red pepper flakes, which add a subtle heat. You can increase the amount according to your spice tolerance or add fresh jalapeño slices for more kick.
Do I need to sterilize the jars before pickling?
Yes, sterilizing your jars is important to prevent unwanted bacteria from spoiling the pickles and to help them last the full two months in the fridge.
Why do I need to remove the blossom ends of cucumbers?
Removing blossom ends prevents the enzyme that causes cucumbers to soften from affecting your pickles, helping them stay firm and crunchy in The Ultimate Dill Pickle Recipe for Bold, Crunchy Flavor Recipe.
Final Thoughts
There is something truly satisfying about making your own pickles from scratch, and The Ultimate Dill Pickle Recipe for Bold, Crunchy Flavor Recipe delivers on every level. With its fresh ingredients, bold seasoning, and glorious crunch, you’re going to love how simple it is to elevate your snacks, meals, and gatherings. Give it a try today — your taste buds will thank you!
Print
The Ultimate Dill Pickle Recipe for Bold, Crunchy Flavor Recipe
- Prep Time: 10 minutes
- Cook Time: 10 minutes
- Total Time: 20 minutes
- Yield: 4 servings
- Category: Pickling
- Method: No-Cook
- Cuisine: American
- Diet: Gluten Free
Description
This Ultimate Dill Pickle Recipe delivers bold, crunchy pickles with a perfect balance of tangy vinegar, salty brine, and fresh dill flavor. Easy to prepare and naturally fermented in the refrigerator, these pickles are crisp and delicious, perfect for snacking or serving alongside sandwiches and burgers.
Ingredients
Pickles
- 8–10 small pickling cucumbers (about 4 inches each)
Brine
- 4 cups water
- 2 cups white vinegar
- 3 tablespoons kosher salt
- 1 tablespoon sugar (optional, for balance)
Flavorings
- 6 cloves garlic, smashed
- 1 tablespoon black peppercorns
- 1 teaspoon mustard seeds
- 1/2 teaspoon red pepper flakes (optional, for spice)
- 4–6 fresh dill sprigs
Instructions
- Prepare Cucumbers: Wash the cucumbers thoroughly to remove any dirt. Trim off the blossom ends to help maintain crispness during pickling.
- Make the Brine: In a medium saucepan, combine water, white vinegar, kosher salt, and sugar if using. Bring the mixture to a boil while stirring to fully dissolve the salt. Remove from heat and allow to cool slightly.
- Layer Ingredients in Jars: Using sterilized jars, place cucumbers first, then add smashed garlic cloves, black peppercorns, mustard seeds, red pepper flakes, and fresh dill sprigs in layers.
- Add Brine to Jars: Pour the warm brine over the cucumbers and spices, leaving about a 1/2 inch space (headspace) at the top of each jar.
- Seal and Refrigerate: Seal the jars securely with lids and place them in the refrigerator. Let the pickles sit for at least 24 to 48 hours to develop flavor.
- Storage and Serving: The pickles will keep well in the refrigerator for up to 2 months. Serve chilled as a tangy, crunchy snack or alongside your favorite dishes.
Notes
- Trimming blossom ends prevents softening and helps cucumbers stay crisp.
- Adjust the amount of red pepper flakes to control the level of spiciness.
- You can omit sugar for a more tart pickle or include it for a balanced flavor.
- Ensure jars and lids are properly sterilized to prolong shelf life and safety.
- For best flavor, allow pickles to ferment for a full 2 days before consumption.

