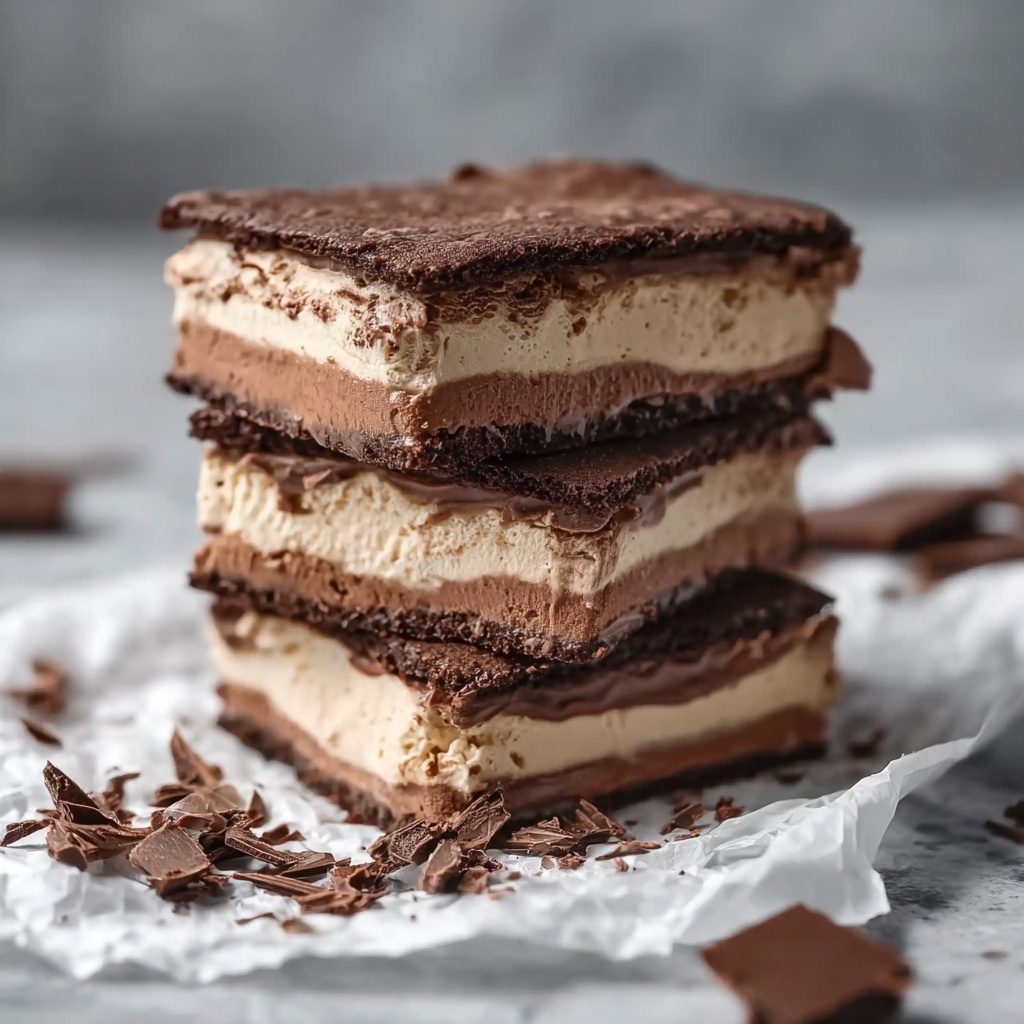
If you’ve ever dreamed of the perfect nostalgic treat that combines rich chocolate cookies with creamy vanilla ice cream, look no further than this Classic Chocolate Ice Cream Sandwich Recipe. It is every bit as delightful as you imagine, with soft, fudgy chocolate cookies that hug a smooth scoop of vanilla ice cream. The balance of textures and flavors is simply irresistible, and making these at home lets you savor an elevated version of a beloved treat anytime you want. I can’t wait to share with you how easy and fun this recipe is to make—it might just become your new favorite dessert to share with friends and family.
Ingredients You’ll Need
This recipe calls for a handful of simple, pantry-friendly ingredients that work together beautifully to create those rich chocolate cookies and creamy ice cream centers you adore. Each addition has a purpose—to bring the perfect flavor, texture, and even a lovely deep color to your ice cream sandwiches.
- Vegetable oil cooking spray: Keeps your cookies from sticking and ensures easy removal after baking.
- 1/2 cup all-purpose flour: The base that provides structure to your cookies.
- 1 tablespoon all-purpose flour: Added to adjust the consistency and help give the cookies a tender crumb.
- 1/4 teaspoon kosher salt: Enhances the chocolate flavor and balances sweetness.
- 1/4 teaspoon baking soda: Gives a slight lift to keep the cookies soft, not cakey.
- 1/3 cup sifted Dutch-process cocoa powder: Responsible for the deep chocolate richness and velvety color.
- 3 tablespoons unsalted butter, softened: Adds richness and helps create a melt-in-your-mouth texture.
- 1/4 cup white sugar: Provides sweetness and helps with cookie spreading.
- 2 tablespoons light brown sugar: Adds subtle caramel notes and moisture for chewiness.
- 1/2 teaspoon pure vanilla extract: A warm hint that complements both chocolate and vanilla ice cream.
- 1/3 cup whole milk, at room temperature: Brings the batter together and keeps the cookies soft.
- 6 scoops vanilla ice cream: The star filling for these sandwiches; pick your favorite quality brand or homemade version.
How to Make Classic Chocolate Ice Cream Sandwich Recipe
Step 1: Prepare for Baking
Start by preheating your oven to 350°F (175°C). Line a baking sheet with a silicone mat or parchment paper to prevent sticking, then lightly coat it with vegetable oil cooking spray. This sets a perfect foundation for baking your cookies evenly and ensuring they release effortlessly.
Step 2: Mix Dry Ingredients
In a medium bowl, whisk together the 1/2 cup flour, the extra tablespoon of flour, salt, baking soda, and sifted Dutch-process cocoa powder. Making sure this chocolate mixture is smooth and lump-free will ensure your cookies bake with an even texture and that vivid chocolate color.
Step 3: Cream Butter and Sugars
In another bowl, blend the softened unsalted butter with white sugar, light brown sugar, and vanilla extract until the mixture is silky smooth. This step is key for getting those cookies tender and sweet while building flavor layers that marry beautifully with the cocoa.
Step 4: Combine Ingredients into Batter
Now add your dry ingredients and whole milk to the butter-sugar mixture, stirring just until you have a thick, luscious batter. Avoid overmixing to keep the cookies soft and chewy rather than tough.
Step 5: Scoop and Bake
Scoop 12 even portions of batter onto your prepared baking sheet. Bake for about 9 to 10 minutes, or until the tops lose their glossy sheen. Once they come out, tap the pan gently on the counter to flatten the cookies slightly—this helps them form that perfect shape for ice cream sandwich assembly.
Step 6: Cool and Chill
Allow the cookies to cool on the baking sheet for 15 minutes, then transfer them to the freezer for 15 minutes to firm up. Once chilled, poke 10 to 12 tiny holes on each cookie surface with a fork or toothpick; this prevents sogginess later. Return the cookies to the freezer until you’re ready to assemble your sandwiches.
Step 7: Assemble Your Ice Cream Sandwiches
Place one cookie upside down, add a scoop of vanilla ice cream, and gently press another cookie on top to complete your sandwich. Repeat for all the cookies. These are delicious right away but taste even better if wrapped and frozen for about 3 hours to firm up fully.
How to Serve Classic Chocolate Ice Cream Sandwich Recipe
Garnishes
Classic chocolate ice cream sandwiches stand beautifully on their own, but if you want to add a little extra something, roll the edges in mini chocolate chips, chopped nuts, or sprinkles for a festive touch. A light dusting of powdered sugar over the top cookies can also create an elegant contrast to the rich chocolate.
Side Dishes
For a perfect dessert platter, pair your sandwiches with fresh berries or a drizzle of warm caramel or raspberry sauce. A glass of cold milk or a scoop of extra vanilla ice cream adds extra indulgence that friends and family will adore.
Creative Ways to Present
Serve these sandwiches on a rustic wooden board for a casual vibe, or individually wrap them in wax paper tied with twine as charming party favors. You can also slice a few smaller portions for tasting plates if you want to offer a sampling of different ice cream sandwich combinations.
Make Ahead and Storage
Storing Leftovers
If you have leftovers (which may be unlikely!), wrap each sandwich tightly in plastic wrap or place them in an airtight container. Keep them in the freezer to maintain freshness and prevent ice crystals from forming on the ice cream and cookies.
Freezing
The Classic Chocolate Ice Cream Sandwich Recipe is excellent for making ahead. After assembling, freeze the sandwiches for at least 3 hours for a firm, scoopable texture. They can be stored in the freezer for up to 2 weeks without losing quality, making them a perfect make-ahead dessert for gatherings or hot days.
Reheating
Since these are ice cream treats, reheating isn’t recommended. Instead, allow frozen sandwiches to sit at room temperature for 5 to 10 minutes before serving to soften the cookies slightly while keeping the ice cream delightfully cold.
FAQs
Can I use other flavors of ice cream?
Absolutely! While vanilla pairs perfectly in this Classic Chocolate Ice Cream Sandwich Recipe, you can experiment with flavors like mint chocolate chip, salted caramel, or strawberry to create your own delicious twist.
What if I don’t have Dutch-process cocoa powder?
You can substitute natural cocoa powder, but the flavor and color may be a bit sharper and less mellow. Dutch-process gives a richer, smoother chocolate taste that elevates this recipe wonderfully.
Is there a way to make these gluten-free?
Yes! Replace the all-purpose flour with a gluten-free baking mix designed to substitute 1:1 in cookies. Just be mindful that texture might change slightly, but they’ll still be delicious.
How long do these sandwiches stay fresh?
When stored properly in the freezer, Classic Chocolate Ice Cream Sandwich Recipe keeps best for up to two weeks. Beyond that, ice cream texture and flavor can start to decline.
Can I make the cookies in advance?
Definitely! Bake and freeze the cookies ahead of time, then assemble the sandwiches just before eating. This is a great way to save time when you want a quick dessert ready to go.
Final Thoughts
Every bite of this Classic Chocolate Ice Cream Sandwich Recipe is pure bliss and a reminder of how magical simple ingredients can be when combined thoughtfully. Whether you’re indulging yourself after a long day or sharing a sweet moment with family, these homemade ice cream sandwiches are an absolute winner. Trust me, once you try making them yourself, they’ll quickly become a cherished favorite in your dessert rotation. So grab your apron and get ready to make some unforgettable memories with this delightful treat!
Print
Classic Chocolate Ice Cream Sandwich Recipe
- Prep Time: 15 minutes
- Cook Time: 10 minutes
- Total Time: 1 hour 10 minutes
- Yield: 6 ice cream sandwiches
- Category: Dessert
- Method: Baking
- Cuisine: American
Description
Classic Chocolate Ice Cream Sandwiches made with rich, cocoa-flavored cookies and creamy vanilla ice cream. These homemade treats combine soft, chewy chocolate cookies with smooth vanilla ice cream, perfect for a refreshing dessert or snack.
Ingredients
For the Cookies
- Vegetable oil cooking spray
- 1/2 cup all-purpose flour
- 1 tablespoon all-purpose flour
- 1/4 teaspoon kosher salt
- 1/4 teaspoon baking soda
- 1/3 cup sifted Dutch-process cocoa powder
- 3 tablespoons unsalted butter, softened
- 1/4 cup white sugar
- 2 tablespoons light brown sugar
- 1/2 teaspoon pure vanilla extract
- 1/3 cup whole milk, at room temperature
For Assembly
- 6 scoops vanilla ice cream
Instructions
- Preheat and Prepare Baking Sheet: Preheat your oven to 350°F (175°C). Line a baking sheet with a silicone mat or parchment paper, then lightly coat it with vegetable oil cooking spray to prevent sticking.
- Mix Dry Ingredients: In a bowl, whisk together 1/2 cup all-purpose flour, 1 tablespoon all-purpose flour, 1/4 teaspoon kosher salt, 1/4 teaspoon baking soda, and 1/3 cup sifted Dutch-process cocoa powder until smooth and free of lumps.
- Cream Butter and Sugars: In a separate bowl, mix 3 tablespoons softened unsalted butter, 1/4 cup white sugar, 2 tablespoons light brown sugar, and 1/2 teaspoon pure vanilla extract until the mixture is smooth and creamy.
- Combine Ingredients: Gradually add the dry ingredients to the butter and sugar mixture, stirring while slowly adding 1/3 cup room-temperature whole milk. Mix until you form a thick batter.
- Shape and Bake Cookies: Scoop 12 portions of the batter onto the prepared baking sheet, spacing them evenly. Bake the cookies for 9–10 minutes, until the tops are no longer glossy.
- Flatten and Cool: Remove the baking sheet from the oven and gently tap it on the counter to flatten the cookies slightly. Allow the cookies to cool on the sheet for 15 minutes.
- Freeze Cookies: Place the cookies on the baking sheet into the freezer for 15 minutes until firm enough to handle.
- Prepare Cookies for Assembly: Remove the cookies from the freezer and poke 10–12 small holes in each cookie to reduce ice crystal formation, then return them to the freezer until you’re ready to assemble the sandwiches.
- Assemble Ice Cream Sandwiches: Take one cookie and place it upside down on a clean surface. Add a scoop of vanilla ice cream on top, then gently press a second cookie on top to form a sandwich. Repeat this process for all 6 ice cream sandwiches.
- Serve or Store: Serve the ice cream sandwiches immediately for a soft texture, or wrap them individually and freeze for about 3 hours if you prefer a firmer texture.
Notes
- For best results, use high-quality Dutch-process cocoa powder for a rich chocolate flavor.
- Allow the cookies to cool and freeze well before assembling to prevent melting the ice cream too quickly.
- Poking small holes in the cookies before freezing helps reduce ice crystal formation, keeping the texture intact.
- You can substitute vanilla ice cream with other flavors to customize your sandwiches.
- Wrap assembled sandwiches tightly in plastic wrap or parchment paper to avoid freezer burn.


