
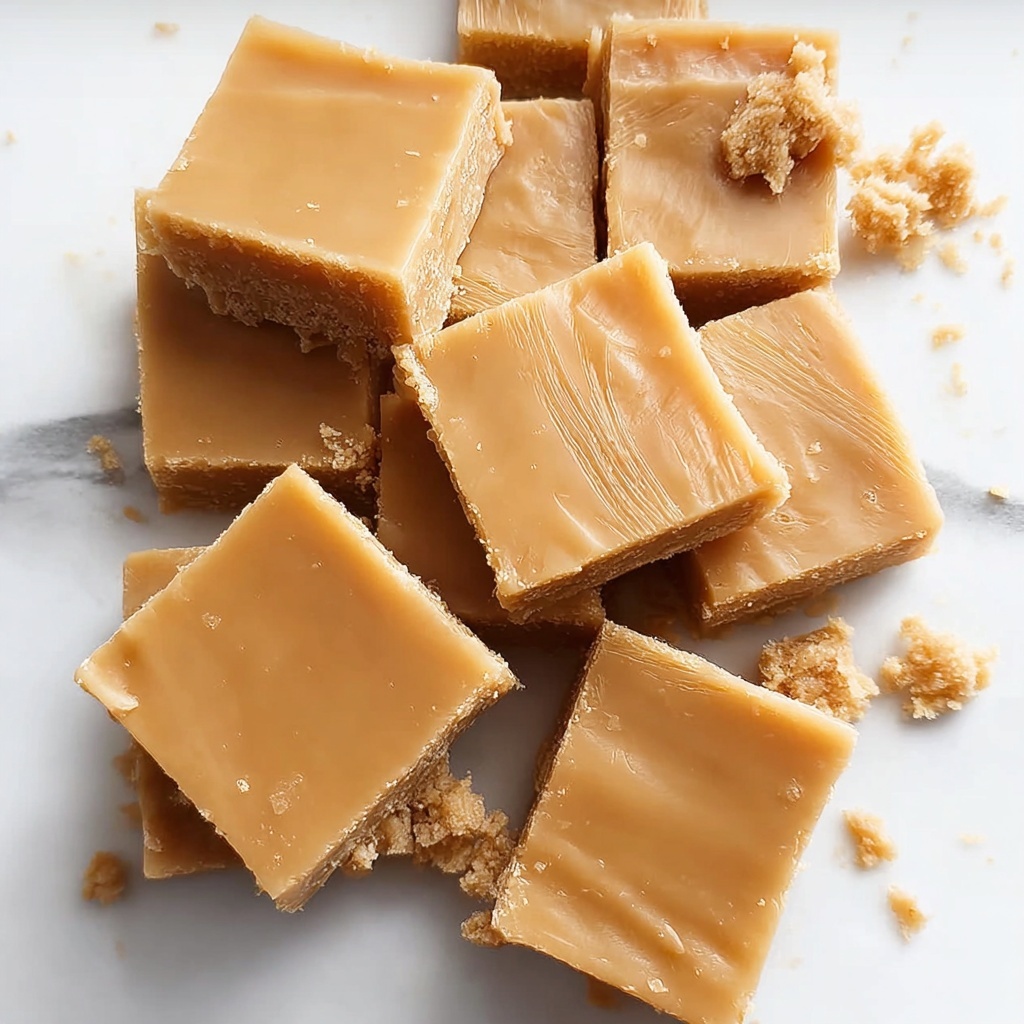
There is something irresistibly comforting about this White Chocolate Fudge Recipe that makes it a perennial favorite for sweet lovers everywhere. Creamy, luscious, and sweet with just a touch of vanilla, this fudge melts in your mouth and brings pure joy with every bite. Combining simple ingredients like white chocolate chips and sweetened condensed milk, it’s a treat that’s as easy to make as it is delightful to eat. Whether you’re preparing a gift for a friend or spoiling yourself on a cozy afternoon, this White Chocolate Fudge Recipe delivers indulgence in its finest form.
Ingredients You’ll Need
The magic of this White Chocolate Fudge Recipe lies in its straightforward ingredients, each playing a vital role to create that smooth, rich texture and heavenly flavor. These pantry staples come together quickly but pack a punch in taste and appearance, ensuring your fudge is perfect every time.
- White chocolate chips: The star of the show, providing that creamy sweetness and iconic ivory color.
- Sweetened condensed milk: Adds richness and moisture, binding the fudge into a delectably smooth consistency.
- Unsalted butter: Enhances creaminess and helps create a melt-in-your-mouth texture without overpowering sweetness.
- Vanilla extract: Infuses warmth and depth, balancing the sweetness with a subtle aroma.
- Salt: A pinch to contrast and elevate the flavors, preventing the fudge from tasting overly sweet.
How to Make White Chocolate Fudge Recipe
Step 1: Prepare Your Baking Dish
Start by lining an 8×8 inch baking dish with parchment paper. This step is essential because it makes removing the fudge from the dish a breeze and ensures a perfect square shape when cutting.
Step 2: Melt the Butter
Place unsalted butter in a saucepan over low heat and let it melt gently. Taking it slow preserves the buttery flavor and prevents scorching, setting a smooth base for your fudge mixture.
Step 3: Combine White Chocolate and Condensed Milk
Add the white chocolate chips and sweetened condensed milk to the melted butter. Stir continuously over low heat until the mixture is completely smooth and glossy. This blending step ensures that the fudge will have that classic creamy consistency you crave.
Step 4: Add Vanilla and Salt
Remove the saucepan from heat, then stir in the vanilla extract and salt. These two simple ingredients subtly elevate the flavor profile, giving your fudge a wonderful aroma and balanced sweetness.
Step 5: Pour into the Dish and Chill
Pour the creamy mixture into the parchment-lined dish and spread it evenly. Pop it into the refrigerator for at least 2 hours until fully set, allowing it to firm up into the perfect, sliceable fudge.
Step 6: Cut and Serve
Once chilled and firm, lift the fudge out of the dish using the parchment paper and slice into bite-sized squares. Now you’re ready to indulge or share this sweet masterpiece!
How to Serve White Chocolate Fudge Recipe

Garnishes
Adding a little something extra on top can take this fudge from delightful to dazzling. Try sprinkling chopped nuts, colorful sprinkles, or even a drizzle of dark chocolate for contrast. These touches add texture and make the presentation shine.
Side Dishes
Serve your white chocolate fudge alongside fresh berries or a cup of rich coffee or espresso. The tartness of berries or the bold bitterness of coffee creates a wonderful balance against the fudge’s creamy sweetness, turning your treat time into a refined tasting experience.
Creative Ways to Present
For a festive occasion, arrange the fudge squares on a decorative platter amidst edible flowers or use small cupcake liners for individual servings. You could also layer the fudge with crushed cookies or dried fruit for a charming layered dessert in a jar, perfect for gifting.
Make Ahead and Storage
Storing Leftovers
Keep your white chocolate fudge fresh by storing it in an airtight container at room temperature or in the refrigerator for up to two weeks. This helps maintain its soft texture while protecting it from absorbing other flavors.
Freezing
If you want to prepare your White Chocolate Fudge Recipe in advance, it freezes beautifully. Wrap the fudge tightly in plastic wrap and then foil before placing it in the freezer. When stored this way, it keeps well for up to three months without losing flavor or texture.
Reheating
Fudge is best enjoyed chilled or at room temperature, so reheating is generally not necessary. However, if the fudge feels too firm, a few minutes at room temperature will soften it naturally. Avoid microwaving, as this can affect the texture negatively.
FAQs
Can I use white chocolate bars instead of chips?
Absolutely! Just chop the white chocolate bars into small pieces to ensure they melt evenly, and use the same amount as the chips. This can give you a slightly smoother melt, depending on the brand.
What if my fudge turns out too soft?
If your fudge is too soft, it may not have chilled long enough or the ingredients proportions might have been slightly off. Make sure to refrigerate for the full two hours or longer, and measure ingredients carefully for the best consistency.
Can I add nuts or dried fruit to this recipe?
Yes, feel free to stir in chopped nuts, dried fruits, or even small candy pieces after you remove the mixture from heat but before pouring it into the pan. This adds exciting textures and flavor variations.
Is this White Chocolate Fudge Recipe suitable for gifting?
Definitely! Wrapped in parchment or placed in a decorative box, this fudge makes a heartfelt homemade gift that’s sure to impress anyone with a sweet tooth.
How long does this fudge stay fresh at room temperature?
When stored correctly in an airtight container, the fudge will stay fresh and delicious at room temperature for about 3 to 5 days, making it perfect for parties and gatherings.
Final Thoughts
Making this White Chocolate Fudge Recipe is such a joyful experience, from watching those simple ingredients melt into something magical to sharing the final results with loved ones. It’s remarkably easy but feels luxurious and special, proving that you don’t need complex steps to create a delicious treat. Give it a try, and I promise this fudge will quickly become a treasured favorite in your recipe collection!
Print
White Chocolate Fudge Recipe
- Prep Time: 10 minutes
- Cook Time: 10 minutes
- Total Time: 2 hours 20 minutes
- Yield: 16 servings
- Category: Dessert
- Method: Stovetop
- Cuisine: American
Description
This white chocolate fudge is a creamy, rich, and irresistibly sweet treat perfect for satisfying your sweet tooth. Made with simple ingredients like white chocolate chips, sweetened condensed milk, and butter, this fudge is easy to prepare and requires no baking. Chill it until set for a smooth, decadent delight that’s perfect for sharing or gifting.
Ingredients
Fudge Ingredients
- 2 cups white chocolate chips
- 1 can (14 oz) sweetened condensed milk
- 1/2 cup unsalted butter
- 1 teaspoon vanilla extract
- 1/4 teaspoon salt
Instructions
- Prepare the baking dish: Line an 8×8 inch baking dish with parchment paper, ensuring the paper extends over the edges to make removing the fudge easier later.
- Melt the butter: In a saucepan, melt the 1/2 cup of unsalted butter over low heat to prevent burning.
- Add chocolate and condensed milk: Stir in the 2 cups of white chocolate chips and the 14 oz can of sweetened condensed milk. Continuously stir the mixture until it becomes smooth and fully combined.
- Remove from heat and flavor: Take the saucepan off the heat and stir in 1 teaspoon of vanilla extract and 1/4 teaspoon of salt to enhance the flavor and balance sweetness.
- Pour into dish: Transfer the mixture into the prepared baking dish, spreading it evenly for consistent thickness throughout the fudge.
- Chill the fudge: Refrigerate the dish for at least 2 hours, allowing the fudge to set firmly.
- Serve: Once fully set, lift the fudge out using the parchment paper, cut into 16 squares, and serve.
Notes
- Use high-quality white chocolate chips for best flavor and texture.
- Ensure to stir continuously while melting to avoid burning the chocolate.
- Refrigerate for the full time to allow the fudge to firm up properly.
- Store leftovers in an airtight container in the refrigerator for up to one week.
- For a different twist, you can add chopped nuts or dried fruit before chilling.


