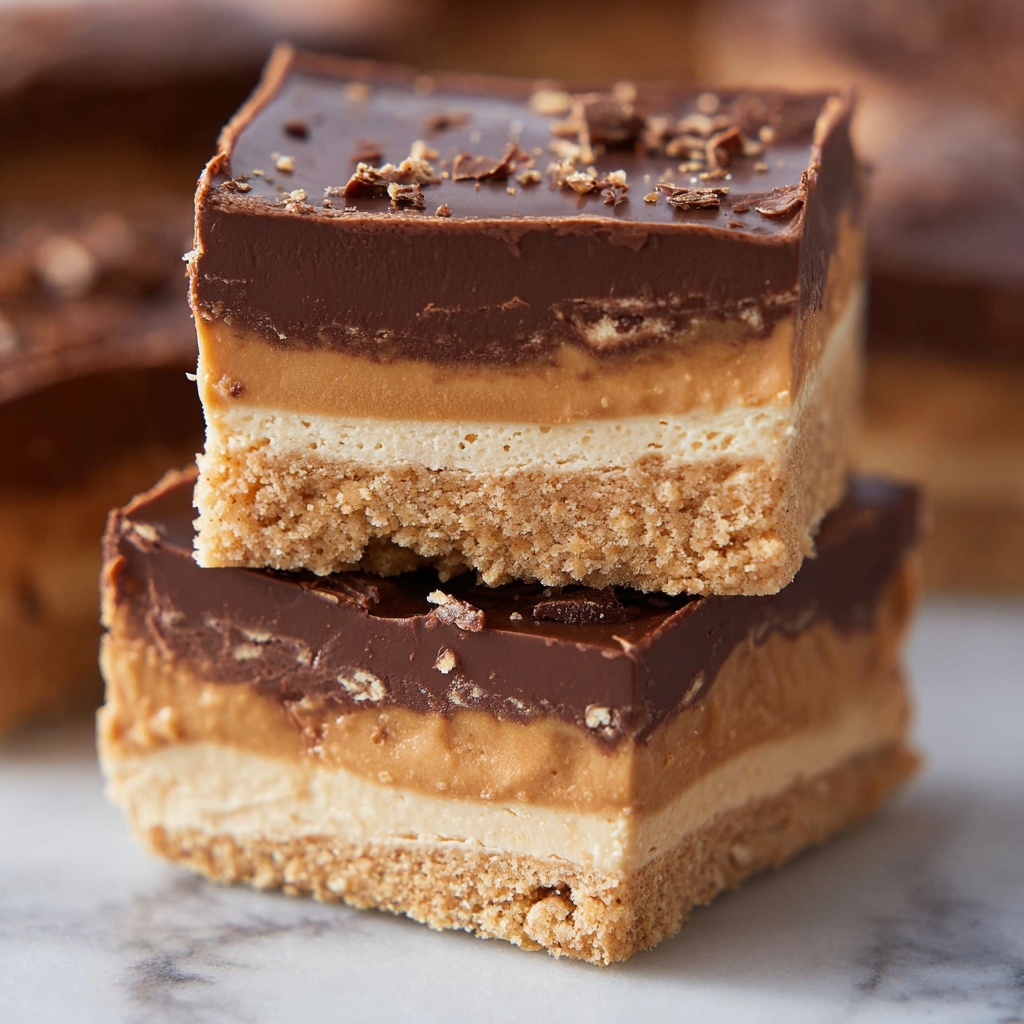
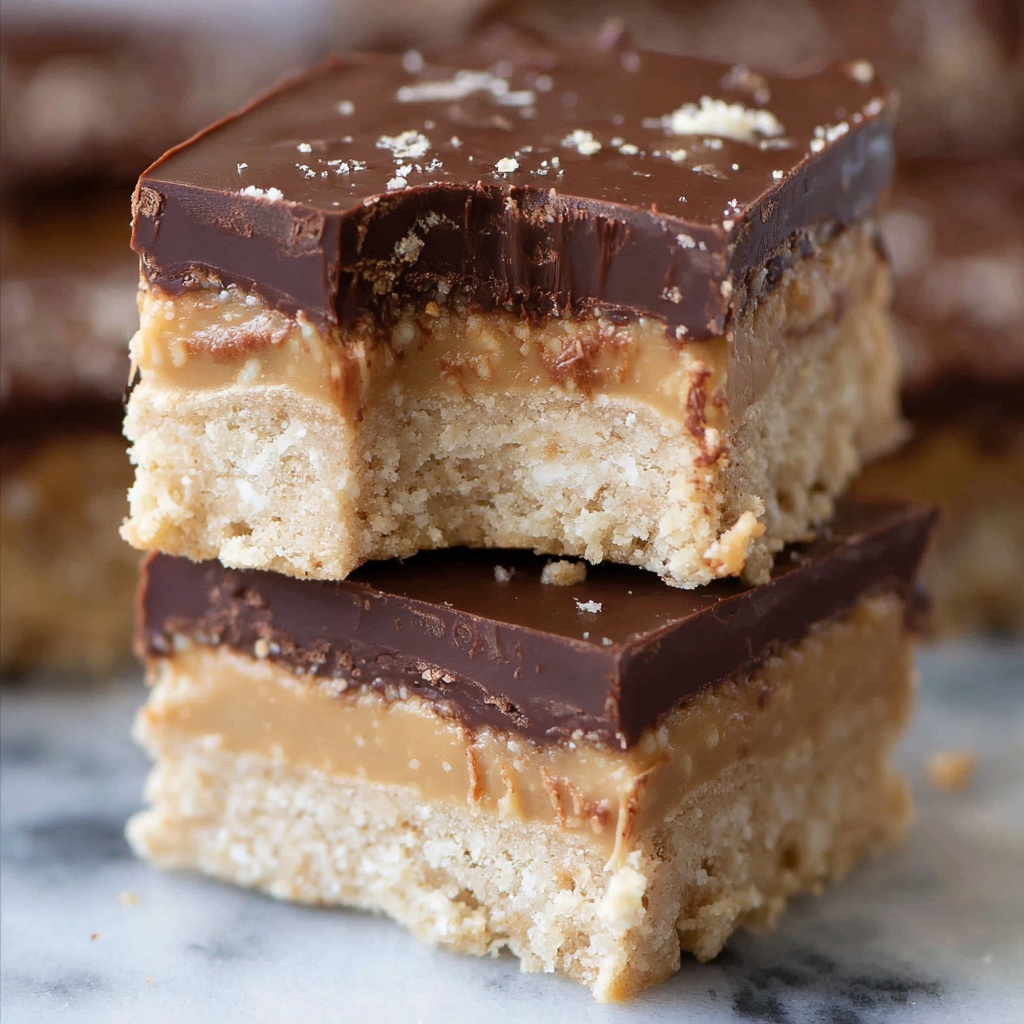
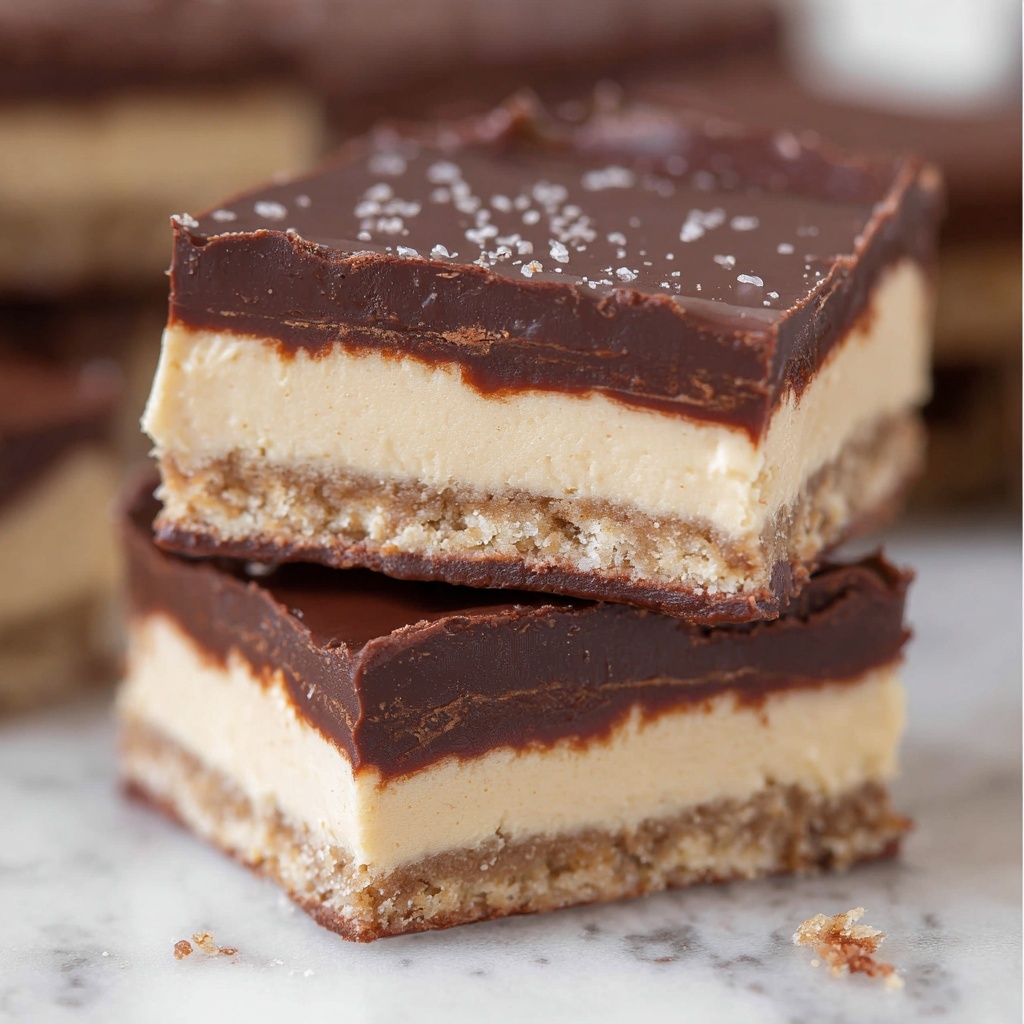
If you’re craving a nostalgic treat that’s both sweet and satisfyingly peanut buttery, you’re in for a real delight with this Disneyland Peanut Butter Sandwich Bars Recipe. These bars pack all the magic of Disneyland right into your kitchen—think creamy peanut butter layered between crunchy graham crackers, all smothered in luscious chocolate. It’s like a sandwich you never knew you wanted, blending classic flavors with a texture that’s simply irresistible. Whether you’re looking for a crowd-pleasing dessert or a cozy snack, this recipe will quickly become your go-to indulgence.
Ingredients You’ll Need
This Disneyland Peanut Butter Sandwich Bars Recipe comes together with just a few simple but essential ingredients. Each one plays a crucial role—bringing creaminess, crunch, sweetness, or that rich chocolate finish that ties it all together beautifully. Having these on hand means you’re just minutes away from making a dessert that tastes like a special treat you’d find at your favorite theme park.
- Creme peanut butter (¾ cup or 200g): Choose a smooth variety for that perfect creamy texture and peanut flavor that shines through every bite.
- Unsalted butter (4 tablespoons or 57g, softened): Adds richness and smoothness to the peanut butter mixture, helping it bind nicely.
- Salt (¼ teaspoon): Enhances the peanut butter flavor and balances the sweetness perfectly.
- Powdered sugar (1 ½ to 2 cups or 160-226g): Sweetens the filling while giving it that dreamy, melt-in-your-mouth consistency.
- Graham cracker sheets (10-12 sheets): Provide the ideal crunchy sandwich layers and a subtle honey flavor supporting the peanut butter and chocolate.
- Chocolate chips (2 cups or 340g): Use semi-sweet or milk chocolate to create a smooth, decadent topping that melts perfectly.
- Shortening (3 tablespoons): Helps the chocolate set with a silky shine and firm finish.
How to Make Disneyland Peanut Butter Sandwich Bars Recipe
Step 1: Prepare Your Pan
Start by lining a 9×9 inch square pan with foil or parchment paper, then spray it with nonstick cooking spray. This step is a game changer because it makes removing your bars so much easier and keeps everything looking neat and polished when you serve.
Step 2: Mix the Peanut Butter Filling
Beat together the creamy peanut butter, softened butter, salt, and 1 ½ cups of powdered sugar using a hand mixer until smooth. The mixture will be crumbly at first – that’s exactly what you want. Test it by forming a ball in your hands; it should hold together without stickiness. If it’s too crumbly, gently mix in extra powdered sugar, adding up to ½ cup more. Getting this just right is the secret to that perfect peanut butter texture in every bite.
Step 3: Melt the Chocolate
Place your chocolate chips and shortening in a microwave-safe bowl. Heat everything in 30-second increments, stirring well after each, until the chocolate is fully melted and silky smooth. The shortening ensures your chocolate sets with a rich, glossy finish, making these bars look as good as they taste.
Step 4: Assemble the First Layers
Lay half of the graham crackers in a single layer on the bottom of your prepared pan. Next, spread a third of the melted chocolate over the crackers, then scoop out small balls of the peanut butter mixture. Flatten these balls between your hands and place them evenly over the chocolate layer. Use your fingers to smooth out the peanut butter gently so it’s as even as possible—this helps the layers meld together beautifully.
Step 5: Build the Final Layers
Spread another third of the melted chocolate over the peanut butter layer, then add the remaining graham crackers as a second layer. Finish by spreading the rest of the chocolate on top. This triple-layer effect creates the perfect texture contrast between crunchy, creamy, and smooth.
Step 6: Chill and Slice
Pop your assembled bars into the refrigerator and chill for at least an hour to set. Once firm, use the foil or parchment to lift the entire block from the pan, then slice into bars—about 36 pieces for perfect party-sized portions. Keep chilled until ready to serve for that clean, firm bite everyone will love.
How to Serve Disneyland Peanut Butter Sandwich Bars Recipe
Garnishes
A simple sprinkle of crushed graham crackers or a few whole chocolate chips on top before chilling adds a charming finishing touch. If you’re feeling fancy, a light drizzle of melted white chocolate can add a pretty contrast and a little extra sweetness that pairs perfectly with the peanut butter.
Side Dishes
These bars are indulgent on their own, but pairing them with a cold glass of milk or a scoop of vanilla ice cream makes for an unforgettable treat. A cup of hot coffee or tea also balances the richness wonderfully if you prefer something warm alongside these bars.
Creative Ways to Present
For parties or gifts, stack the bars with parchment paper in between and tie with a bright ribbon. You can also cut them into fun shapes using cookie cutters for festive occasions or plate them alongside fresh fruit to brighten up the presentation and add a fresh note.
Make Ahead and Storage
Storing Leftovers
These bars keep wonderfully in the refrigerator for up to a week. Just be sure to store them in an airtight container or wrapped tightly in foil to maintain their freshness and prevent the chocolate from blooming or getting sticky.
Freezing
If you’re making these ahead of time or want to keep them longer, you can freeze the bars for up to three months. Wrap them well in plastic wrap and then foil or use a freezer-safe container. Thaw overnight in the fridge before serving for the best texture and flavor.
Reheating
While these bars are perfect cold, if you’d like a softer experience, briefly warm them in the microwave for about 10-15 seconds. This will make the peanut butter filling creamier and the chocolate softer, almost like a warm peanut butter cup but remember not to overheat or they’ll get messy.
FAQs
Can I use crunchy peanut butter instead of creamy?
While crunchy peanut butter adds extra texture, this recipe works best with creamy peanut butter to ensure the filling is smooth enough to hold the layers together evenly.
Is it possible to use milk chocolate instead of semi-sweet?
Absolutely! Milk chocolate will add a sweeter, creamier flavor, which some people prefer. Just be mindful that it melts a bit faster and might set a little softer than semi-sweet chocolate.
Can I substitute shortening with something else?
If you don’t have shortening, you can use coconut oil or even butter as a replacement. Just keep in mind that coconut oil may add a slight coconut flavor, and butter won’t give quite the same glossy finish.
How long does it take to chill the bars?
Chilling them for at least 1 hour is necessary for everything to firm up nicely. If you’re in a hurry, you can pop them in the freezer for about 30 minutes but watch closely to avoid freezing them solid.
Can I double the recipe for a larger batch?
Definitely! Just use a larger pan or two 9×9 pans and double the ingredients as listed. The layers and steps remain the same—it’s just more of this irresistible Disneyland Peanut Butter Sandwich Bars Recipe to enjoy.
Final Thoughts
This Disneyland Peanut Butter Sandwich Bars Recipe is a fun, nostalgic treat that’s surprisingly easy to make and endlessly satisfying. Once you taste that lush peanut butter filling combined with crunchy grahams and silky chocolate, you’ll wonder how you ever lived without it. Whether you’re baking for friends, family, or just treating yourself, these bars bring a little magical joy to every bite. Give it a try and get ready to fall in love with your new favorite sandwich bar!
Print
Disneyland Peanut Butter Sandwich Bars Recipe
- Prep Time: 15 minutes
- Cook Time: 0 minutes
- Total Time: 1 hour 15 minutes
- Yield: 36 bars
- Category: Dessert
- Method: No-Cook
- Cuisine: American
Description
Disneyland Peanut Butter Sandwich Bars are a delightful no-bake treat combining creamy peanut butter filling sandwiched between crunchy graham crackers and layered with rich melted chocolate. These bars are perfect for parties, snacks, or a sweet indulgence and require minimal preparation time with no oven needed.
Ingredients
Peanut Butter Filling
- ¾ cup (200g) creamy peanut butter
- 4 tablespoons (57g) unsalted butter, softened
- ¼ teaspoon salt
- 1 ½ – 2 cups (160-226g) powdered sugar
Other Ingredients
- 10–12 graham cracker sheets
- 2 cups (340g) chocolate chips
- 3 tablespoons shortening
Instructions
- Prepare the Pan: Line a 9×9-inch square pan with foil or parchment paper and spray it lightly with nonstick cooking spray to ensure easy removal of the bars.
- Make Peanut Butter Mixture: Using a hand mixer, beat together the creamy peanut butter, softened butter, salt, and 1 ½ cups (160g) of powdered sugar until smooth. The mixture will initially be crumbly. Check the texture by seeing if it forms a ball easily without being sticky. If it falls apart, add up to another ½ cup (57g) of powdered sugar to reach the correct consistency. Typically, about 1 ¾ cups (203g) of powdered sugar is used.
- Melt Chocolate: Place chocolate chips and shortening in a microwave-safe bowl. Heat in 30-second intervals, stirring after each, until the chocolate is fully melted and smooth.
- First Layer Assembly: Arrange half of the graham cracker sheets in a single layer on the bottom of the prepared pan. Spread one-third (about 113g) of the melted chocolate evenly over the graham crackers.
- Add Peanut Butter Layer: Scoop out small balls of the peanut butter mixture and flatten them between your hands. Place the flattened balls evenly over the chocolate layer. Gently smooth the peanut butter evenly with your fingers.
- Second Chocolate Layer and More Crackers: Spread another one-third (113g) of the melted chocolate over the peanut butter layer. Then, add another layer of graham crackers on top.
- Top with Chocolate: Spread the remaining melted chocolate over the final layer of graham crackers.
- Chill and Set: Refrigerate the assembled bars for at least 1 hour to allow the layers to set firmly.
- Serve: Once set, slice into bars and store them in the refrigerator to maintain freshness.
Notes
- Ensure the peanut butter mixture isn’t sticky to get a firm layer; adjust powdered sugar as needed.
- Shortening helps the chocolate layer stay shiny and firm; do not substitute with butter for best texture.
- Use creamy peanut butter for optimal smoothness in filling.
- Store bars in the refrigerator to keep them firm and prevent melting.
- Bars can be wrapped tightly and frozen for up to 2 weeks; thaw in the refrigerator before serving.


