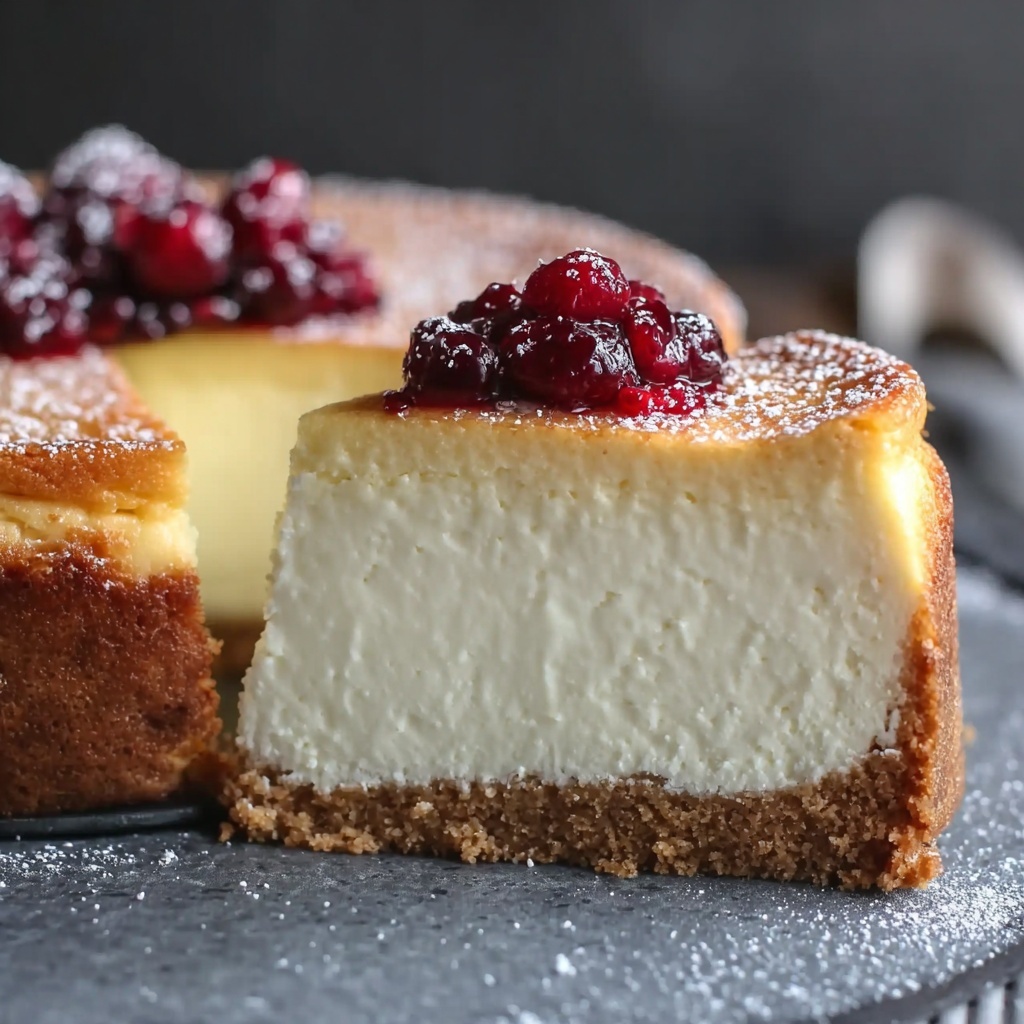
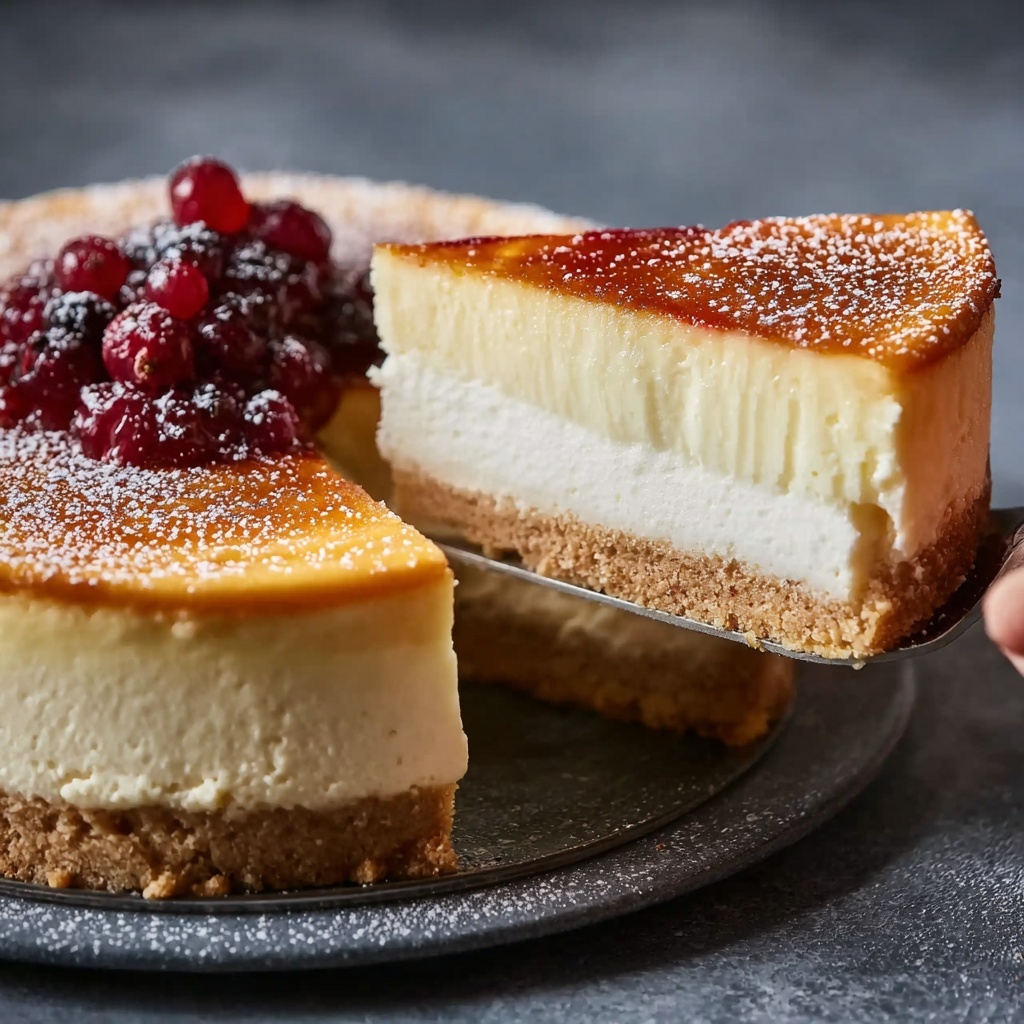
If you’ve been on the hunt for a dessert that feels like a warm hug in every bite, look no further than The Best Creamy Cheesecake Recipe. This cheesecake boasts a luxuriously smooth texture matched with a perfectly buttery graham cracker crust that melts in your mouth. Every ingredient plays its part in creating that dreamy richness, from the tangy sour cream to the subtle vanilla aroma. Whether you’re celebrating a special occasion or simply treating yourself, this dessert is bound to become your new favorite indulgence.
Ingredients You’ll Need
Simple ingredients often create the most magical flavors, and that’s absolutely true here. Each component is carefully chosen not just for taste but for the texture and balance it brings to the cheesecake. Ready to gather your essentials?
- 1½ cups graham cracker crumbs: Provides the crunchy, buttery base that contrasts beautifully with the creamy filling.
- ⅓ cup granulated sugar (for crust): Adds just the right touch of sweetness to balance the tanginess of the cheese.
- 6 tablespoons melted butter: Holds the crust together with a rich, golden flavor.
- Pinch of salt (for crust): Enhances the other flavors without stealing the spotlight.
- 32 oz (4 packages) cream cheese, room temperature: The star ingredient for that ultra-smooth, creamy consistency.
- 1 cup granulated sugar (for filling): Sweetens the filling without overpowering the natural richness.
- 1 cup sour cream, room temperature: Adds tang and moisture, keeping the cheesecake irresistibly soft.
- 4 large eggs, room temperature: Bind the filling and create the perfect custard texture.
- 2 teaspoons pure vanilla extract: Adds warmth and depth of flavor — a little goes a long way.
- 2 tablespoons all-purpose flour: Gives structure without compromising creaminess.
- ¼ teaspoon salt (for filling): Balances sweetness and enhances all the rich flavors.
How to Make The Best Creamy Cheesecake Recipe
Step 1: Prepare Your Pan and Oven
Start by setting your oven to 325°F (163°C). Wrap the outside of a 9-inch springform pan with aluminum foil tightly. This simple but vital step prevents any water from seeping in during the water bath, which keeps your cheesecake smooth and crack-free — that’s the secret to perfection!
Step 2: Create the Perfect Crust
Mix the graham cracker crumbs, sugar, melted butter, and a pinch of salt until the mixture feels like damp sand. Press this firmly into the bottom of your prepared pan, aiming for an even layer that will bake into that irresistible crunchy base. Pop it in the oven for about 10 minutes, and once you smell that toasted graham cracker aroma, you’ll know you’re on the right track.
Step 3: Blend the Silky Filling
This step is where the magic truly begins. Beat the cream cheese until it’s fluffy and smooth — this usually takes 3 to 4 minutes. Slowly add the sugar and continue mixing to incorporate. Then blend in the sour cream for tang and silkiness. Add the eggs one at a time and mix gently after each addition; overmixing might add unwanted air bubbles that cause cracks later, so treat this step with tender love.
Step 4: Add Final Touches
Now, gently fold in the vanilla extract, flour, and salt. The batter should be luscious and silky, with no lumps in sight. Pour it over your baked crust and smooth the surface out with an offset spatula. Look at that creamy goodness sitting pretty!
Step 5: Master the Water Bath
Place your springform pan into a larger roasting pan and carefully pour hot water until it reaches halfway up the sides of your cheesecake pan. This moist heat environment is a game-changer — it helps your cheesecake cook evenly and prevents those pesky cracks, giving you that flawlessly creamy finish.
Step 6: Bake to Perfection
Bake your cheesecake for 55 to 60 minutes. You’re aiming for the edges to be set but the center to jiggle slightly when you shake the pan gently. This tells you the custard is perfectly cooked while staying creamy inside. Once baked, turn off the oven and crack the door open, allowing the cheesecake to cool gradually for an hour — patience here makes a massive difference.
Step 7: Complete the Cooling Process
After removing the pan from the water bath, let it cool completely at room temperature. Then refrigerate for at least 4 hours or overnight. This chilling step is crucial as it lets the flavors marinate and the texture set into that dreamy creaminess that defines The Best Creamy Cheesecake Recipe.
How to Serve The Best Creamy Cheesecake Recipe

Garnishes
While this cheesecake is divine on its own, adding a few thoughtful garnishes can take it to the next level. Fresh berries like strawberries, blueberries, or raspberries add a pop of color and refreshing tartness. A drizzle of homemade caramel or chocolate sauce brings luscious sweetness that complements the tangy cream cheese beautifully. For a touch of elegance, sprinkle some toasted nuts or edible flowers on top.
Side Dishes
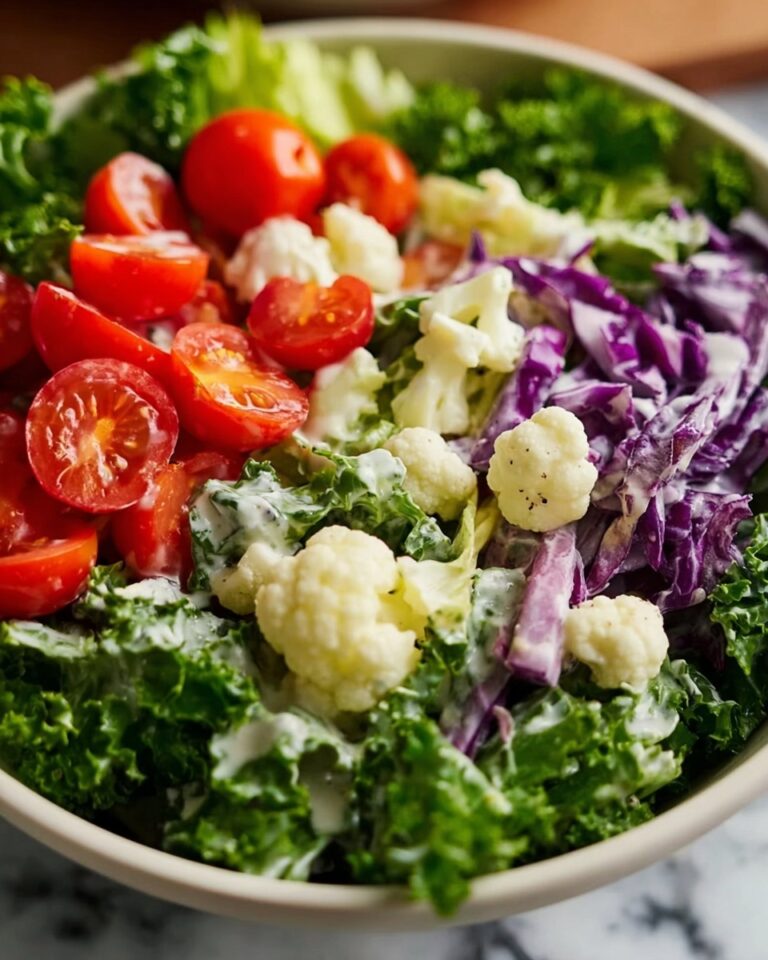
Serving cheesecake alongside a light side can balance its richness. Consider pairing it with a simple fresh fruit salad or a dollop of whipped cream infused with a hint of cinnamon or citrus zest. A cup of hot coffee or tea also makes a perfect companion, helping to cut through the creamy density and offering a comforting contrast.
Creative Ways to Present
Want to impress guests or just enjoy a fun twist on tradition? Try plating individual cheesecake slices with layered parfaits using crumbled crust, fresh fruit, and cheesecake filling. You can also turn leftovers into cheesecake-stuffed crepes or mini cheesecakes in mason jars for grab-and-go treats. No matter how you serve it, this recipe shines every time.
Make Ahead and Storage
Storing Leftovers
After enjoying your cheesecake, cover any leftovers tightly with plastic wrap or store them in an airtight container. Kept refrigerated, they’ll stay fresh and delicious for 4 to 5 days, maintaining that creamy texture you love.
Freezing
If you want to save some for later, cheesecake freezes beautifully. Wrap the whole cheesecake or individual slices securely in plastic wrap and then foil to prevent freezer burn. Freeze for up to 2 months. When ready to enjoy, thaw overnight in the fridge to preserve the texture and flavor.
Reheating
Cheesecake is best enjoyed chilled, but if you prefer it slightly warmer, remove it from the fridge for about 15 minutes before serving. Avoid microwaving as it can ruin the texture, making it greasy or grainy.
FAQs
Can I use a different crust instead of graham crackers?
Absolutely! While graham cracker crust is classic and delicious, you can use gluten-free graham crackers for special diets, or substitute with almond flour for a nuttier crust that still complements the creamy filling perfectly.
What if I don’t have sour cream?
Sour cream adds tanginess and moisture, but if you don’t have it on hand, plain Greek yogurt can work as a substitute. It will give a slightly different flavor but still keep your cheesecake creamy and delicious.
How do I prevent cracks in my cheesecake?
Crack prevention is all about gentle mixing, using a water bath during baking, and letting the cheesecake cool slowly. Wrapping the pan, baking at a moderate temperature, and opening the oven door slowly for cooling also help maintain a smooth surface.
Can I make this cheesecake dairy-free?
Yes! Swap regular cream cheese for vegan cream cheese alternatives and use coconut cream in place of sour cream. These substitutions still deliver a luscious texture and delicious taste that comes close to the original recipe.
How long does this cheesecake need to chill?
For the best texture, chill your cheesecake for at least 4 hours in the refrigerator, but overnight chilling is ideal. This resting time ensures the creamy filling sets perfectly, making each slice indulgently smooth.
Final Thoughts
You now have everything you need to create The Best Creamy Cheesecake Recipe that will wow family and friends alike. This recipe blends classic flavors with a foolproof technique, delivering a dessert that feels both comforting and special. So go ahead, gather those simple ingredients, roll up your sleeves, and treat yourself to a slice of pure bliss. You deserve it!
Print
The Best Creamy Cheesecake Recipe
- Prep Time: 20 minutes
- Cook Time: 1 hour 10 minutes
- Total Time: 5 hours 30 minutes
- Yield: 12 servings
- Category: Dessert
- Method: Baking
- Cuisine: American
- Diet: Gluten Free
Description
This luscious, creamy cheesecake features a perfectly toasted graham cracker crust and a silky smooth cream cheese filling baked in a water bath to ensure a crack-free, velvety texture. Ideal for dessert lovers seeking a classic, rich treat that’s perfectly balanced and easy to make.
Ingredients
Crust
- 1½ cups graham cracker crumbs (about 12 crackers)
- ⅓ cup granulated sugar
- 6 tablespoons melted butter
- Pinch of salt
Filling
- 32 oz (4 packages) cream cheese, room temperature
- 1 cup granulated sugar
- 1 cup sour cream, room temperature
- 4 large eggs, room temperature
- 2 teaspoons pure vanilla extract
- 2 tablespoons all-purpose flour
- ¼ teaspoon salt
Optional Substitutions
- Gluten-free: Use gluten-free graham crackers or almond flour crust
- Lower fat: Substitute half the cream cheese with Greek yogurt
- Dairy-free: Use vegan cream cheese and coconut cream
- Sugar alternatives: Replace sugar with equivalent amounts of maple syrup or stevia
Instructions
- Prepare Your Pan and Oven: Preheat your oven to 325°F (163°C). Wrap the outside of a 9-inch springform pan with aluminum foil to prevent water from seeping in during the water bath. This step is crucial for achieving a smooth texture without cracks.
- Create the Perfect Crust: Mix graham cracker crumbs, sugar, melted butter, and salt until the mixture resembles wet sand. Press firmly into the bottom of your prepared pan to create an even layer. Bake for 10 minutes until lightly golden and fragrant.
- Blend the Silky Filling: In a large bowl, beat cream cheese until completely smooth and fluffy, about 3-4 minutes. Gradually add sugar, beating until well combined. Mix in sour cream, then add eggs one at a time, beating just until incorporated to avoid bubbles.
- Add Final Touches: Gently fold in vanilla extract, flour, and salt. The batter should be smooth and pourable without lumps. Pour the mixture over the crust, smoothing the top with an offset spatula.
- Master the Water Bath: Place the springform pan in a larger roasting pan. Carefully pour hot water into the roasting pan until it reaches halfway up the sides of the springform pan. This humid heat prevents cracking and promotes even baking.
- Bake to Perfection: Bake for 55-60 minutes until the edges are set and the center is just slightly jiggly. Turn off the oven and crack the door open, letting the cheesecake cool gradually for one hour inside the oven.
- Complete the Cooling Process: Remove the cheesecake from the water bath and cool completely at room temperature. Refrigerate for at least 4 hours or overnight to develop the creamiest texture.
Notes
- Be sure that all ingredients are at room temperature to ensure a smooth batter and prevent cracking.
- Do not overmix when adding the eggs to avoid incorporating excess air bubbles.
- Wrapping the springform pan with foil prevents water from leaking in during the water bath, which is key for texture.
- Patience during cooling (gradual oven cooling and refrigeration) greatly improves the cheesecake’s creaminess.
- Feel free to customize the crust or filling with substitutions to suit dietary preferences such as gluten-free or dairy-free.


