
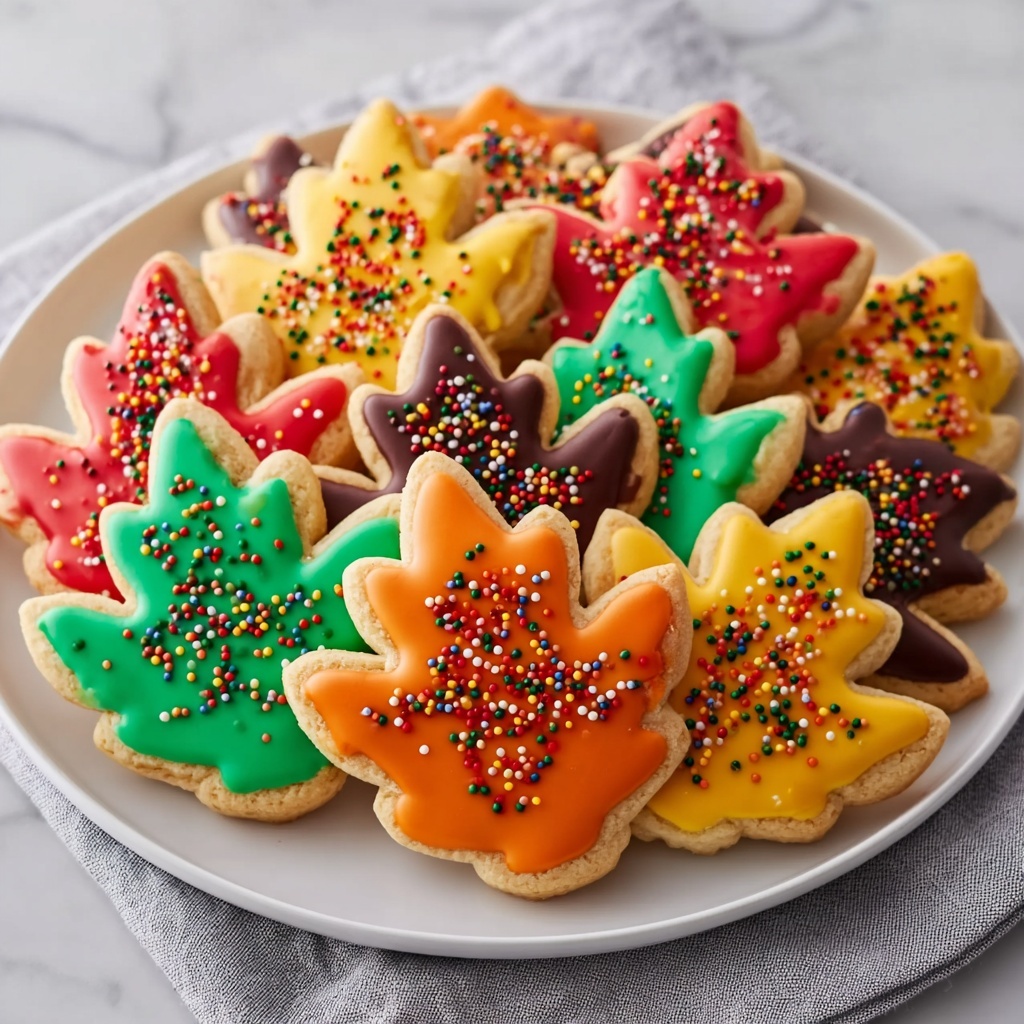
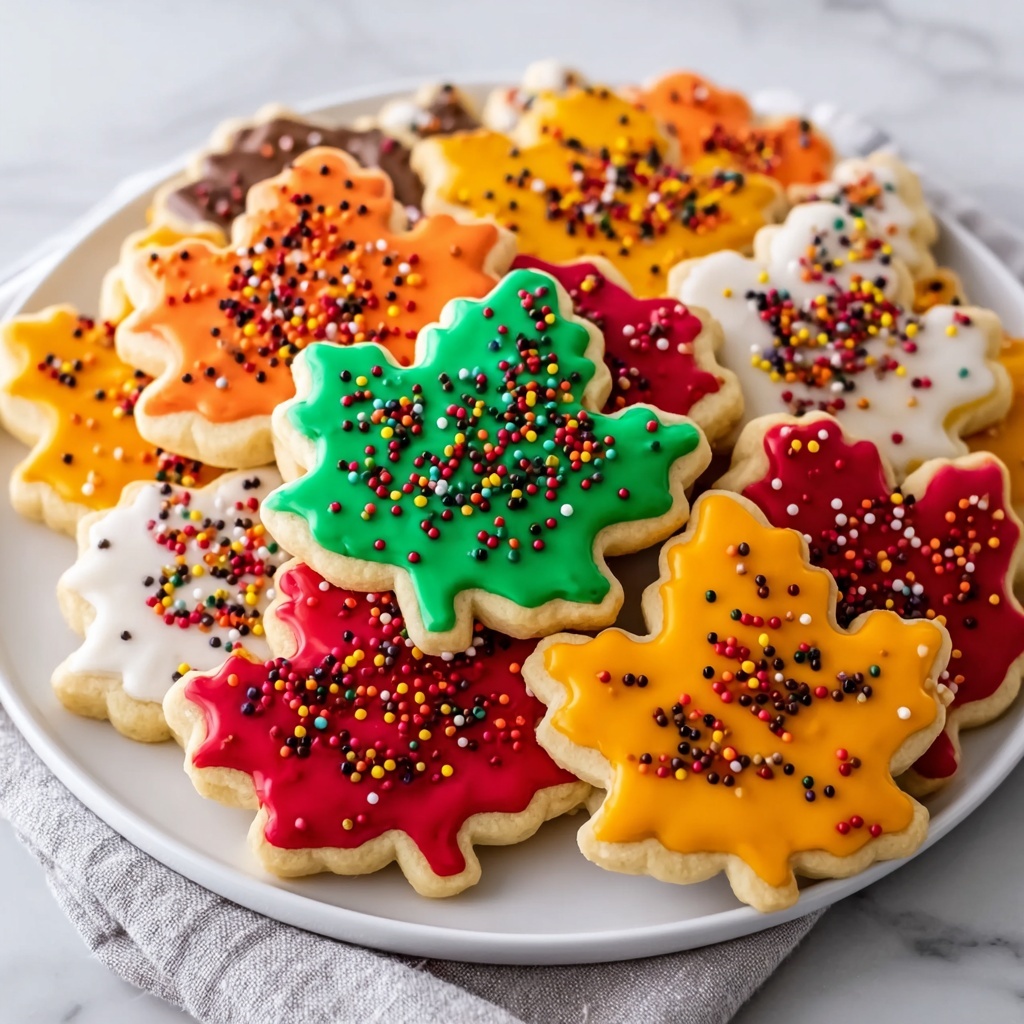
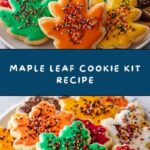
If you’re ready to bring a burst of autumn magic into your kitchen, the Maple Leaf Cookie Kit Recipe is your new best friend. These charming maple leaf-shaped cookies combine a tender, buttery base with the rich, warm flavor of pure maple syrup, all decorated with vibrant fall-inspired royal icing. It’s such a joyful baking project, especially when shared with loved ones, and yields plenty of treats to enjoy or gift. Whether you’re a seasoned baker or just looking for a fun, festive activity, this recipe wraps up that crisp fall feeling in the coziest, tastiest way possible.
Ingredients You’ll Need
Gathering your ingredients is the first exciting step, and you’ll find everything needed is simple but vital. Each item plays a role in producing the perfect cookie texture and flavor, while the decorating elements add that special seasonal flair you’ll adore.
- All-purpose flour (2 1/2 cups): The sturdy foundation that gives your cookies the right structure and softness.
- Baking powder (1/2 teaspoon): Helps create a light, tender crumb.
- Fine sea salt (1/4 teaspoon): Balances sweetness and enhances flavor depth.
- Unsalted butter, softened (1/2 cup): Adds richness and a tender crumb, so be sure it’s soft but not melted.
- Granulated sugar (1/2 cup): Sweetens the dough evenly for a classic cookie taste.
- Light brown sugar (1/4 cup, packed): Brings moisture and a hint of caramel for that warm maple vibe.
- Large egg (1): Binds ingredients and adds moisture.
- Pure maple syrup (1/3 cup): The star ingredient, infusing cookies with authentic autumn sweetness.
- Vanilla extract (1 teaspoon): Deepens overall flavor with a subtle aromatic note.
- Powdered sugar, sifted (3 cups): Essential for smooth, glossy royal icing.
- Egg whites or meringue powder & water (2 large egg whites or 4 tbsp meringue powder + 1/4 cup water): Creates that perfect icing consistency that dries firm for decorating.
- Vanilla or maple extract (1/2 teaspoon): Added to your royal icing for extra flavor.
- Food coloring in autumn shades: Red, orange, yellow, brown, and green bring the leaves to life on your cookies.
- Assorted sprinkles: Add sparkle and texture to your masterpieces.
- Edible glitter or sugar pearls: Whether subtle or dazzling, they elevate the festive feel.
- Mini chocolate chips (optional): A fun twist if you want a little chocolate element in your designs.
How to Make Maple Leaf Cookie Kit Recipe
Step 1: Combine Dry Ingredients
Start by whisking together your all-purpose flour, baking powder, and sea salt in a medium bowl. This ensures the leavening is evenly distributed, so your cookies will bake up just right.
Step 2: Cream Sugars and Butter
In a large bowl, beat the softened butter with the granulated sugar and brown sugar until the mixture is light and fluffy. This aeration is what gives your cookies that lovely tender texture.
Step 3: Incorporate Wet Ingredients
Next, add the egg, pure maple syrup, and vanilla extract to your creamed mixture. Beat everything together until thoroughly combined, infusing sweetness and moisture directly into the dough.
Step 4: Form the Dough
Gradually add the dry ingredients into the wet mixture, stirring gently until a cohesive dough forms. Avoid overmixing here to keep your cookies soft rather than tough.
Step 5: Chill Dough
Divide the dough in half and shape each portion into a disk. Wrap tightly with plastic wrap and refrigerate for at least 30 minutes. This chilling step is crucial for easier rolling and crisp edges after baking.
Step 6: Prepare Oven and Baking Sheets
While your dough chills, preheat your oven to 350°F (175°C) and line baking sheets with parchment paper to prevent sticking and promote even baking.
Step 7: Roll and Cut Shapes
On a lightly floured surface, roll out one disk of dough to about 1/4-inch thickness. Use your maple leaf cookie cutter to cut out shapes—there’s nothing like the promise of those pretty leaves starting to take form.
Step 8: Arrange Cookies
Place your cut-out cookies on the prepared baking sheets, spacing them about one inch apart to allow for gentle spreading during baking.
Step 9: Bake and Cool
Bake the cookies for 12 to 15 minutes, or until the edges turn a delicate golden brown. Let them rest on the baking sheet for 5 minutes before transferring to a wire rack to cool completely—this cooling prevents breakage and preps them for decorating.
Step 10: Prepare Royal Icing
Beat the sifted powdered sugar with your egg whites or meringue powder mixture until thick and glossy. Add vanilla or maple extract to enrich the icing’s flavor—a luscious, room-temperature icing makes all the decorating fun even better.
Step 11: Color Icing
Divide the royal icing into separate bowls and tint each with your chosen autumn food coloring—think reds, oranges, yellows, browns, and greens to mimic the glorious fall foliage.
Step 12: Decorate Cookies
Fill piping bags with your colored icing and let your creativity run wild as you pipe intricate designs onto the cooled cookies. Sprinkle with edible glitter, pearls, or sprinkles to add sparkling finishing touches.
Step 13: Set Icing
Allow the royal icing to dry completely—this could take several hours at room temperature. Proper drying ensures your decorations won’t smudge when handling or stacking your beautifully decorated maple leaves.
How to Serve Maple Leaf Cookie Kit Recipe
Garnishes
Enhance your maple leaf cookies by adding extra edible glitter or small clusters of mini chocolate chips for texture and fun. A light dusting of cinnamon or cardamom can also add a subtle spice that complements the maple flavor beautifully.
Side Dishes
Pair these cookies with a warm mug of spiced chai, pumpkin spice latte, or even a simple cup of black coffee. The warmth of these beverages contrasts delightfully with the sweet, crisp cookie, creating a cozy and comforting snack experience.
Creative Ways to Present
Display your cookies on a rustic wooden board surrounded by colorful, fallen leaves for a true autumn vibe. Alternatively, package them in clear cellophane bags tied with twine and tiny sprigs of rosemary or cinnamon sticks for charming, homemade gifts your friends and family will love.
Make Ahead and Storage
Storing Leftovers
Once your cookies are fully baked and decorated with dry icing, store them in an airtight container at room temperature. They will stay fresh for up to a week, maintaining their delightful texture and flavor for snack time enjoyment.
Freezing
If you want to get a head start, freeze the undecorated cookie dough wrapped tightly in plastic wrap and placed in a freezer bag for up to 3 months. You can also freeze fully decorated cookies in single layers separated by parchment paper, though the icing may be delicate after thawing.
Reheating
These cookies are best enjoyed as is, but if you’d like them slightly warmed, pop them in a preheated oven at 300°F for 5 minutes. Avoid microwaving, as it can soften the icing and change the cookie texture.
FAQs
Can I use something other than pure maple syrup?
While maple syrup adds a unique, rich flavor that defines this recipe, you can substitute with honey if needed. Keep in mind the taste will be different but still delicious.
Do I have to use real egg whites in the royal icing?
No, meringue powder mixed with water is a safe and convenient alternative that’s commonly used to ensure food safety and longer shelf life.
Can I make the cookie dough ahead of time?
Absolutely! Chilling the dough enhances the flavor and texture. You can even freeze it and thaw it overnight in the fridge before rolling and cutting.
What if I don’t have a maple leaf cookie cutter?
Feel free to use any leaf-shaped cutter or even get creative with other autumn shapes like acorns or pumpkins to keep with the seasonal theme.
How long does the royal icing need to dry?
To get that perfect hard finish, it usually takes several hours at room temperature, or overnight. Avoid stacking cookies until the icing is thoroughly set.
Final Thoughts
The Maple Leaf Cookie Kit Recipe is such a joy to make and share, capturing the spirit of fall in every bite. Whether you’re treating yourself, gifting friends, or creating a festive baking tradition, these cookies infuse warmth and creativity into your kitchen time. Give it a try—the delicious results and happy memories are absolutely worth it.
Print
Maple Leaf Cookie Kit Recipe
- Prep Time: 15 minutes
- Cook Time: 15 minutes
- Total Time: 45 minutes
- Yield: 24 servings
- Category: Baking
- Method: Baking
- Cuisine: American
- Diet: Vegetarian
Description
This Maple Leaf Cookie Kit recipe combines classic sugar cookies with the rich flavor of pure maple syrup, perfect for autumn celebrations. The recipe guides you through making tender maple-flavored cookies and decorating them with colorful royal icing in fall-inspired shades and festive toppings like edible glitter and sprinkles. Ideal for family baking sessions or festive gatherings, these cookies combine visual appeal and delicious taste.
Ingredients
Cookie Dough
- 2 1/2 cups all-purpose flour
- 1/2 teaspoon baking powder
- 1/4 teaspoon fine sea salt
- 1/2 cup unsalted butter, softened
- 1/2 cup granulated sugar
- 1/4 cup packed light brown sugar
- 1 large egg
- 1/3 cup pure maple syrup
- 1 teaspoon vanilla extract
Royal Icing
- 3 cups powdered sugar, sifted
- 2 large egg whites or 4 tablespoons meringue powder with 1/4 cup water
- 1/2 teaspoon vanilla or maple extract
- Food coloring in autumn shades (red, orange, yellow, brown, green)
Decorations
- Assorted sprinkles
- Edible glitter or sugar pearls
- Mini chocolate chips (optional)
Instructions
- Combine dry ingredients: In a medium bowl, whisk together the all-purpose flour, baking powder, and fine sea salt to prepare the dry mixture for the dough.
- Cream sugars and butter: In a large bowl, beat the softened unsalted butter along with granulated sugar and light brown sugar until the mixture becomes light and fluffy, ensuring a smooth base for the dough.
- Incorporate wet ingredients: Add the large egg, pure maple syrup, and vanilla extract to the creamed butter and sugars. Beat everything together until fully combined and smooth.
- Form dough: Gradually mix the dry ingredients into the wet mixture until a cohesive dough forms, ensuring there are no pockets of flour remaining.
- Chill dough: Divide the dough in half and shape each portion into a disk. Wrap them tightly in plastic wrap and refrigerate for 30 minutes to firm up for easier rolling and cutting.
- Prepare oven and baking sheets: Preheat the oven to 350°F (175°C). Line baking sheets with parchment paper to prevent sticking and ensure even baking.
- Roll and cut shapes: On a lightly floured surface, roll the chilled dough to approximately 1/4-inch thickness. Use a maple leaf cookie cutter to cut out shapes carefully.
- Arrange cookies: Place the cut-out cookies on the prepared baking sheets, spacing them about 1 inch apart to allow for slight spreading during baking.
- Bake and cool: Bake the cookies for 12 to 15 minutes until the edges turn a light golden color. Let them cool on the baking sheet for 5 minutes before transferring them to a wire rack to cool completely.
- Prepare royal icing: Beat the sifted powdered sugar with either 2 large egg whites or the prepared meringue powder mixture until the icing is thick and glossy. Stir in vanilla or maple extract for added flavor.
- Color icing: Divide the royal icing into separate bowls and tint each with food coloring in autumn-inspired shades such as red, orange, yellow, brown, and green to mimic fall foliage.
- Decorate cookies: Fill piping bags with the colored icing and pipe intricate designs onto the cooled cookies. Enhance decoration by adding assorted sprinkles, edible glitter, sugar pearls, or mini chocolate chips as desired.
- Set icing: Allow the decorated cookies ample time to dry completely before stacking or serving to prevent smudging.
Notes
- Use pure maple syrup for the best authentic flavor in the cookies.
- Ensure the butter is softened but not melted for optimal creaming results.
- Chilling the dough makes it easier to handle and cuts cleaner cookie shapes.
- If using raw egg whites in the icing, ensure they are pasteurized for food safety.
- Royal icing can be stored in an airtight container with plastic wrap touching the surface to prevent drying out.
- Allow decorated cookies to dry in a cool, dry place to set the icing properly.
- For a gluten-free version, substitute all-purpose flour with a gluten-free flour blend that measures 1:1.
