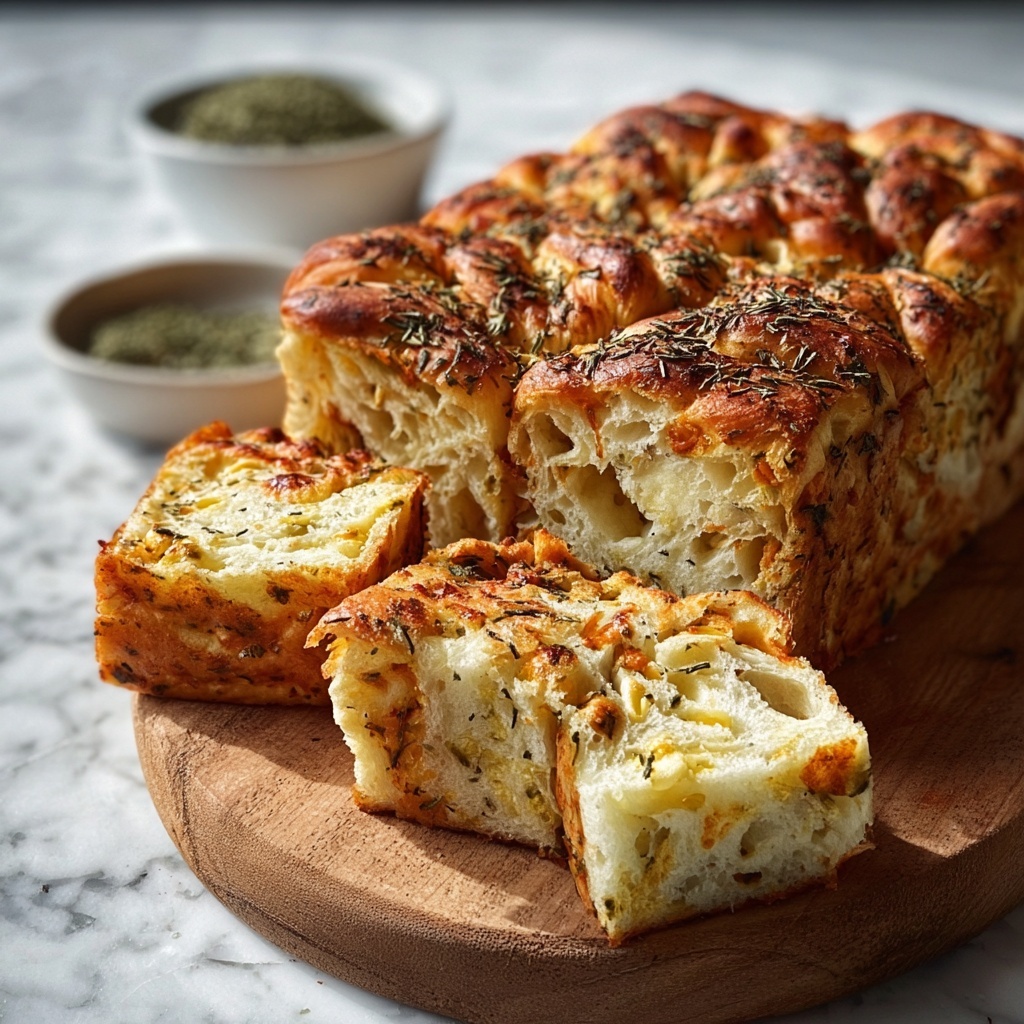
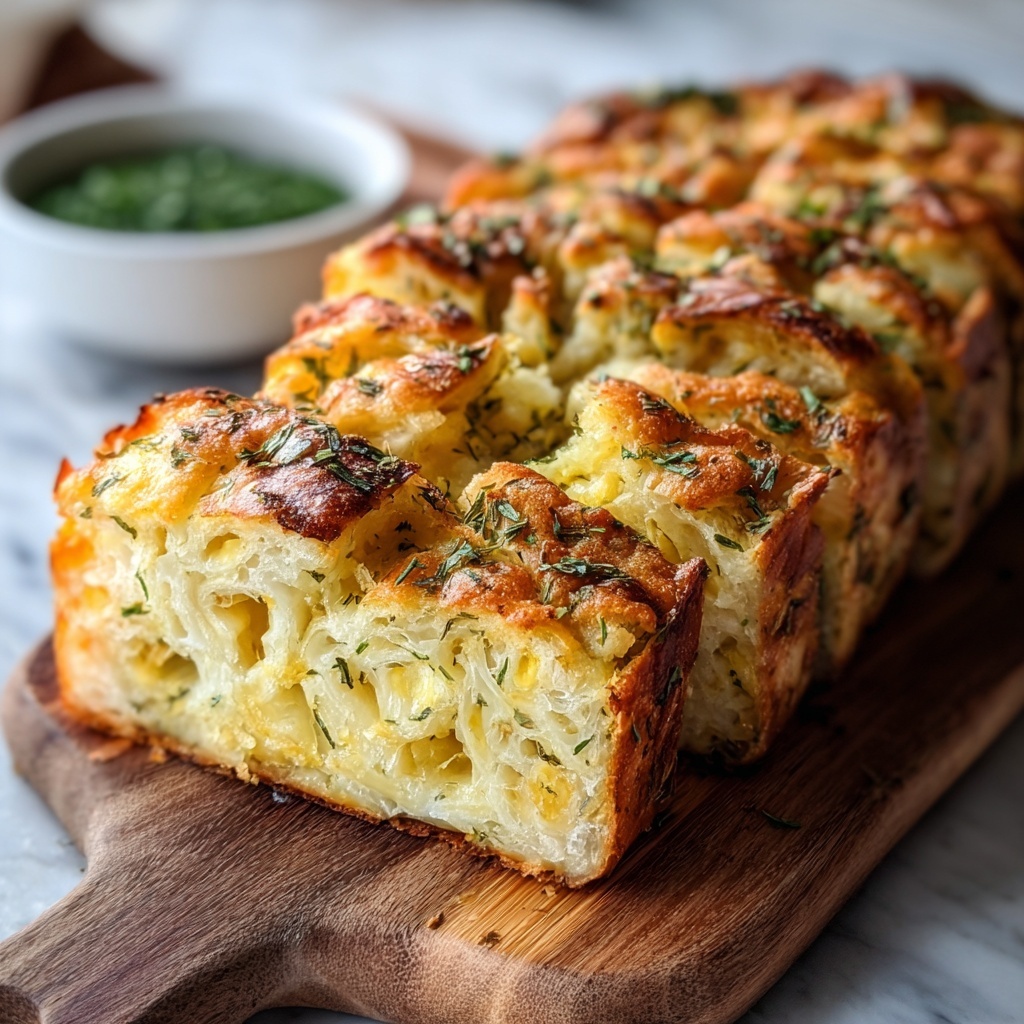
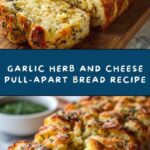
Nothing brings people together quite like warm, comforting bread fresh from the oven, and this Garlic Herb and Cheese Pull-Apart Bread Recipe is a shining star that will elevate any gathering. It’s a heavenly combination of soft, fluffy dough layered with fragrant garlic, fresh herbs, and a melty blend of Philly and tasty cheese. Each pull-apart piece bursts with flavor and gooey goodness, making it impossible to stop at just one. Whether you’re sharing it with friends or indulging in a cozy night in, this recipe is destined to become a beloved favorite in your kitchen.

Ingredients You’ll Need
This recipe uses simple yet exceptional ingredients that perfectly balance flavor and texture. Each item plays a vital role, from the plain flour creating the soft base, to the fresh herbs infusing the bread with vibrant aroma and the cheeses adding that irresistible cheesiness.
- 500g plain flour: The foundation of your bread, providing structure and softness.
- ½ tbsp dried yeast granules: Activates the dough to rise beautifully, creating airiness.
- ½ tbsp salt: Enhances the overall flavor, balancing the sweetness and richness.
- ½ tbsp sugar: Feeds the yeast and adds a subtle hint of sweetness.
- ½ tsp bread improver: Helps create a finer crumb and better rise.
- 325ml water (room temperature): Moistens the dough perfectly for kneading without stickiness.
- ½ tbsp olive oil: Adds richness and improves dough elasticity.
- 1 garlic clove, crushed: Infuses fresh, piquant flavor that hits every bite.
- ⅓ cup chopped parsley: Brings a bright, fresh note and lovely green color.
- ⅓ cup chopped basil: Adds sweet herbaceous undertones for complexity.
- ¼ cup chopped rosemary leaves: Gives a piney, aromatic punch that complements the garlic perfectly.
- 1 tbsp butter: Spreads richness and helps the herbs stick to the dough.
- 200g grated Philly and tasty cheese: Creates that mouthwatering melty texture that makes this pull-apart bread irresistible.
How to Make Garlic Herb and Cheese Pull-Apart Bread Recipe
Step 1: Prepare the Dough
Begin by combining the plain flour, dried yeast, salt, sugar, and bread improver in a large bowl. Gradually add half of the water and mix, then pour in the remaining water slowly until a rough dough ball forms. This gentle hydration kick-starts the gluten development and perfectly balances moisture.
Step 2: Knead the Dough
Turn your dough onto a floured surface and add the olive oil. Knead with love and determination until the dough becomes smooth, elastic, and just a little bit silky to the touch. If it sticks too much, sprinkle extra flour carefully to maintain softness while achieving that perfect stretchiness.
Step 3: First Rise
Return your dough ball to the bowl, cover it tightly with plastic wrap and then a tea towel to keep warmth in, creating an ideal climate for proofing. Let it rise in a cozy spot for 1 to 1.5 hours, or until it doubles in size. This rise is what gives your bread its airy character.
Step 4: Shape the Bread
Once risen, gently punch down the dough—this releases excess gas and redistributes flavor. Cut the dough in half and roll each piece into a rectangle roughly 50cm by 25cm. Spread half a tablespoon of butter over each rectangle, then sprinkle crushed garlic, fresh chopped herbs, and the wonderful cheese blend evenly across. This layering is where all the magic happens.
Step 5: Cut and Stack
Cut each rectangle into long strips matching the height of your loaf tins. Then stack these strips on top of each other before slicing into squares the width of your tins. Grease or line your loaf tins, then stack these cheese-herb squares on their sides inside. Cover and let them proof again for 30 minutes to puff up gorgeously.
Step 6: Bake the Bread
Preheat your oven to 190°C. Remove any plastic wrap and place your loaf tins in the oven. Bake for about 55 minutes, until the bread is a beautiful golden brown and the cheese has melted and bubbled enticingly. Let it cool in the tin for 10 minutes so it sets slightly, then serve warm for maximum pull-apart pleasure.
How to Serve Garlic Herb and Cheese Pull-Apart Bread Recipe
Garnishes
For an added touch of color and flavor, sprinkle freshly chopped parsley or basil on top just before serving. A drizzle of olive oil or a light brushing of melted butter over the warm bread enhances its shine and moisture, making each pull-apart piece glisten invitingly.
Side Dishes
This bread pairs beautifully with a simple salad to balance richness, or alongside a hearty soup such as tomato basil or creamy pumpkin for a cozy meal. It also shines as a standout side to grilled meats or roasted vegetables, adding comforting texture and savory notes.
Creative Ways to Present
Serve the pull-apart bread family-style in the loaf tin or arrange the individual pieces on a rustic wooden board alongside dips like garlic butter, marinara sauce, or pesto. Wrapping it in parchment paper with a sprig of rosemary makes for an adorable gift or party centerpiece.
Make Ahead and Storage
Storing Leftovers
Wrap leftover pull-apart bread tightly in foil or plastic wrap and keep it at room temperature for up to two days. To maintain freshness, reheating slightly before serving is a great idea.
Freezing
If you want to save some for later, freeze your cooled pull-apart bread wrapped securely in foil and plastic wrap. It will keep well for up to two months while preserving its flavor and texture beautifully.
Reheating
To bring your pull-apart bread back to life, warm it in an oven at 160°C for 10-15 minutes wrapped loosely in foil. This revives the soft bread and melts the cheese delightfully without drying it out.
FAQs
Can I use fresh yeast instead of dried yeast?
Yes, you can substitute fresh yeast by using more weight—typically three times the amount of dried yeast. Just crumble it into the water and dissolve before mixing with your flour.
What can I substitute for bread improver?
If you don’t have bread improver, you can omit it; your bread will still be delicious though perhaps slightly less lofty. Alternatively, a small pinch of vital wheat gluten can help with texture.
Can I add other types of cheese?
Absolutely! Feel free to experiment with mozzarella, cheddar, or even a bit of parmesan to customize your flavor and cheesiness according to your taste.
Is this recipe suitable for a dinner party?
Totally! This pull-apart bread’s wow-factor and shareability make it a crowd-pleaser perfect for impressing guests while keeping things casual and fun.
How long can I proof the dough if I want to prep in stages?
If timing requires, you can slow-proof your dough in the refrigerator overnight after the first rise. Just bring it back to room temperature before shaping and baking.
Final Thoughts
Give the Garlic Herb and Cheese Pull-Apart Bread Recipe a go and watch how this simple, flavorful loaf lifts your meals and moments. There’s something truly special about tearing into warm, cheesy bread infused with fresh herbs and garlic—it’s comfort food at its finest and sure to become a staple you reach for again and again.
Print
Garlic Herb and Cheese Pull-Apart Bread Recipe
- Prep Time: 20 minutes
- Cook Time: 1 hour
- Total Time: 1 hour 20 minutes plus 1–1.5 hours rising time and 30 minutes proofing
- Yield: 2 loaves (2 servings per loaf)
- Category: Bread
- Method: Baking
- Cuisine: Western
Description
This Garlic Herb and Cheese Pull-Apart Bread is a deliciously soft and flavorful pull-apart loaf infused with fresh herbs, roasted garlic, and a melty blend of Philly and tasty cheese. Perfect for sharing, this bread combines the irresistible aroma of garlic and herbs with cheesy goodness, baked to golden perfection for a crowd-pleasing appetizer or snack.
Ingredients
Dough
- 500g plain flour
- ½ tbsp dried yeast granules
- ½ tbsp salt
- ½ tbsp sugar
- ½ tsp bread improver
- 325ml water (room temperature)
- ½ tbsp olive oil
Filling
- 1 garlic clove, crushed
- ⅓ cup chopped parsley
- ⅓ cup chopped basil
- ¼ cup chopped rosemary leaves
- 1 tbsp butter
- 200g grated Philly and tasty cheese
Instructions
- Prepare the Dough: In a large bowl, combine plain flour, dried yeast, salt, sugar, and bread improver. Add half the room temperature water and begin mixing. Gradually add the remaining water, mixing until the ingredients come together to form a cohesive dough ball.
- Knead the Dough: Transfer the dough to a lightly floured surface. Add the olive oil and knead thoroughly until the dough is smooth and elastic, incorporating extra flour as necessary to prevent sticking.
- First Rise: Place the dough back into the bowl, cover with plastic wrap and a tea towel, and leave in a warm, draft-free area to rise for 1 to 1.5 hours or until the dough has doubled in size.
- Shape the Bread: Once risen, punch the dough down to release air. Divide dough in half and roll each half into a rectangle about 50cm by 25cm. Spread half a tablespoon of butter over each rectangle, then evenly sprinkle crushed garlic, chopped parsley, basil, rosemary, and grated Philly and tasty cheese across the surface.
- Cut and Stack: Cut each rectangle into strips matching the height of your loaf tins. Stack these strips on top of each other, then cut into squares the width of the loaf tins. Grease or line the loaf tins, arrange the squares vertically into the tins, cover, and proof for 30 minutes.
- Bake the Bread: Preheat your oven to 190°C (375°F). Remove the plastic wrap and bake the loaves for 55 minutes, or until they turn golden brown and sound hollow when tapped. Allow loaves to cool for 10 minutes in the tins before serving warm for the best pull-apart experience.
Notes
- Ensure water is at room temperature to properly activate the yeast without killing it.
- Kneading is essential for gluten development, making the bread soft and elastic.
- You can customize the herb mix to your preference or use fresh herbs for more aroma.
- Keep an eye on baking time as ovens can vary; the bread should be golden and cooked through.
- Cool the bread slightly before serving to let the cheese set but still enjoy it warm and melty.


