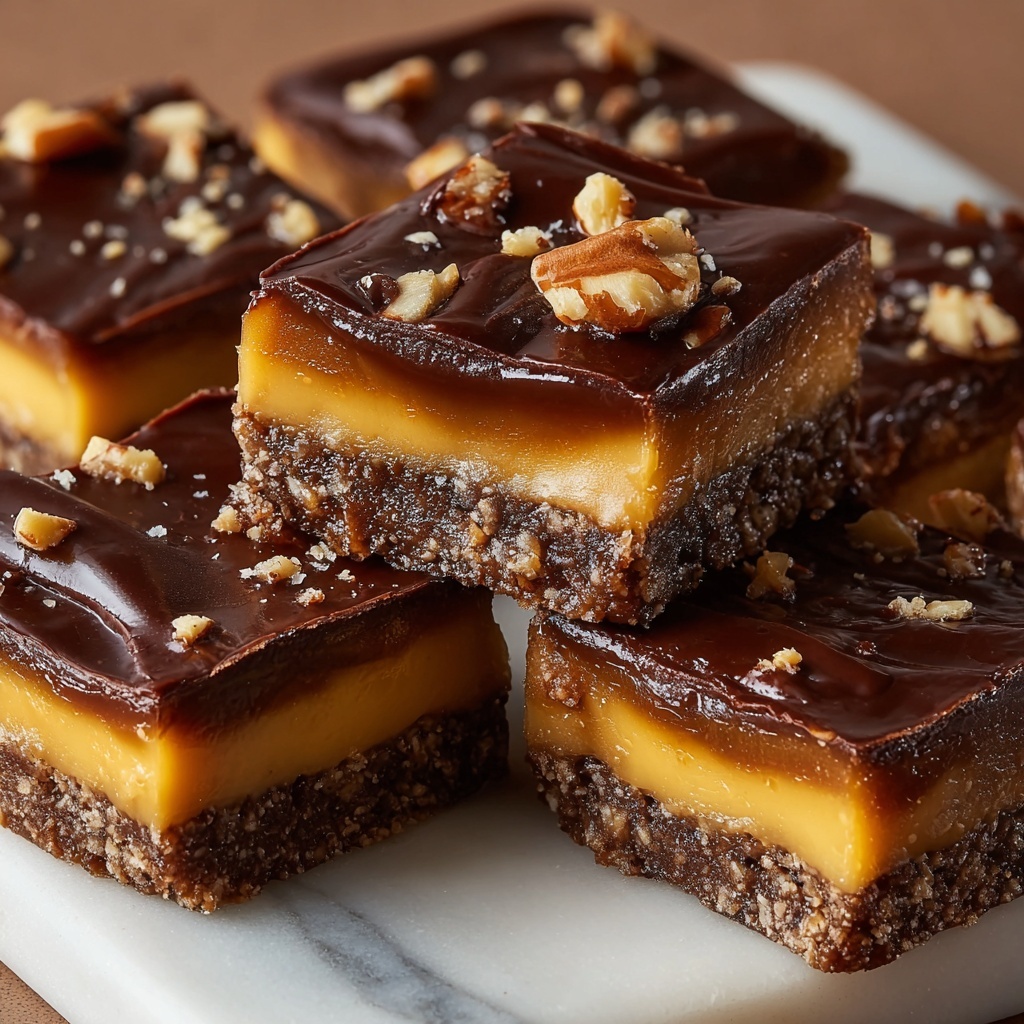
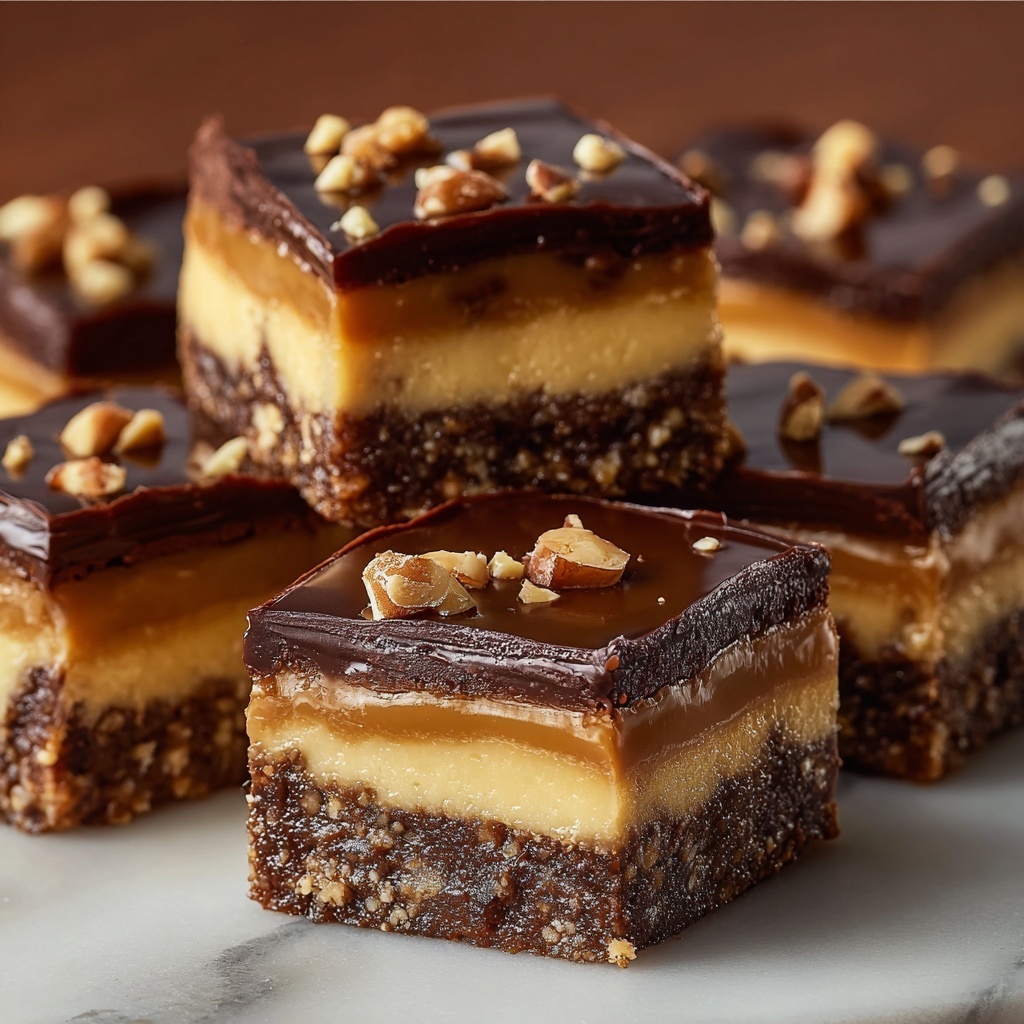
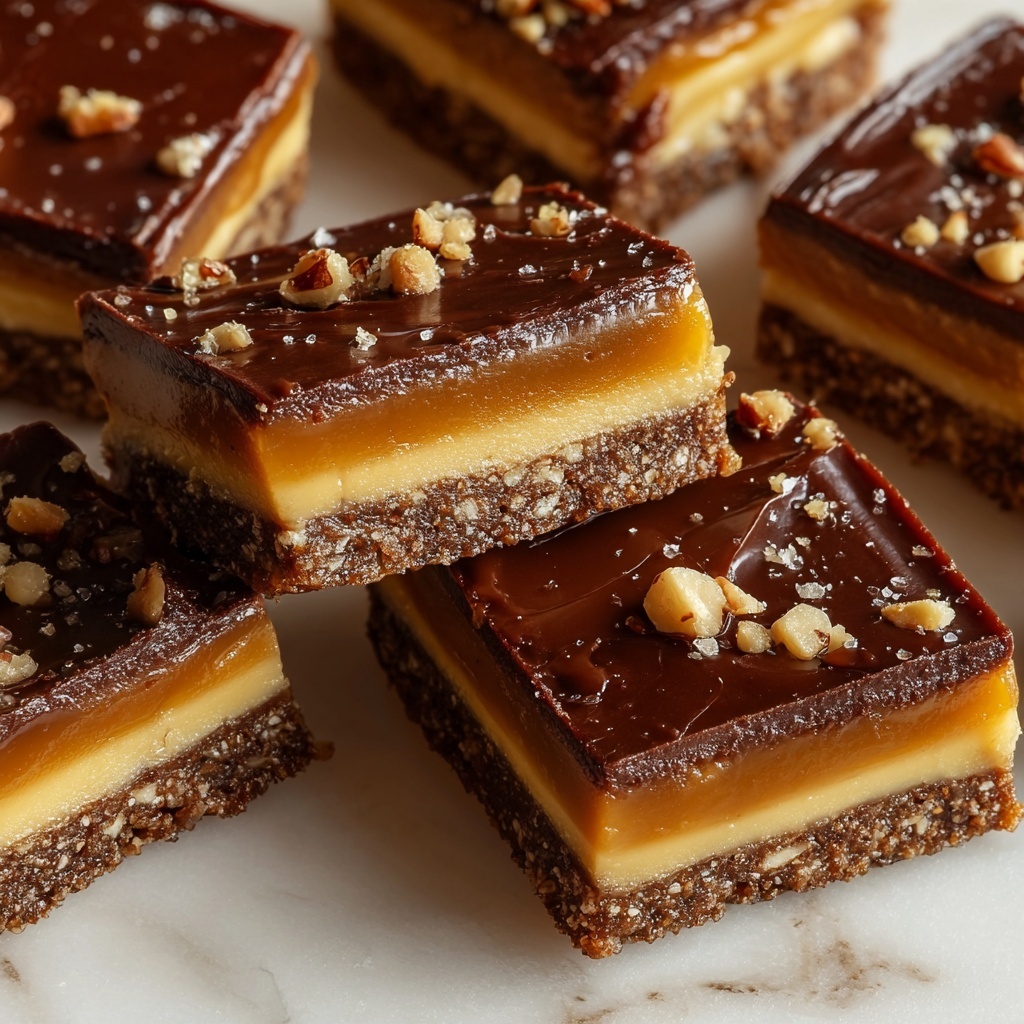
If you have a sweet tooth and a love for rich, gooey textures, then this Turtle Bars Recipe is about to become your new obsession. Picture a buttery shortbread crust hugged by a luscious caramel layer, topped with toasted pecans and melted chocolate that melts in your mouth with every bite. It’s the perfect harmony of crunchy, chewy, salty, and sweet that’s irresistibly satisfying. Whether you’re making these bars for a cozy night in or impressing guests at your next gathering, this Turtle Bars Recipe transforms simple ingredients into a decadent treat everyone will rave about.
Ingredients You’ll Need
Gathering the right ingredients is key to achieving that signature balance of flavors and textures in this Turtle Bars Recipe. Each component plays an essential role, from the rich butter creating a tender base to the nuts and chocolate adding layers of crunch and sweetness.
- All-purpose flour (2 cups): Builds the sturdy yet tender crust foundation for these bars.
- Unsalted butter, softened (1 cup + 1 cup): Provides richness and helps create both the crust and the caramel layers.
- Brown sugar, packed (1/2 cup + 1 cup): Gives a deep, molasses flavor essential for caramelizing sweetness.
- Heavy cream (1/4 cup): Adds creaminess and smoothness to the caramel section.
- Vanilla extract (1 teaspoon): Enhances all the sweet flavors with a warm, aromatic touch.
- Sea salt (1/4 teaspoon + optional 1/2 teaspoon): Brings out the sweetness and creates a wonderful contrast in flavor.
- Pecans, chopped (1 ½ cups): Gives a satisfying crunch and nutty flavor that complements the sweetness.
- Semi-sweet chocolate chips (1 ½ cups): Delivers a rich chocolate layer that melts perfectly atop the caramel and pecans.
How to Make Turtle Bars Recipe
Step 1: Preheat and Prepare
Start by heating your oven to 350°F (175°C). Grease a 9×13-inch baking pan and line it with parchment paper. This ensures your bars come out cleanly without sticking—and makes cleanup a breeze!
Step 2: Make the Crust
In a mixing bowl, combine 2 cups of all-purpose flour, 1 cup of softened unsalted butter, and 1/2 cup of packed brown sugar. Use your hands or a pastry cutter to mix until the texture is crumbly but holds together when pressed. Then, firmly press this mixture into the bottom of your prepared pan to form the crust. Bake for about 15 minutes, until it turns lightly golden. Once done, set it aside to cool.
Step 3: Prepare the Caramel Layer
While the crust is baking, place 1 cup of unsalted butter and 1 cup of packed brown sugar into a saucepan over medium heat. Stir consistently as it melts together. Then add in 1/4 cup heavy cream, 1 teaspoon vanilla extract, and 1/4 teaspoon sea salt. Bring the mixture to a gentle boil, stirring constantly for 3 to 4 minutes until it thickens slightly and becomes that perfect luscious caramel.
Step 4: Layer the Bars
Pour the hot caramel evenly over your cooled crust. Smooth it out quickly with a spatula so it spreads evenly. Immediately sprinkle the chopped 1 ½ cups pecans on top, making sure they are well distributed.
Step 5: Bake and Add Chocolate
Pop the pan back into the oven and bake for another 10 to 12 minutes. You’ll know it’s ready when the caramel is bubbling and the pecans look toasted. Remove the bars from the oven right away, then sprinkle the semi-sweet chocolate chips all over the hot caramel and nuts. Let the chocolate soften for a few minutes, then gently spread it into an even layer. This melting step adds that iconic rich chocolate finish to the bars.
Step 6: Cool and Slice
Allow your Turtle Bars to cool completely at room temperature, or pop them in the fridge to set faster. When firm, slice into squares and, if you’d like, sprinkle a pinch of sea salt on top for that final salty-sweet contrast.
How to Serve Turtle Bars Recipe
Garnishes
Adding a light sprinkle of flaky sea salt on top before serving can elevate the flavors beautifully by balancing the sweetness. For an extra indulgent touch, drizzle a bit of melted chocolate or caramel sauce on the plate. Fresh mint leaves or a dollop of whipped cream also brighten up these bars wonderfully.
Side Dishes
Turtle Bars pair delightfully with a scoop of vanilla ice cream for dessert, creating a perfect temperature and textural contrast. If you want a lighter option, serve alongside a cup of freshly brewed coffee or a creamy latte—both cut through the richness and complement the nutty, caramel notes.
Creative Ways to Present
For a special occasion, arrange these bars on a decorative platter with a handful of whole pecans and scattered chocolate chips to highlight the ingredients. You might also layer them in clear glass jars with parchment paper for thoughtful, grab-and-go gifts that show off this Turtle Bars Recipe’s irresistible layers.
Make Ahead and Storage
Storing Leftovers
Once fully cooled, you can store Turtle Bars in an airtight container at room temperature for up to 3 days. This keeps the crust crisp while the caramel and chocolate remain deliciously soft and gooey.
Freezing
These bars freeze exceptionally well. Wrap individual slices tightly in plastic wrap and place them in a freezer-safe container or bag. Freeze for up to 2 months, then thaw at room temperature before serving to enjoy the same mouthwatering texture.
Reheating
If you prefer your Turtle Bars slightly warm, microwave a single bar for about 10-15 seconds or place it briefly in a low oven. This will soften the chocolate and caramel, bringing back that irresistible gooeyness.
FAQs
Can I use nuts other than pecans in this Turtle Bars Recipe?
Absolutely! Walnuts or almonds work beautifully as substitutes if you’re not a fan of pecans or want to switch things up.
Is it necessary to line the pan with parchment paper?
While not mandatory, lining your pan with parchment paper makes removing the bars easier and prevents sticking, ensuring clean slices every time.
Can I make these bars gluten-free?
Yes, by swapping the all-purpose flour for a 1-to-1 gluten-free baking flour, you can make a version suitable for gluten-sensitive eaters.
Why do we add sea salt to the caramel layer?
The sea salt enhances the caramel’s sweetness by providing a subtle contrast, making each bite more complex and delightful.
How long do these Turtle Bars last once baked?
Stored properly, they stay fresh for about 3 days at room temperature and up to a week if refrigerated.
Final Thoughts
Making this Turtle Bars Recipe is truly a joy, both because it’s so straightforward and because the results are downright heavenly. Every layer shines on its own but comes together to create a mouthwatering, crowd-pleasing treat that’s perfect for any occasion. Trust me, once you try these bars, they’ll quickly become a beloved staple in your recipe collection. Now go ahead, bake some happiness and share the magic!
Print
Turtle Bars Recipe
- Prep Time: 15 minutes
- Cook Time: 27 minutes
- Total Time: 42 minutes
- Yield: 12 servings
- Category: Dessert
- Method: Baking
- Cuisine: American
Description
Delicious and indulgent Turtle Bars featuring a buttery crust topped with a rich caramel layer, toasted pecans, and melted semi-sweet chocolate. Perfect as a decadent dessert or sweet treat for gatherings.
Ingredients
Crust
- 2 cups all-purpose flour
- 1 cup unsalted butter, softened
- 1/2 cup brown sugar, packed
Caramel Layer
- 1 cup unsalted butter
- 1 cup brown sugar, packed
- 1/4 cup heavy cream
- 1 tsp vanilla extract
- 1/4 tsp sea salt
Toppings
- 1 ½ cups pecans, chopped
- 1 ½ cups semi-sweet chocolate chips
- 1/2 tsp sea salt (optional, for sprinkling)
Instructions
- Preheat Oven. Preheat your oven to 350°F (175°C). Grease a 9×13-inch baking pan and line it with parchment paper to prevent sticking.
- Make the Crust. In a mixing bowl, combine the flour, softened butter, and brown sugar. Mix until the mixture becomes crumbly and evenly combined.
- Press Crust. Evenly press the crumbly mixture into the bottom of the prepared baking pan to form a compact crust layer.
- Bake Crust. Bake the crust in the preheated oven for about 15 minutes or until it turns lightly golden. Remove and let it cool slightly.
- Prepare Caramel Layer. In a medium saucepan over medium heat, melt the butter and brown sugar together, stirring frequently to combine.
- Add Cream, Vanilla, and Salt. Stir in the heavy cream, vanilla extract, and sea salt to the melted butter and sugar mixture.
- Boil and Thicken. Bring the mixture to a gentle boil, stirring constantly for 3-4 minutes until it thickens slightly and takes on a caramel consistency.
- Pour Caramel. Remove the caramel from heat and immediately pour it over the baked crust, spreading it evenly with a spatula.
- Add Pecans. Sprinkle the chopped pecans evenly over the warm caramel layer.
- Bake Again. Return the baking pan to the oven and bake for an additional 10-12 minutes until the caramel bubbles and the pecans become lightly toasted.
- Add Chocolate Chips. Remove the pan from the oven and immediately sprinkle the semi-sweet chocolate chips on top of the hot caramel-pecan layer.
- Spread Melted Chocolate. Allow the chocolate chips to sit for a few minutes to soften, then gently spread the melted chocolate evenly over the surface.
- Cool Completely. Let the bars cool at room temperature or refrigerate until the chocolate and caramel layers are fully set.
- Serve. Once cooled, slice into bars and optionally sprinkle with sea salt before serving.
Notes
- Line the baking pan with parchment paper for easy removal and cleaner slices.
- Make sure to stir the caramel constantly to prevent it from burning.
- Use fresh pecans for the best texture and flavor.
- Chilling the bars can help the layers to set faster and make slicing easier.
- Optional sea salt topping adds a nice contrast to the sweetness.


