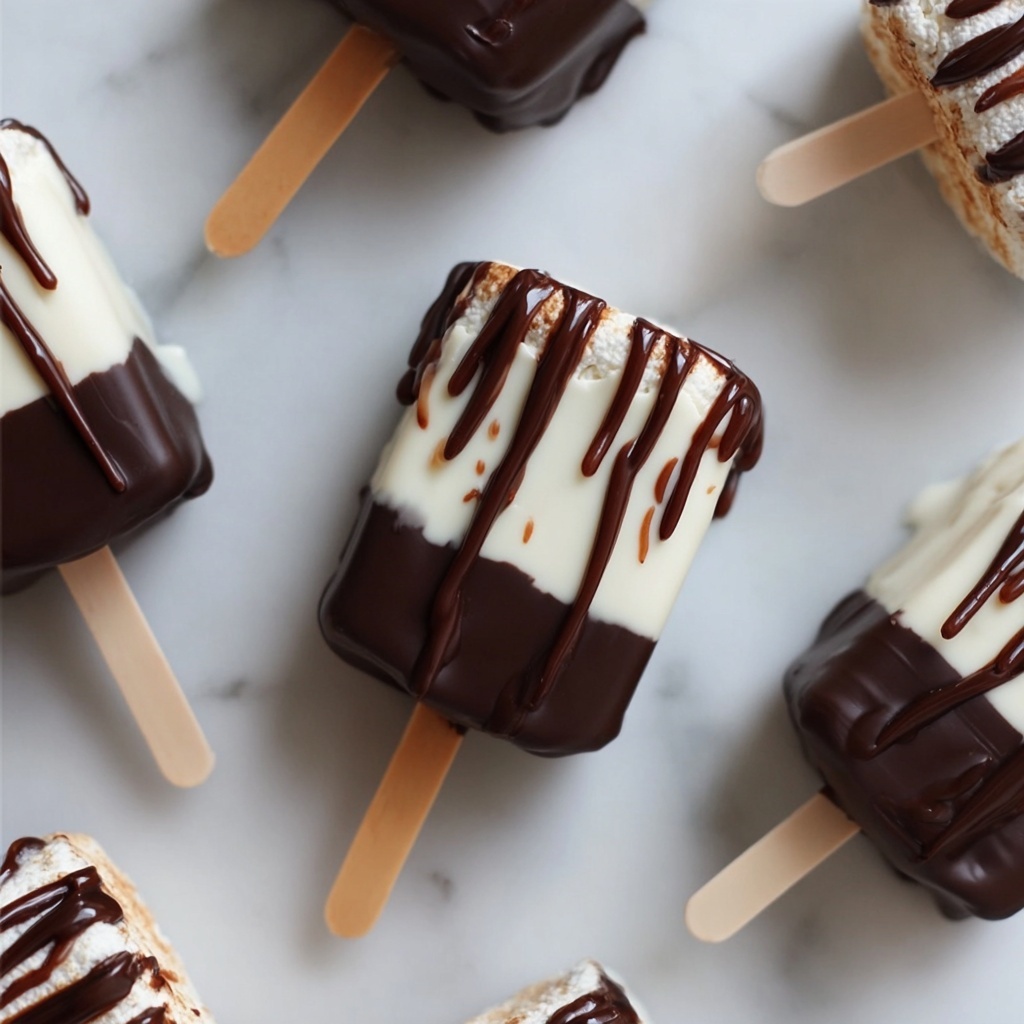
If you’re looking to add a little magic and whimsy to your treats, this Hocus Pocus Pops Recipe is an absolute must-try. Imagine fluffy marshmallows dipped in luscious milk and white chocolate, then sprinkled with shimmering edible glitter and colorful sprinkles that sparkle like tiny spells. These pops are as fun to make as they are to eat, perfect for parties, festive gatherings, or whenever you want to bring a sprinkle of enchantment to your day. Trust me, once you try this Hocus Pocus Pops Recipe, it will quickly become a favorite way to satisfy your sweet tooth with a dash of charm.
Ingredients You’ll Need
The beauty of this Hocus Pocus Pops Recipe is just how simple and straightforward the ingredients are. Each plays a crucial role in creating the perfect balance of flavor, texture, and visual delight that makes these pops so irresistible.
- 1 cup milk chocolate chips: These melt into a silky, creamy coating that brings rich sweetness and smooth texture to half the pops.
- 1 cup white chocolate chips: Offering a lovely contrast and a delicate sweetness, white chocolate is perfect for creating a lovely color and flavor variety.
- 12 large marshmallows: Soft, pillowy, and oh-so-tasty, these are the star of the show that hold all the delicious chocolate coating.
- 12 lollipop sticks: Essential for easy dipping and handling, making these treats fun to eat and perfect for parties.
- Assorted sprinkles and edible glitter: The finishing touch that adds sparkle, texture, and a magical look to each pop.
- Wax paper: To line your baking sheet and ensure your pops set beautifully without sticking.
How to Make Hocus Pocus Pops Recipe
Step 1: Prepare Your Workspace
Start by lining a baking sheet with wax paper. This simple step will ensure your marshmallow pops won’t stick once coated with the delicious chocolate. It’s a small prep that makes a big difference in cleanup and presentation.
Step 2: Insert the Sticks
Next, slide a lollipop stick into each marshmallow carefully but firmly. Having the stick firmly in place makes the dipping process a breeze and gives your pops that classic lollipop feel which is half the fun.
Step 3: Melt the Chocolates
Place the milk chocolate chips in one microwave-safe bowl and the white chocolate chips in another. Heat them separately in 30-second bursts, stirring in between to keep things smooth and lump-free. This melting method will keep your chocolate perfectly tempered, so it hardens with a glossy finish.
Step 4: Dip the Marshmallows
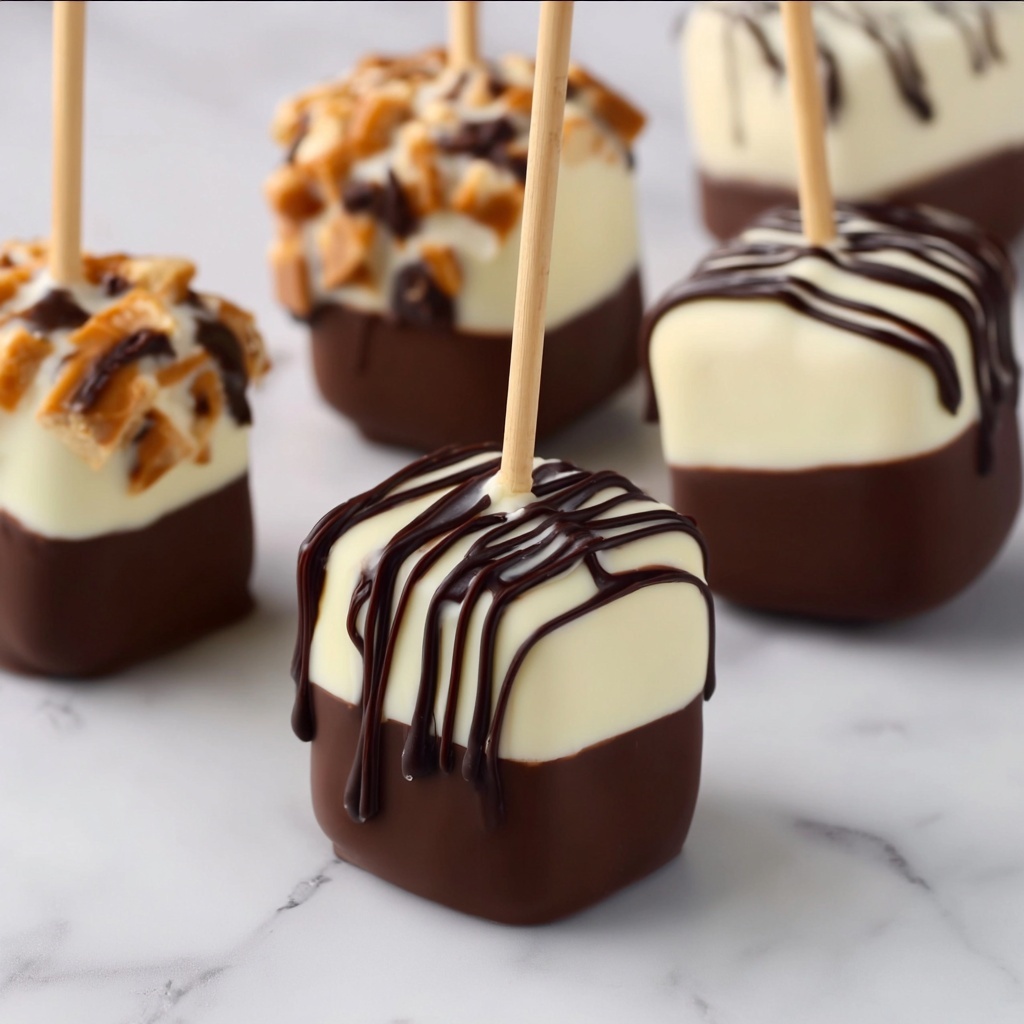
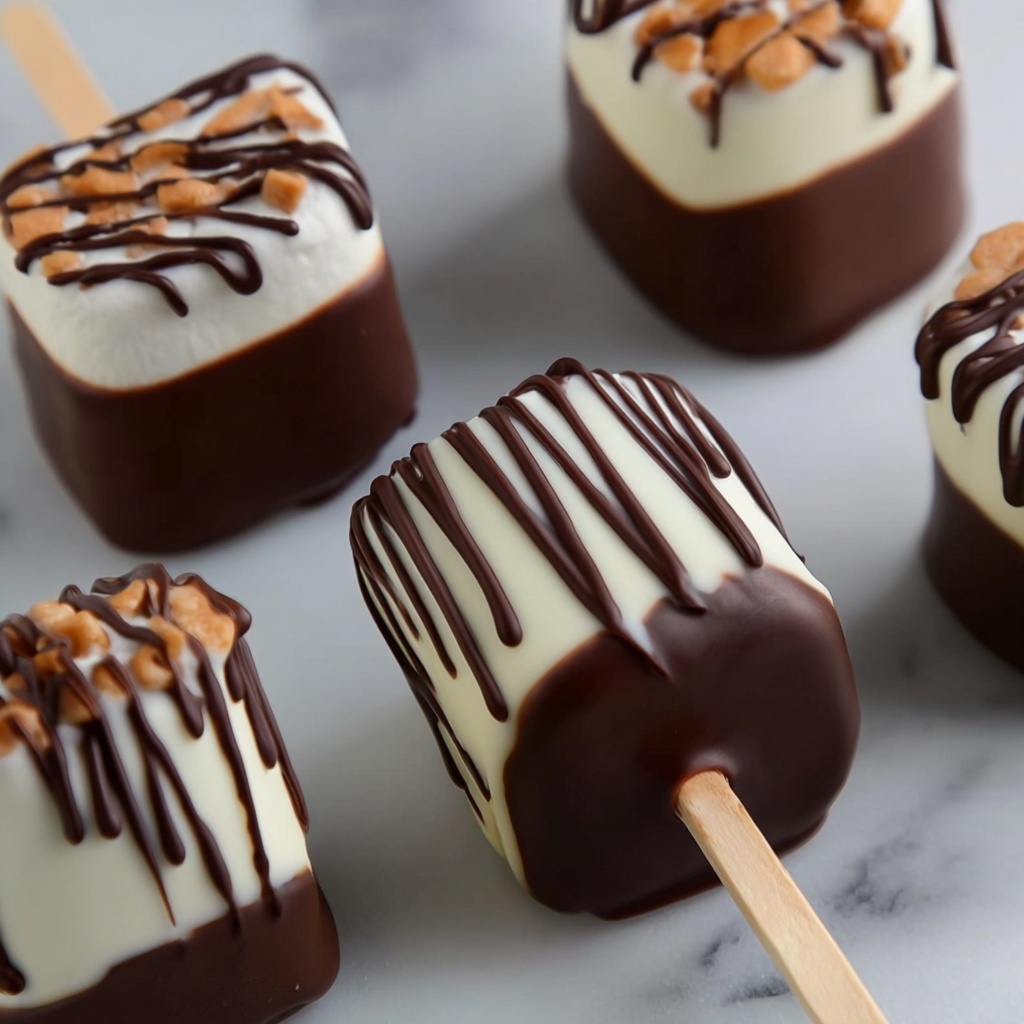
Dip half of the marshmallows into the milk chocolate, gently tapping off any excess. Place them on the wax paper-lined sheet. Repeat with the remaining marshmallows, this time dipping them into the white chocolate. This dual-chocolate approach not only tastes divine but makes your pops visually stunning too.
Step 5: Add Magical Decorations
While the chocolate is still wet, it’s time to get creative—sprinkle on your assorted sprinkles and edible glitter. This step transforms simple chocolate-coated marshmallows into enchanting treats that dazzle with every bite.
Step 6: Chill to Set
Pop your decorated marshmallow pops into the refrigerator for about 15 minutes. This allows the chocolate to harden perfectly, giving you that wonderful crisp snap and a beautiful glossy finish on each pop.
Step 7: Serve and Enjoy!
Once set, your Hocus Pocus Pops are ready to wow friends and family. Serve them up and watch as everyone’s faces light up with delight—these pops are as charming as they are delicious!
How to Serve Hocus Pocus Pops Recipe
Garnishes
While your pops are lovely straight from the fridge, adding just a few extra garnishes can elevate the experience. Consider drizzling a little contrasting chocolate over the set pops or adding tiny edible stars for an extra whimsical touch. Fresh mint leaves or a dusting of powdered sugar can also add a beautiful finishing touch.
Side Dishes
Hocus Pocus Pops pair wonderfully with light, refreshing treats like fresh fruit or a scoop of vanilla ice cream. Their sweet and rich chocolate coating makes them a perfect complement to subtly flavored sides, giving your dessert table balance and variety.
Creative Ways to Present
For parties or gifts, arrange your Hocus Pocus Pops upright in a charming jar or a decorated foam block covered with tissue paper. Wrapping each pop in cellophane tied with a ribbon adds an extra touch of care and makes your treats feel extra special and ready to gift.
Make Ahead and Storage
Storing Leftovers
If you find yourself with leftovers, no worries! Store your Hocus Pocus Pops in an airtight container at room temperature in a cool, dry place. Keep them away from direct sunlight or heat to prevent the chocolate from melting or softening.
Freezing
You can freeze these pops if you want to prepare well in advance. Place them in a single layer on a parchment-lined tray first, freeze until firm, then transfer to a sealed freezer-safe container. When you’re ready to enjoy, just thaw them in the refrigerator to avoid condensation ruining the chocolate finish.
Reheating
Since these are marshmallow and chocolate treats, reheating isn’t really necessary or recommended as it might melt the chocolate. However, if you want the marshmallow a bit softer, just let them come to room temperature for a few minutes before serving.
FAQs
Can I use dark chocolate instead of milk chocolate for the Hocus Pocus Pops Recipe?
Absolutely! Dark chocolate will give the pops a richer and slightly more intense flavor, which can be a nice twist. Just melt and dip as you would with the milk chocolate.
Are there any allergy-friendly alternatives for chocolate chips?
Yes, there are dairy-free and nut-free chocolate chips available in most stores. Look for vegan or allergy-friendly brands to keep the recipe safe for everyone.
How long do these marshmallow pops stay fresh?
When stored properly in an airtight container, your Hocus Pocus Pops should stay fresh for up to a week at room temperature, making them great for weekend parties or a fun weekday treat.
Can I add flavors to the marshmallows or chocolate?
Certainly! Adding a drop of peppermint, orange, or almond extract to the melted chocolate before dipping can add a festive flavor boost. Similarly, you can gently brush flavored liqueurs on the marshmallows for an adult version.
What’s the best way to handle the pops if they get sticky in warm weather?
Keep your pops chilled until serving time to avoid stickiness. If they do get sticky, a very light dusting of powdered sugar can help, or pop them back into the fridge to firm up again.
Final Thoughts
There’s something so joyful about creating and sharing the Hocus Pocus Pops Recipe. It’s simple, fun, and magically delicious all at once, perfect for adding celebration and sparkle to any moment. Whether you’re making these for a special event or just because, these pops are sure to bring smiles and a little sweet surprise to everyone lucky enough to try them. So go ahead and enchant your taste buds with this delightful treat—you won’t regret it!
Print
Hocus Pocus Pops Recipe
- Prep Time: 10 minutes
- Cook Time: 10 minutes
- Total Time: 20 minutes
- Yield: 12 servings
- Category: Dessert
- Method: No-Cook
- Cuisine: American
Description
Hocus Pocus Pops are whimsical marshmallow treats dipped in rich milk and white chocolate, adorned with colorful sprinkles and edible glitter. Perfect for festive gatherings or magical-themed parties, these easy-to-make pops are both delightful to look at and delicious to enjoy.
Ingredients
Chocolate
- 1 cup milk chocolate chips
- 1 cup white chocolate chips
Marshmallow Pops
- 12 large marshmallows
- 12 lollipop sticks
Decoration
- Assorted sprinkles
- Edible glitter
- Wax paper
Instructions
- Prepare the Baking Sheet: Line a baking sheet with wax paper to prevent sticking and set it aside for later use.
- Insert Lollipop Sticks: Carefully insert a lollipop stick into each marshmallow, ensuring it is secure but not through the other side. Set these aside for dipping.
- Melt Chocolate Chips: Place milk chocolate chips in one microwave-safe bowl and white chocolate chips in another. Microwave each in 30-second intervals, stirring well between each session until the chocolates are completely melted and smooth.
- Dip Marshmallows in Milk Chocolate: Dip half of the marshmallows into the melted milk chocolate, gently tapping them to remove any excess chocolate. Place the dipped marshmallows on the prepared baking sheet.
- Dip Marshmallows in White Chocolate: Repeat the dipping process with the remaining marshmallows, this time using the melted white chocolate. Place them alongside the milk chocolate dipped ones on the baking sheet.
- Decorate the Pops: Before the chocolate sets, quickly decorate each marshmallow pop with assorted sprinkles and edible glitter to add a magical touch.
- Set the Chocolate: Place the baking sheet with the decorated marshmallow pops into the refrigerator for about 15 minutes to allow the chocolate coating to harden completely.
- Serve and Enjoy: Once the chocolate has set, your Hocus Pocus Pops are ready to be served and enjoyed at your magical-themed event or party.
Notes
- Ensure the chocolate is fully melted but not overheated to prevent burning or seizing.
- You can substitute chocolate chips with candy melts for easier melting and more color options.
- Store pops in an airtight container in the refrigerator for up to 3 days for best freshness.
- Use wax paper or parchment paper to prevent sticking during the chocolate setting process.
- Feel free to experiment with different sprinkles to match various party themes or holidays.


