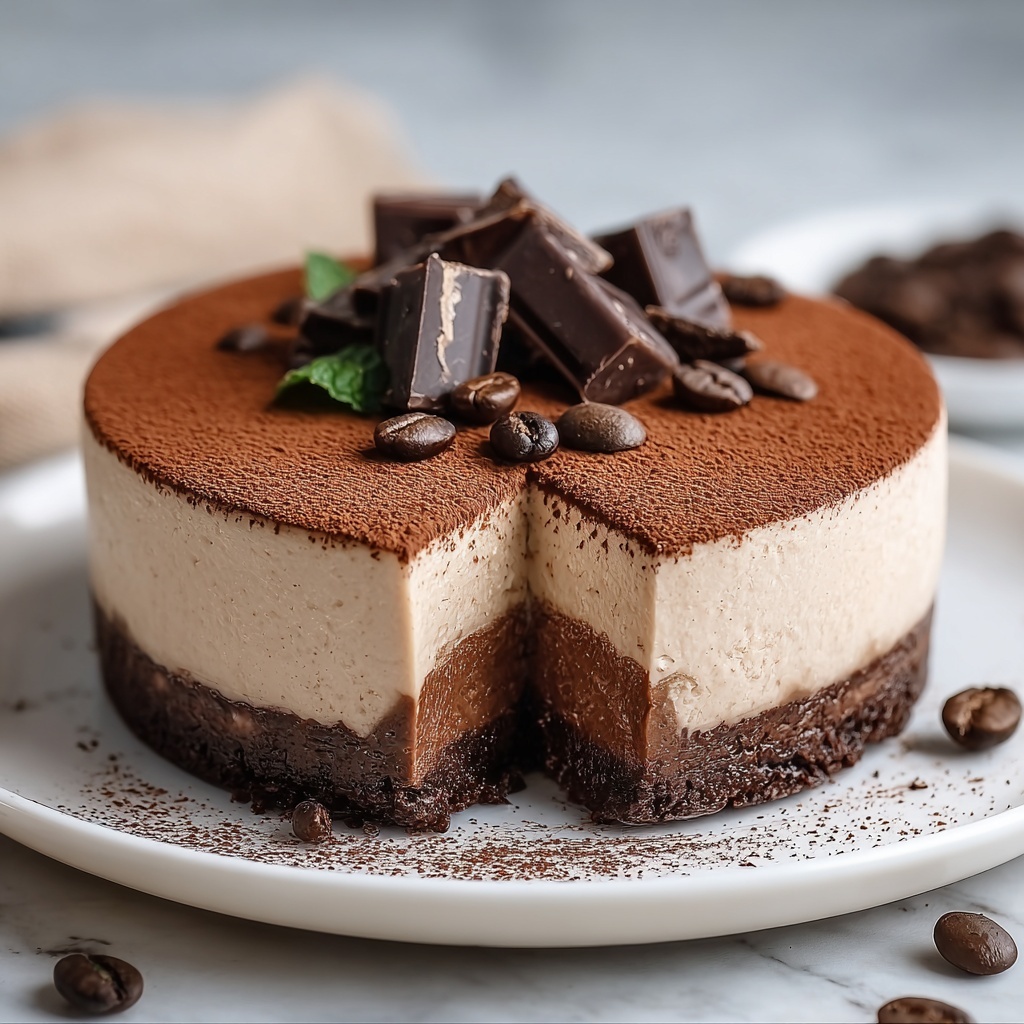
If you are a fan of rich, indulgent desserts with a bit of a kick, this Chocolate Espresso Cheesecake Recipe is going to become your new obsession. Combining the deep, bittersweet flavor of dark chocolate with the bold, aromatic essence of espresso, this cheesecake offers a luxurious texture and a perfectly balanced taste that will have everyone asking for seconds. It’s an elegant treat that’s surprisingly simple to make and is ideal for sharing with friends or savoring all to yourself on a cozy afternoon.
Ingredients You’ll Need
Every ingredient in this Chocolate Espresso Cheesecake Recipe plays an essential role in creating the perfect harmony of flavors and textures. From the crumbly biscuit base that provides a sturdy foundation to the silky cream cheese and whipped cream that create the smooth filling, these simple ingredients come together beautifully to make each bite irresistible.
- Dark chocolate with 70% cocoa solids (200 grams): This high-quality chocolate offers an intense, rich flavor that’s the star of the cheesecake.
- Espresso (60 milliliters): Adds a bold coffee flavor and enhances the chocolate’s complexity—make sure it’s cooled before mixing.
- Digestive biscuits or plain Graham crackers (200 grams): Crushed for the base, they provide a buttery, crunchy contrast to the creamy filling.
- Melted butter (100 grams): Binds the biscuit crumbs together and adds richness to the crust.
- Cream (250 milliliters): Whipped to soft peaks, it lightens the cheesecake, making it decadent without feeling heavy.
- Cream cheese (400 grams): The creamy base that gives the cheesecake its smooth texture and tangy depth.
- Castor sugar (200 grams): Sweetens the filling without overpowering the chocolate and coffee notes.
- Additional cream: For serving, adding a luscious touch on top or alongside your slices.
How to Make Chocolate Espresso Cheesecake Recipe
Step 1: Melt the Chocolate
Start by gently melting the dark chocolate using a double boiler or microwave in short bursts to avoid burning. Once fully melted and glossy, set it aside to cool. This step is crucial because melted chocolate, when too hot, can curdle the cream cheese mixture.
Step 2: Prepare the Espresso
Next, make your espresso and allow it to cool completely. The espresso infuses the cheesecake with that unmistakable coffee flavor that perfectly complements the chocolate and doesn’t overpower it.
Step 3: Prepare the Tin
Line a 22 to 23 centimeter springform cake tin with baking paper to ensure your cheesecake comes out cleanly and maintains its beautiful shape without sticking.
Step 4: Whip the Cream
Whip the cream until it just reaches soft peaks using a stand mixer or hand whisk. The light, airy texture is what gives the cheesecake its delicate, melt-in-the-mouth quality.
Step 5: Make the Biscuit Base
Process the digestive biscuits or Graham crackers into fine crumbs. Combine them with melted butter and press this mixture firmly into the base of the lined tin. Use the back of a spoon or a flat-bottomed glass to create an even, compact base that supports the creamy topping.
Step 6: Beat the Cream Cheese and Sugar
In a clean bowl, beat the cream cheese with the castor sugar until the mixture is smooth and the sugar crystals have dissolved. It’s important to get a silky texture here as it sets the foundation for your filling.
Step 7: Add Chocolate and Espresso
Slowly pour the cooled melted chocolate and espresso into the cream cheese mixture. Whip everything together until fully combined and smooth. The mixture should be rich and glossy, with the flavors harmoniously blended.
Step 8: Fold in Whipped Cream
Gently fold the whipped cream into the chocolate and cream cheese mixture. This step lightens the filling, ensuring your cheesecake is rich but not dense, creating that perfect creamy texture.
Step 9: Pour into Tin and Chill
Pour the luscious filling over the biscuit base, smoothing the top with a spatula or the back of a spoon. Refrigerate the cheesecake for several hours or overnight until it is firmly set and ready to slice.
Step 10: Decorate and Serve
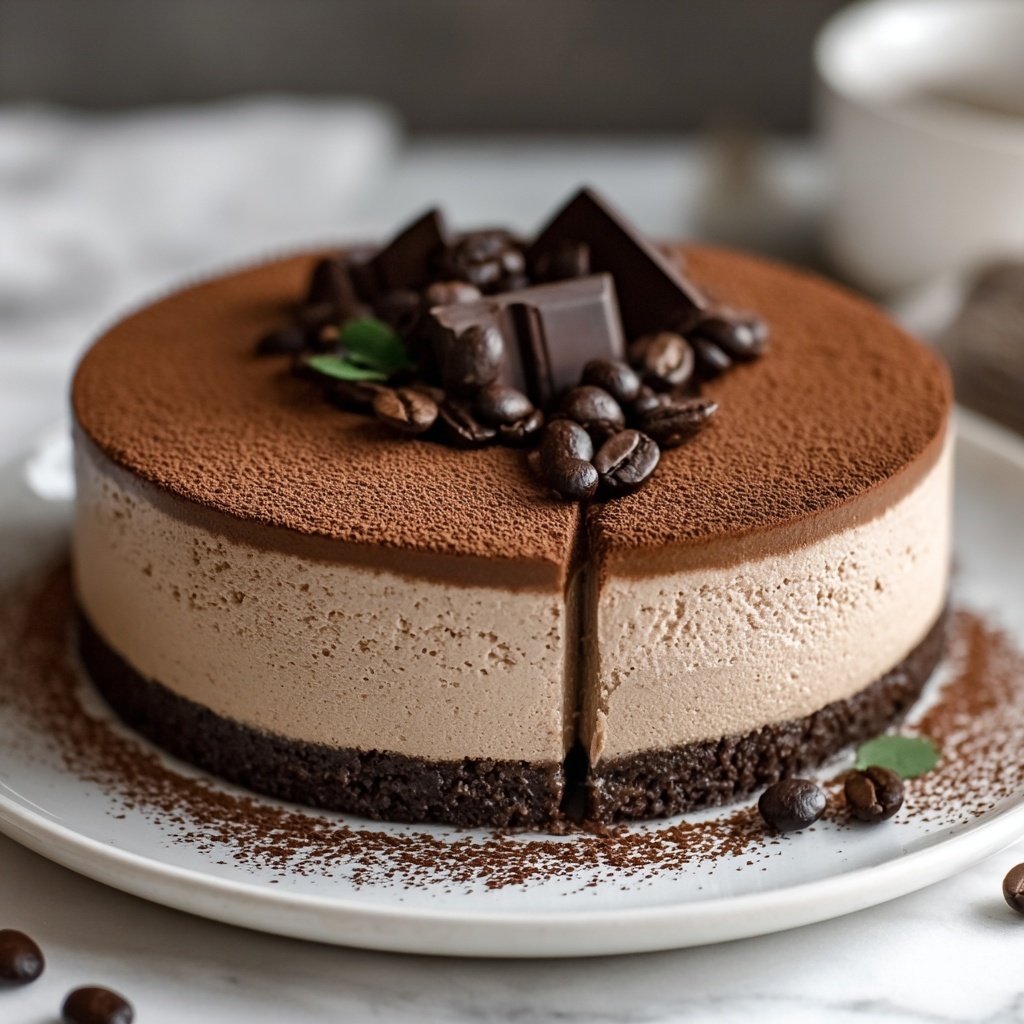
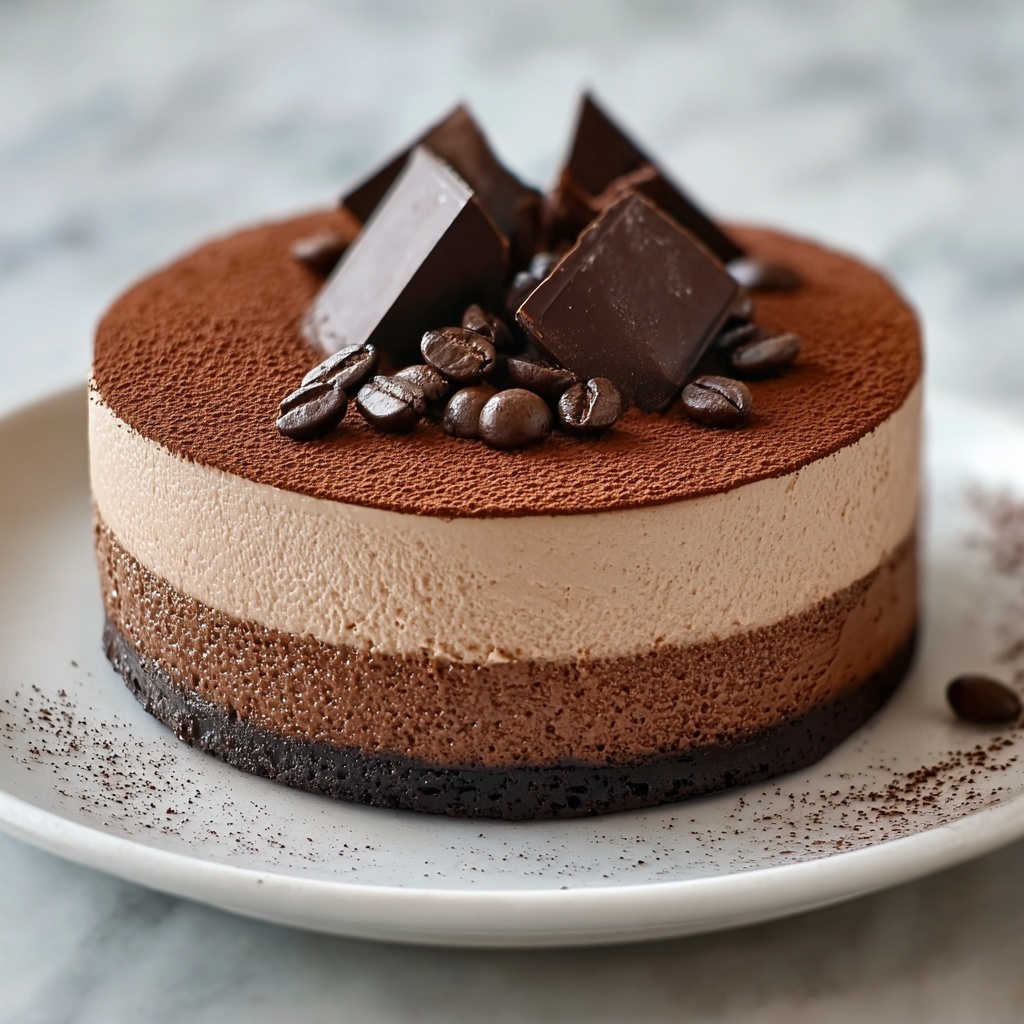
Finally, grate some extra dark chocolate over the chilled cheesecake for a decorative and delicious finish. Serve with a dollop of fresh whipped cream for the ultimate dessert experience.
How to Serve Chocolate Espresso Cheesecake Recipe
Garnishes
Simple garnishes like finely grated dark chocolate or chocolate shavings bring an elegant touch and intensify the chocolate flavor. A light dusting of cocoa powder or a few espresso beans placed artfully on top can also elevate the presentation and hint at what’s inside.
Side Dishes
A scoop of vanilla bean ice cream or a drizzle of salted caramel sauce makes a fantastic side. Fresh berries, particularly raspberries or strawberries, add a refreshing contrast and a pop of color that balances the richness beautifully.
Creative Ways to Present
For a stunning party centerpiece, serve individual cheesecake portions in clear glasses layered with crushed biscuits and topped with whipped cream and chocolate curls. Alternatively, place mini espresso cups alongside each slice to enhance the coffee theme and impress your guests.
Make Ahead and Storage
Storing Leftovers
This cheesecake keeps wonderfully in the fridge for up to 4 days when stored in an airtight container. Keeping it chilled ensures the texture stays creamy and firm, making it easy to slice and enjoy later.
Freezing
If you want to prepare ahead of time, the Chocolate Espresso Cheesecake Recipe freezes well. Wrap it tightly in plastic wrap and foil, then freeze for up to 2 months. Thaw overnight in the fridge before serving for the best results.
Reheating
As a chilled dessert, this cheesecake is best served cold or at room temperature. Avoid reheating as it will compromise the texture. Just take it out of the fridge about 15 minutes before serving so the flavors can fully shine.
FAQs
Can I use instant coffee instead of espresso?
Yes, a strong brewed instant coffee can be a convenient substitute. Just make sure it’s cooled down before mixing in, so it doesn’t affect the cheesecake’s texture.
How do I prevent cracks on the cheesecake surface?
This no-bake cheesecake is less prone to cracking than baked versions, but to maintain a smooth top, be gentle when folding in the whipped cream and smooth the surface carefully before chilling.
Can I use milk chocolate instead of dark chocolate?
You can, but dark chocolate’s richness and slight bitterness really balance the espresso’s boldness perfectly. Milk chocolate will create a sweeter cheesecake and might overpower the coffee notes.
Is this recipe gluten-free?
Not as written, because the biscuit base contains gluten. To make it gluten-free, substitute the digestive biscuits for gluten-free cookies or nut-based crust alternatives.
How long does the cheesecake take to set?
It’s best to refrigerate the cheesecake for at least 4 hours, but overnight chilling is ideal for the filling to firm up completely and develop its full flavor.
Final Thoughts
You truly can’t go wrong with this Chocolate Espresso Cheesecake Recipe if you want a dessert that’s both indulgent and sophisticated but still surprisingly approachable to make. It’s a guaranteed crowd-pleaser that brings warmth and joy with every bite. So, gather these simple ingredients, follow these easy steps, and treat yourself and your loved ones to something truly special today!
Print
Chocolate Espresso Cheesecake Recipe
- Prep Time: 25 minutes
- Cook Time: 0 minutes
- Total Time: 6 hours 25 minutes
- Yield: 8 servings
- Category: Dessert
- Method: No-Cook
- Cuisine: International
- Diet: Vegetarian
Description
This rich and indulgent Chocolate Espresso Cheesecake combines the bold flavors of dark chocolate and robust espresso for a sophisticated dessert. Featuring a crunchy biscuit base and a creamy, luscious filling whipped to perfection, this no-bake cheesecake is perfect for chocolate lovers looking to impress at gatherings or enjoy a decadent treat at home.
Ingredients
Base
- 200 grams digestive biscuits or plain Graham crackers
- 100 grams melted butter
Filling
- 200 grams dark chocolate with 70% cocoa solids (plus extra for decorating)
- 60 milliliters espresso, allowed to cool
- 250 milliliters (1 cup) cream
- 400 grams cream cheese
- 200 grams castor sugar
To Serve
- Additional cream (whipped)
- Extra grated dark chocolate for decoration
Instructions
- Melt the chocolate: Gently melt the dark chocolate using a double boiler or microwave. Stir occasionally until smooth, then set aside to cool to room temperature.
- Make the espresso: Prepare 60 milliliters of espresso using your preferred method and allow it to cool completely before use.
- Prepare the tin: Line a 22-23 centimeter springform cake tin with baking paper, ensuring the base and sides are covered to prevent sticking.
- Whip the cream: Using a stand mixer fitted with the whisk attachment, whip 250 milliliters of cream until soft peaks form. Transfer the whipped cream to a separate bowl and set aside.
- Make the biscuit base: Grind the digestive biscuits in a food processor until fine crumbs form. Combine the biscuit crumbs with the melted butter and mix thoroughly. Press this mixture evenly into the base of the prepared tin using the back of a spoon. Chill the base if desired to firm it slightly.
- Beat the cream cheese and sugar: In a large mixing bowl, beat 400 grams of cream cheese and 200 grams of castor sugar together until the sugar has completely dissolved and the mixture is smooth.
- Add chocolate and espresso: Slowly add the cooled melted chocolate and espresso to the cream cheese mixture. Whip together until fully combined and smooth.
- Fold in whipped cream: Gently fold the previously whipped cream into the chocolate mixture, being careful not to deflate the airy texture.
- Pour into tin: Transfer the final filling onto the biscuit base in the springform tin. Smooth out the surface evenly with a spatula.
- Chill until set: Refrigerate the cheesecake for several hours, ideally overnight, until the filling is firm and set.
- Decorate and serve: Before serving, decorate the top with freshly grated dark chocolate and serve with additional whipped cream on the side for an extra creamy touch.
Notes
- Use high-quality dark chocolate with at least 70% cocoa for the best flavor intensity.
- Allow all ingredients, especially the cream cheese and melted chocolate, to come to room temperature to ensure smooth mixing.
- The espresso adds a subtle bitterness that complements the sweetness and richness of the chocolate.
- For a firmer base, chill the biscuit crust for 15-20 minutes before adding the filling.
- This cheesecake is best served chilled but can be brought to room temperature for 10-15 minutes before serving for a creamier texture.
- Store leftovers covered in the fridge and consume within 3 days for optimal freshness.


