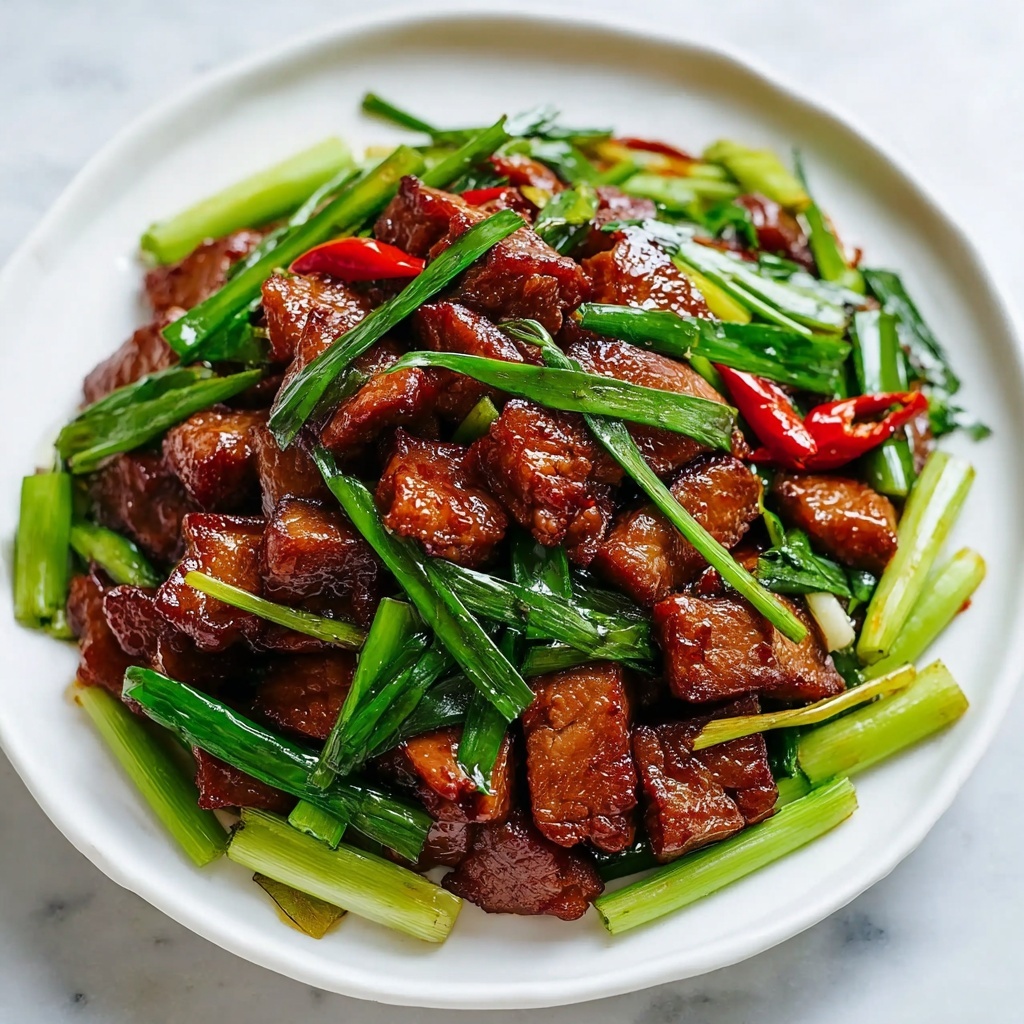
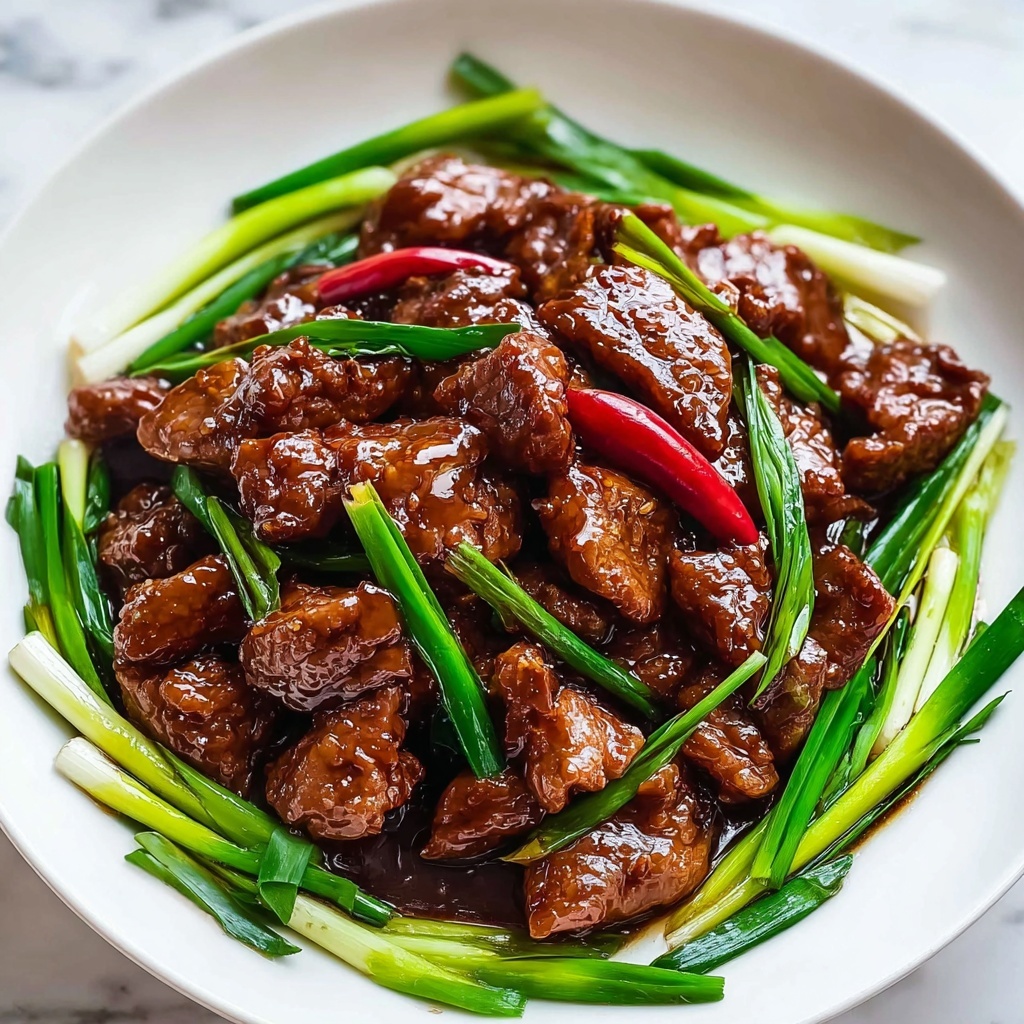
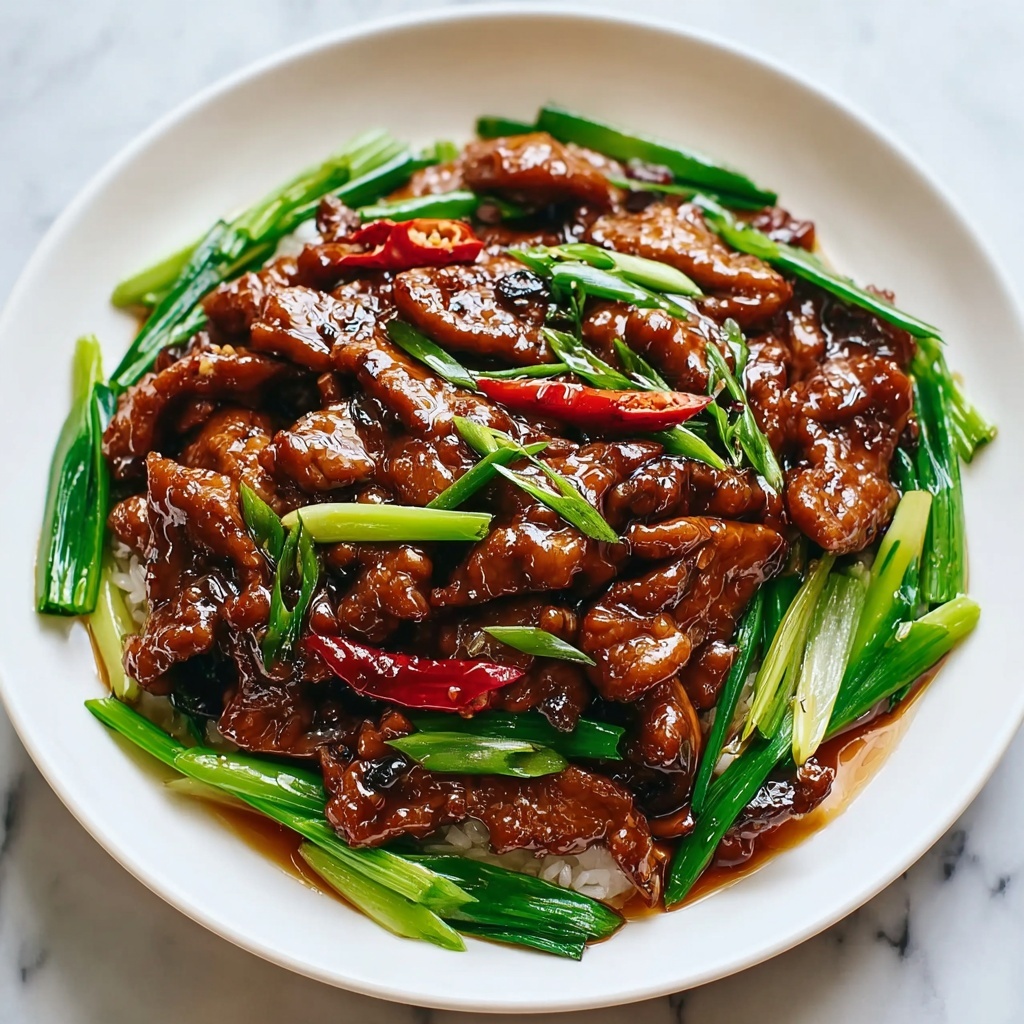
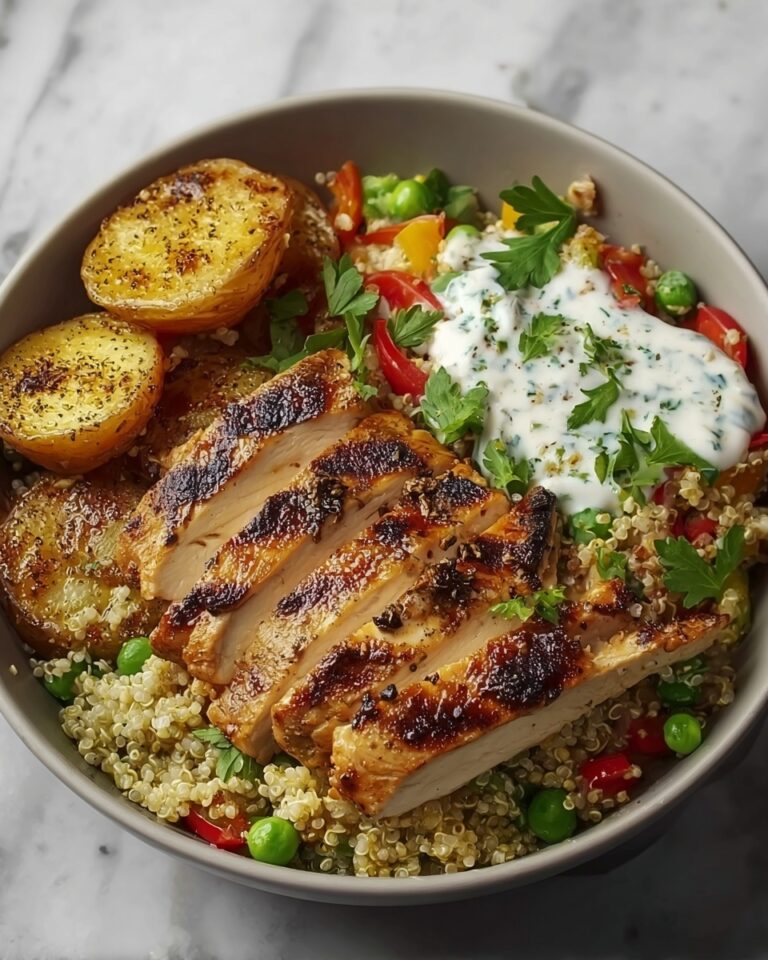
If you’re craving a dish that perfectly balances sweet, savory, and a little bit of heat, you’re going to adore this Mongolian Chicken Recipe. It’s a stunning yet simple recipe that transforms tender, juicy chicken thighs into crispy bites coated with a luscious, sticky sauce full of ginger, garlic, and that signature molasses-rich hoisin flavor. Whether you want a show-stopping weeknight dinner or a crowd-pleasing dish for guests, this Mongolian Chicken Recipe never fails to bring comforting satisfaction with every bite.
Ingredients You’ll Need
Getting this Mongolian Chicken Recipe right starts with a handful of straightforward ingredients that each play a vital role: from the crispy texture of coated chicken to the deep umami of the sauce. Here’s what you’ll need to bring it all together.
- 2 lb skinless, boneless chicken thighs: Tender and juicy, they soak up the sauce beautifully and stay moist when fried.
- 1/2 cup cornstarch: Essential for creating the perfect crispy coating that locks in juices.
- 2/3 cup vegetable oil: A neutral oil ideal for frying without overpowering flavors.
- 4 cloves garlic, minced: Adds aromatic warmth and depth.
- 2 red chili peppers, sliced (optional): For that subtle kick of heat that wakes up the palate.
- 10 slices ginger: Fresh slices add brightness and a peppery zing.
- 8 tablespoons hoisin sauce: The star ingredient delivering sweet and tangy complexity.
- 4 tablespoons regular soy sauce: Balances the sweetness with umami saltiness.
- 4 tablespoons brown sugar: Brings a caramelized sweetness that thickens the sauce beautifully.
- 4 teaspoons sesame oil: Adds a toasty, nutty aroma that finishes the dish.
- 2 tablespoons cornstarch (for slurry): Mixed with water to thicken the sauce into a glossy glaze.
- 1 cup water: Used with cornstarch to make the slurry for the sauce’s perfect texture.
- 2 green onions, finely chopped: Adds a fresh, crisp bite as a garnish.
How to Make Mongolian Chicken Recipe
Step 1: Make the cornstarch slurry
Start by mixing 2 tablespoons of cornstarch with 1 cup of water in a small bowl until smooth. This slurry is the secret to thickening your sauce and giving it that beautiful glossy finish.
Step 2: Prepare the chicken
Dice your chicken thighs into bite-sized chunks, about 1.5 inches each. Resist the temptation to dry them off—the moisture helps the cornstarch stick perfectly, ensuring a crisp exterior after frying.
Step 3: Coat the chicken
Pop the chicken pieces into a large bowl and toss them with ½ cup cornstarch until every piece is evenly coated. Don’t hesitate to add a bit more cornstarch if you think a piece isn’t fully covered. This step is what makes the chicken irresistibly crispy.
Step 4: Cook the chicken
Heat your vegetable oil in a pan over medium-high heat and fry the chicken in batches. Turn them gently until they’re golden brown on all sides, usually about 6 to 8 minutes per batch. If you prefer to air fry, spray the basket lightly with oil, arrange the chicken in a single layer, spray the top lightly, and air fry at 400°F for 10 to 14 minutes, shaking the basket halfway for even cooking. Once done, drain the chicken on paper towels or a wire rack to keep it crisp.
Step 5: Make the sauce
Reduce your pan heat to medium and toss in the ginger slices, minced garlic, and sliced red chili peppers if you want that spicy punch. Sauté just long enough, about 10 seconds, until everything smells aromatic but not burnt.
Step 6: Combine the sauce ingredients
Now add the hoisin sauce, soy sauce, brown sugar, and sesame oil. Stir together until evenly mixed. Give your cornstarch slurry a quick stir and pour it into the pan. Keep stirring continuously as the sauce thickens into a silky, glossy coating that will cling beautifully to your chicken.
Step 7: Combine chicken and sauce
Return the crispy chicken to the pan and toss to coat every piece generously with the rich sauce. Once everything looks shiny and irresistible, remove the pan from heat to avoid overcooking the chicken.
Step 8: Serve
Transfer your Mongolian chicken to a beautiful serving dish, sprinkle with chopped green onions and extra sliced red chili underneath if you like it fiery. Serve hot over fluffy steamed rice or noodles and dive into the deliciousness.
How to Serve Mongolian Chicken Recipe
Garnishes
Fresh green onions are a must—they add crunch and a burst of color that brightens the dish. Thinly sliced red chili peppers add a spicy contrast and vibrant red tones that make the dish as lovely to look at as it is to eat.
Side Dishes
This Mongolian Chicken Recipe is incredibly versatile when it comes to sides. Steamed jasmine or basmati rice is a classic choice that soaks up the sauce perfectly. You could also try it with stir-fried noodles or alongside lightly sautéed vegetables like bok choy or snap peas.
Creative Ways to Present
For a fun twist, serve your Mongolian Chicken Recipe in lettuce cups for a fresh, hand-held appetizer or pile it over cauliflower rice for a lighter, low-carb option. A sprinkle of toasted sesame seeds can add a nice crunch and nutty hint as well.
Make Ahead and Storage
Storing Leftovers
Place any leftover Mongolian Chicken in an airtight container and refrigerate. The flavors actually deepen after a day, so leftovers can taste even better. Store for up to 3 days for the best quality and freshness.
Freezing
You can freeze the cooked chicken and sauce together in a freezer-safe container or bag for up to 2 months. Be sure to cool it completely before freezing. When you thaw it, the texture might be slightly softer than fresh, but the flavorful sauce remains delicious.
Reheating
Reheat leftovers gently in a skillet over medium heat to preserve the crispiness of your chicken and reawaken the sauce’s vibrancy. Avoid microwaving, if possible, as it can make the chicken soggy.
FAQs
Can I use chicken breasts instead of thighs?
Yes, chicken breasts work too! However, thighs stay juicier and tend to be more forgiving when frying, so they’re preferred for keeping moist texture and flavor.
Is there a vegetarian version of Mongolian Chicken Recipe?
Absolutely! You can swap the chicken for tofu or seitan. Coat and cook them similarly, and the sauce works wonderfully with those plant-based protein options.
What can I substitute for hoisin sauce?
If you don’t have hoisin, try mixing soy sauce with a bit of honey, garlic, and five-spice powder to mimic its sweet and savory profile.
How spicy is this dish?
The traditional recipe is mildly spicy and you can adjust the sliced red chili peppers to fit your heat preference—or omit them entirely for a milder dish.
Can I make this recipe gluten-free?
Yes! Use gluten-free soy sauce (tamari works great) and ensure your hoisin sauce is gluten-free or substitute with a mix of miso paste and gluten-free soy sauce.
Final Thoughts
This Mongolian Chicken Recipe is truly a delightful home-cooked treasure that feels both special and approachable. Once you try it, you’ll love how easy it is to whip up a restaurant-quality meal packed with bold flavors right in your own kitchen. Go ahead, give it a whirl, and get ready for everyone to ask for seconds!
Print
Mongolian Chicken Recipe
- Prep Time: 10 minutes
- Cook Time: 15 minutes
- Total Time: 25 minutes
- Yield: 6 servings
- Category: Main Course
- Method: Frying
- Cuisine: Chinese
Description
This Mongolian Chicken recipe features crispy, golden chicken thighs coated in a savory, sweet hoisin and soy-based sauce with ginger, garlic, and a hint of chili heat. Perfectly cooked on the stovetop or air fryer, this dish is quick to prepare and delivers vibrant flavors ideal for a satisfying weeknight dinner.
Ingredients
Chicken and Coating
- 2 lb skinless, boneless chicken thighs
- 1/2 cup cornstarch (or as needed, or substitute with potato starch)
- 2/3 cup vegetable oil (or any neutral oil)
Sauce
- 4 cloves garlic, minced
- 2 red chili peppers, sliced (optional)
- 10 slices ginger
- 8 tablespoons hoisin sauce
- 4 tablespoons regular soy sauce
- 4 tablespoons brown sugar
- 4 teaspoons sesame oil
Cornstarch Slurry
- 2 tablespoons cornstarch (or substitute with potato starch)
- 1 cup water
Garnish
- 2 green onions, finely chopped
- 2 red chili peppers, sliced
Instructions
- Make the cornstarch slurry: In a small bowl, mix 2 tablespoons of cornstarch with 1 cup of water until smooth. Set this mixture aside to be used later for thickening the sauce.
- Prepare the chicken: Dice the chicken thighs into 1.5-inch pieces, approximately 4 to 6 pieces per thigh. Do not pat dry, as the moisture helps the cornstarch adhere better.
- Coat the chicken: In a large mixing bowl, toss the diced chicken with 1/2 cup cornstarch until all pieces are evenly coated. Add more cornstarch if needed to ensure thorough coating.
- Cook the chicken: For stovetop cooking, heat the vegetable oil in a large pan or wok over medium-high heat. Fry the chicken pieces in batches for 6 to 8 minutes until golden brown on all sides. Drain excess oil on a wire rack or paper towel-lined plate. Alternatively, for air frying, lightly spray the air fryer basket with oil, arrange the coated chicken in a single layer without overlapping, spray lightly with oil, and air fry at 400°F for 10 to 14 minutes, shaking the basket halfway through for even cooking.
- Make the sauce: Reduce heat to medium in the same pan after stovetop frying. Add ginger slices, minced garlic, and sliced red chili peppers if using. Sauté for about 10 seconds until fragrant.
- Combine the sauce ingredients: Add hoisin sauce, soy sauce, brown sugar, and sesame oil to the pan. Stir altogether. Remix the cornstarch slurry, then pour it into the pan. Stir continuously until the sauce thickens and becomes smooth and glossy.
- Combine chicken and sauce: Add the cooked chicken back to the pan with the sauce and toss well to coat every piece evenly. Remove from heat once combined.
- Serve: Transfer the sauced chicken to a serving dish. Garnish with finely chopped green onions and extra sliced red chili peppers if desired. Serve hot over steamed rice or noodles for a flavorful meal.
Notes
- Moisture on the chicken helps the cornstarch adhere better for a crisp coating.
- You can substitute potato starch for cornstarch if preferred.
- Adjust chili peppers according to your spice tolerance or omit for a milder dish.
- If using the air fryer, avoid overcrowding to ensure even cooking and crispiness.
- Leftovers can be stored in an airtight container in the refrigerator for up to 3 days.
- Serve with steamed rice or noodles to complement the flavorful sauce.


