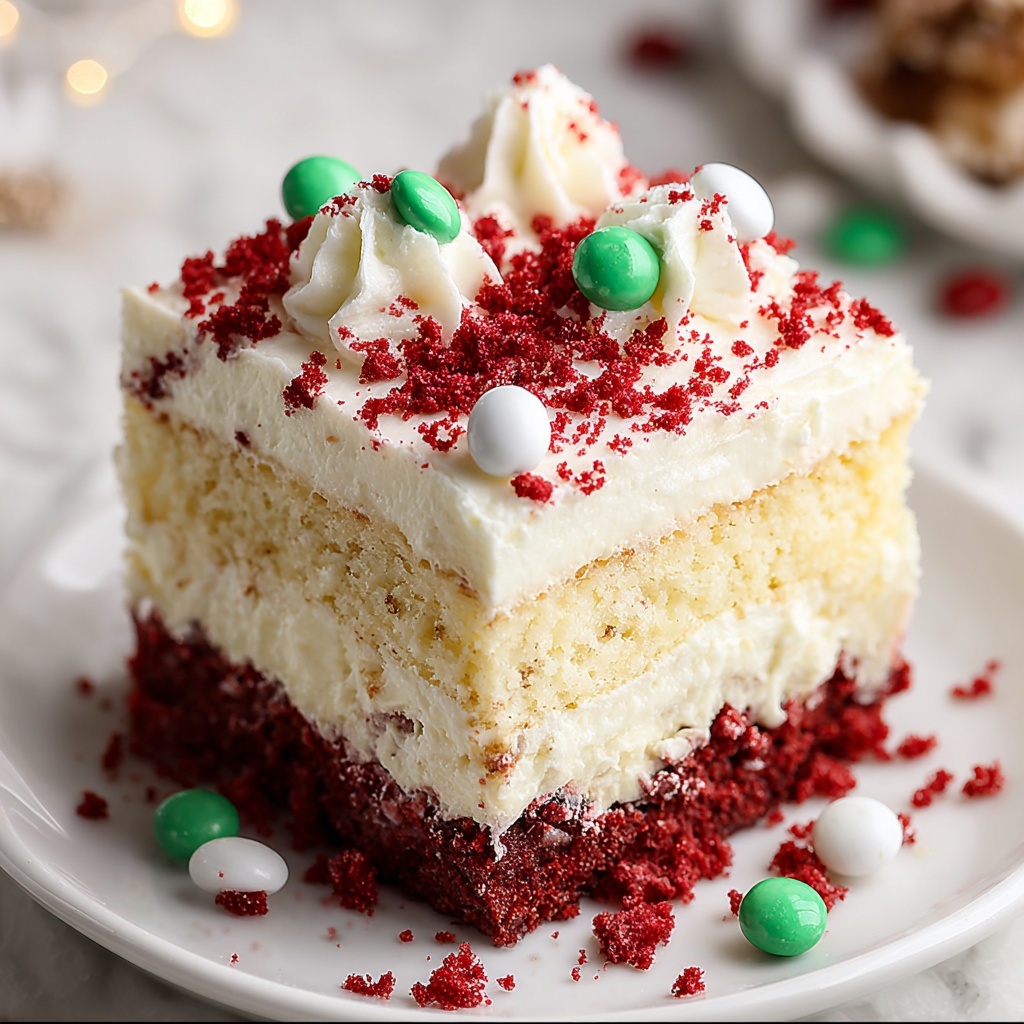
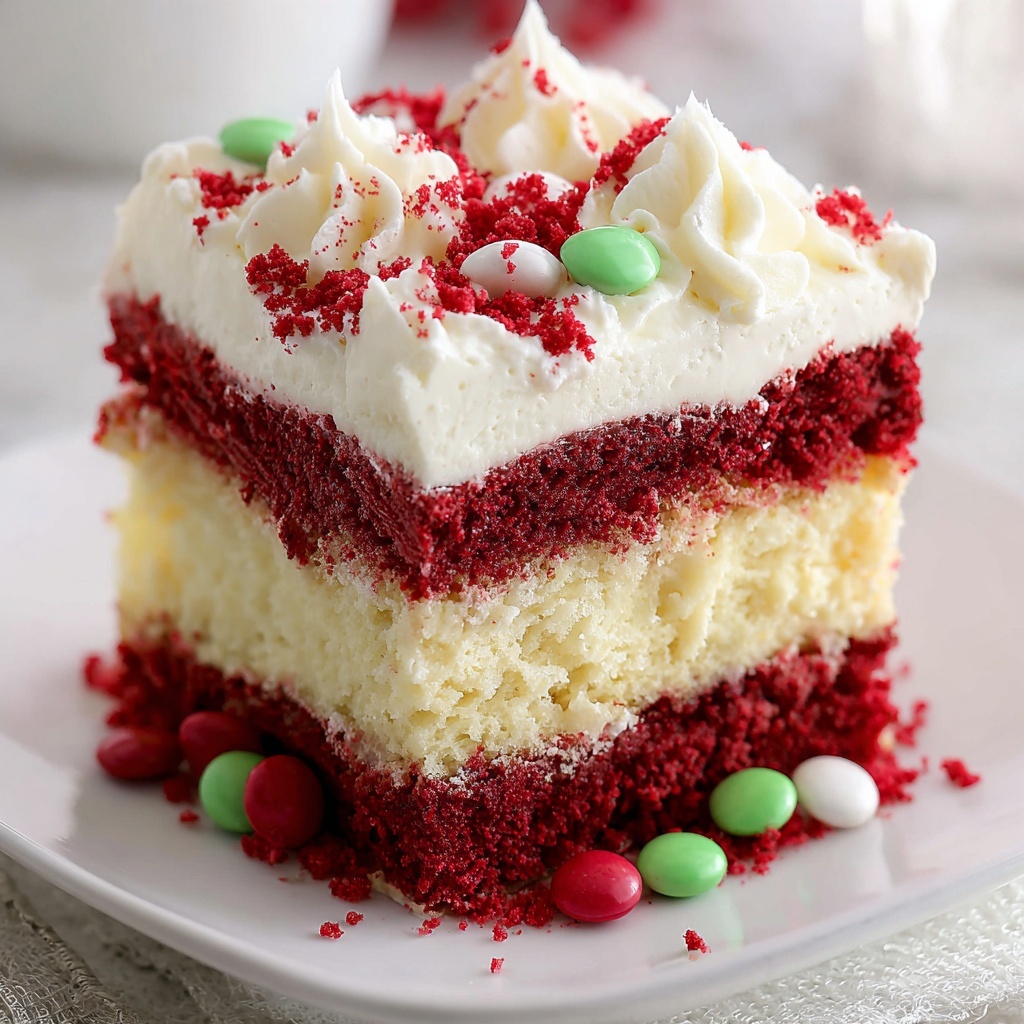
If you’re looking for a festive dessert that bursts with color, flavor, and holiday cheer, you have to try this Christmas Poke Cake Recipe. It’s a delightful twist on the classic poke cake, incorporating vibrant red and green gelatin that seeps beautifully into the cake, creating a moist, flavorful slice every time. Plus, with its whipped topping, candy sprinkles, and a sprinkle of crushed candy canes, this cake is a joyful centerpiece for any holiday gathering, making you feel like the star baker of the season.
Ingredients You’ll Need
Getting the ingredients right is surprisingly simple, and each one plays a crucial role in making this Christmas Poke Cake Recipe shine. From the fluffy white cake base to the colorful gelatin layers and the creamy whipped topping, everything combines to create a dessert that’s as pleasing to the eyes as it is to the taste buds.
- White cake mix: Provides a light, soft foundation that soaks up the gelatin perfectly for unbeatable moistness.
- Eggs, oil, and water: Typical additions needed to bring your box cake mix to life with the perfect texture.
- Red gelatin (3 oz): Adds festive color and a burst of fruity flavor, complementing the cake beautifully.
- Green gelatin (3 oz): Balances the red gelatin with a tangy twist, making the layers pop visually and taste-wise.
- Boiling water (2 cups, divided): Essential for dissolving the gelatin powders and helping them infuse into the cake.
- Whipped topping (8 oz container): Adds creamy, light sweetness and a decorative finish to your poke cake.
- Red and green sprinkles: For that fun, festive crunch and a burst of holiday color on top.
- Crushed candy canes: Offers a refreshing peppermint contrast that enhances the overall flavor profile.
- Holiday-themed candies (mini marshmallows, chocolate chips): Optional decorations that add whimsy and extra sweetness.
How to Make Christmas Poke Cake Recipe
Step 1: Prepare and Bake the White Cake
Start by following the instructions on your white cake mix box, combining it with eggs, oil, and water. Pour the batter into a greased 9×13-inch pan and bake it until a toothpick inserted in the center comes out clean—usually about 30 to 35 minutes. This soft and fluffy base will soak up all the delicious gelatin flavors to come.
Step 2: Bloom the Gelatins
While the cake bakes, dissolve the red and green gelatin powders separately each into 1 cup of boiling water. Stir each until completely dissolved and set aside to cool just slightly. This step is key so the gelatin won’t be too hot when you pour it over the cake, preserving its texture.
Step 3: Poke and Pour the Gelatin
Once the cake has cooled slightly but is still warm, use the handle of a wooden spoon to poke holes all over the cake in a grid-like pattern. Alternate pouring the red and green gelatin into these holes. The gelatin will seep into the cake, creating vibrant pockets of flavor and color that make every bite a festive surprise.
Step 4: Chill the Cake
Refrigerate the cake for at least 2 hours to let the gelatin fully set inside the cake. This chilling time helps the poke cake develop its moist, luscious texture where each bite offers a perfect harmony of cake and jelly.
Step 5: Add the Whipped Topping and Decorations
After chilling, spread the whipped topping evenly over the entire cake. Then, sprinkle your red and green sprinkles, crushed candy canes, and holiday-themed candies to create a festive, textured finishing touch that dazzles the eyes and delights the palate.
How to Serve Christmas Poke Cake Recipe

Garnishes
To make your Christmas Poke Cake Recipe feel extra special when serving, garnish with a handful of crushed candy canes and mini holiday candies. These details not only add visual appeal but also infuse every slice with a hint of peppermint crunch and charming festiveness that guests will remember.
Side Dishes
This cake pairs wonderfully with light, complementary sides such as a scoop of vanilla ice cream or a simple fresh fruit salad to balance its rich sweetness. A cup of hot cocoa or mulled cider alongside will round out the cozy holiday vibe perfectly.
Creative Ways to Present
Why not serve the cake on a bright red or green platter to match your Christmas theme? You could even slice it into individual portions and place each on a festive paper doily with a sprig of fresh mint or a small ornament. Presentation can elevate this poke cake from delicious dessert to the star of the holiday table.
Make Ahead and Storage
Storing Leftovers
After your Christmas celebration, store leftover poke cake in an airtight container in the refrigerator. Thanks to the gelatin and whipped topping, it will stay moist and flavorful for up to 4 days, making it a delightful treat for days to come.
Freezing
If you want to freeze slices of this cake, wrap them tightly in plastic wrap and place them in a freezer-safe bag or container. Freeze for up to 2 months. When ready to enjoy, thaw them overnight in the refrigerator for best texture.
Reheating
This Christmas Poke Cake Recipe is best enjoyed chilled or at room temperature, so reheating isn’t typically recommended. However, if you prefer it less cold, let the slice come to room temperature on the counter for 20–30 minutes before serving.
FAQs
Can I use homemade cake instead of a box mix?
Absolutely! A homemade white cake will work beautifully in this recipe. Just make sure it’s sturdy enough to hold the gelatin without crumbling.
Can I substitute other gelatin flavors?
Yes! Feel free to experiment with your favorite red and green flavors, like raspberry or green apple, to customize the taste of your Christmas Poke Cake Recipe.
How far in advance can I make this poke cake?
You can prepare the cake a day ahead, including chilling and decorating. It actually improves as the gelatin sets fully, making it perfect for busy holiday schedules.
Is this cake gluten-free?
Not if you use a standard boxed cake mix, but you can swap in a gluten-free white cake mix to accommodate dietary needs without sacrificing flavor.
Can I add different toppings instead of candy canes?
Definitely! Nuts, festive chocolate shavings, or even fresh berries can be great alternatives or additions to enhance texture and flavor.
Final Thoughts
This Christmas Poke Cake Recipe is a heartwarming, colorful, and utterly delicious holiday treat that’s sure to become a favorite in your family’s festive dessert rotation. It’s easy to make, fun to decorate, and perfect for sharing with loved ones during the most wonderful time of the year. Give it a try—you might just start a beautiful new tradition!
Print
Christmas Poke Cake Recipe
- Prep Time: 30 minutes
- Cook Time: 35 minutes
- Total Time: 2 hours 20 minutes
- Yield: 12 servings
- Category: Dessert
- Method: Baking
- Cuisine: American
Description
Celebrate the holidays with this festive Christmas Poke Cake featuring a moist white cake layered with red and green gelatin, topped with fluffy whipped cream, colorful sprinkles, crushed candy canes, and holiday-themed candies for a delightful and fun dessert that serves 12.
Ingredients
Cake:
- 1 box white cake mix (plus ingredients as per box instructions, typically eggs, oil, and water)
Gelatin Layers:
- 1 (3 oz) box red gelatin (strawberry or cherry flavor)
- 1 (3 oz) box green gelatin (lime flavor)
- 2 cups boiling water, divided
Topping and Decorations:
- 1 (8 oz) container whipped topping (like Cool Whip), thawed
- Red and green sprinkles
- Crushed candy canes
- Holiday-themed candies (e.g., mini marshmallows, chocolate chips)
Instructions
- Prepare the Cake Batter: Follow the directions on the white cake mix box, typically combining the cake mix with eggs, oil, and water. Pour the batter evenly into a greased 9×13-inch baking pan.
- Bake the Cake: Bake the cake according to the package instructions, usually around 30-35 minutes at 350°F (175°C), or until a toothpick inserted into the center comes out clean. Allow the cake to cool slightly.
- Poke Holes in Cake: Using the handle of a wooden spoon or a similar tool, poke evenly spaced holes all over the cake surface for the gelatin to seep into.
- Prepare Red Gelatin: Dissolve the red gelatin in 1 cup of boiling water, stirring until completely dissolved.
- Add Red Gelatin to Cake: Slowly pour the red gelatin evenly over half of the cake, ensuring it seeps into the holes. Refrigerate the cake for about 10-15 minutes to allow the gelatin to set slightly.
- Prepare Green Gelatin: Dissolve the green gelatin in the remaining 1 cup of boiling water, stirring until fully dissolved.
- Add Green Gelatin to Cake: Carefully pour the green gelatin over the other half of the cake, filling the holes and covering the surface evenly. Return the cake to the refrigerator and chill for at least 1 hour until the gelatin is fully set.
- Apply Whipped Topping: Once the gelatin is set, spread the thawed whipped topping evenly over the top of the cake.
- Decorate the Cake: Sprinkle red and green sprinkles, crushed candy canes, and holiday-themed candies like mini marshmallows and chocolate chips over the whipped topping for a festive look.
- Serve and Enjoy: Slice the cake and serve chilled. Store leftovers covered in the refrigerator.
Notes
- Ensure the cake is cooled before poking holes to prevent breaking apart.
- Use a spoon handle or wooden dowel for uniform holes to evenly distribute gelatin.
- Keep the cake refrigerated after adding gelatin to help it set properly.
- Whipped topping can be substituted with fresh whipped cream for a less processed option.
- Customize toppings with your favorite holiday candies or nuts.


