
“`html
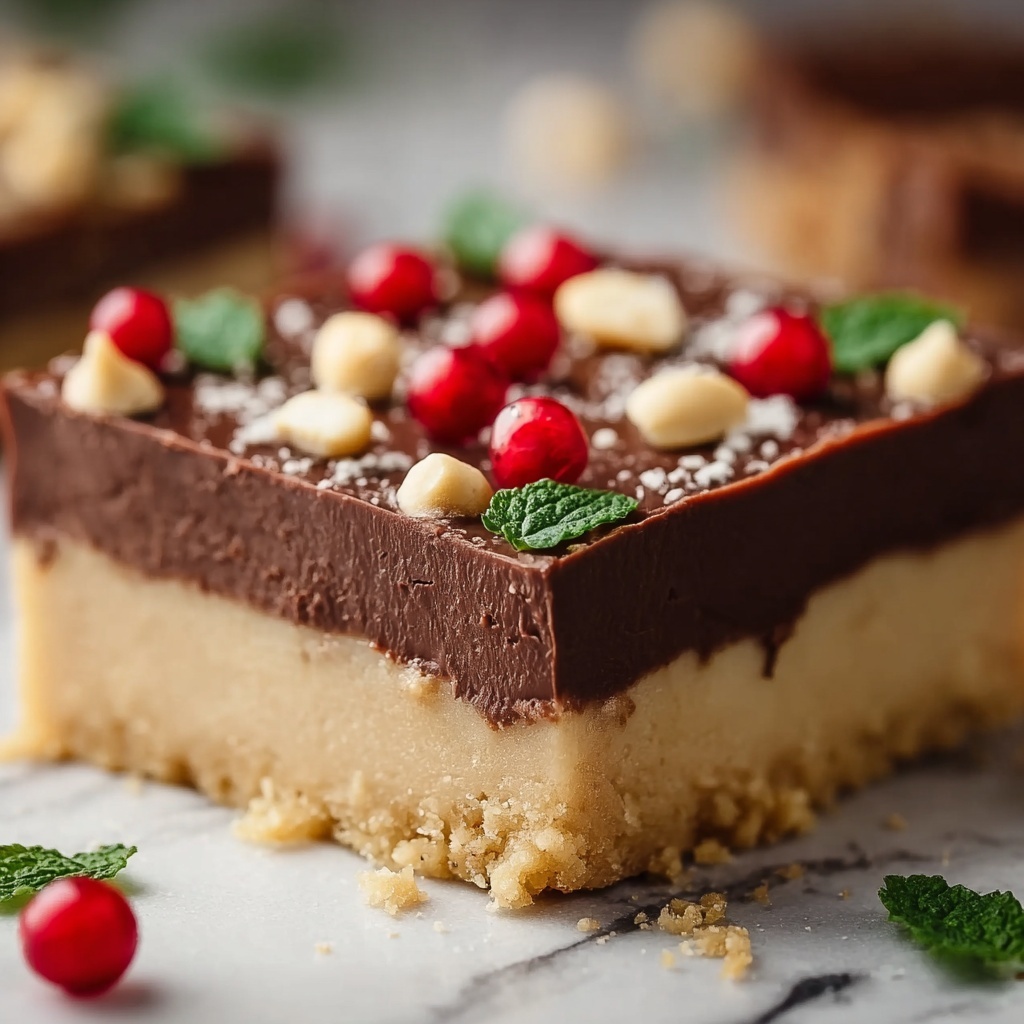
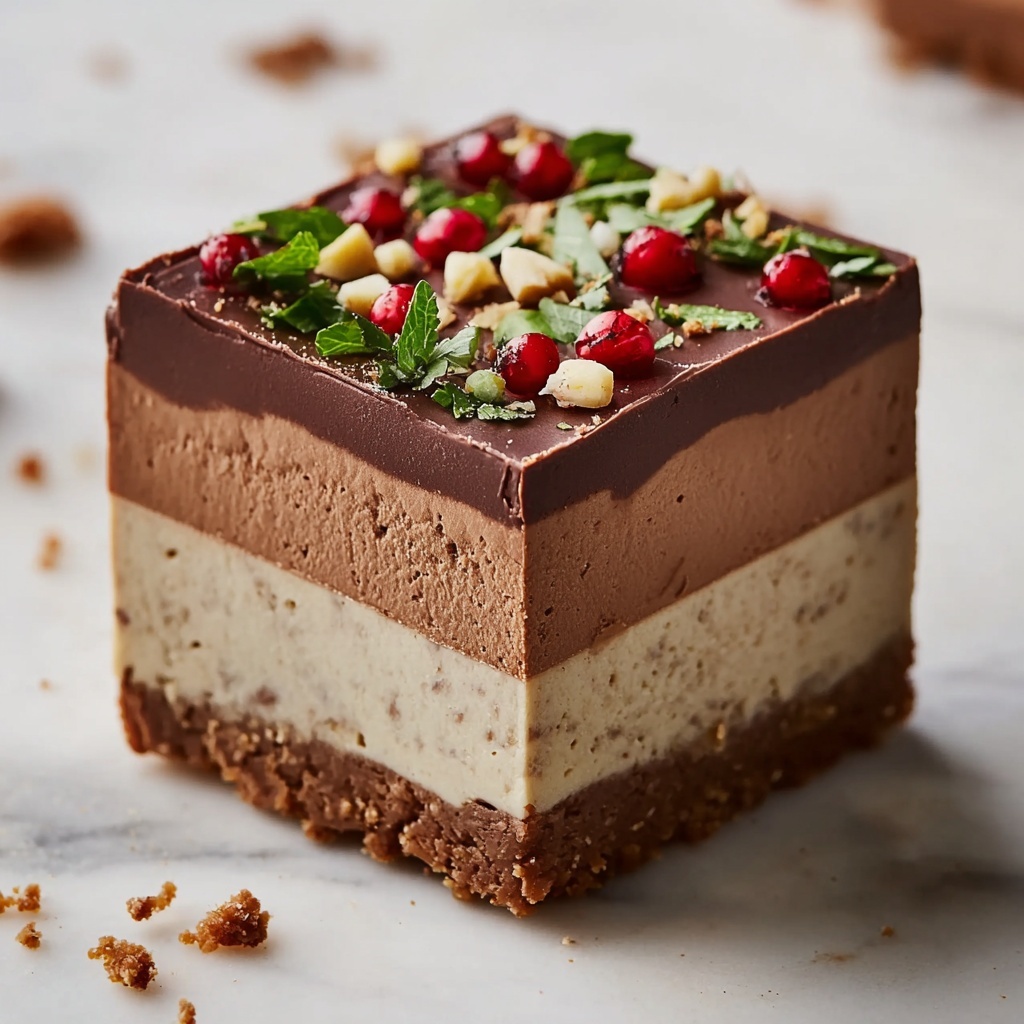
If you’re craving a sweet treat that’s creamy, chocolaty, and utterly irresistible without turning on the oven, this No-Bake Peanut Butter Bars Recipe is about to become your new go-to. Combining the rich, nutty goodness of creamy peanut butter with the silky smoothness of melted chocolate, these bars come together in a snap and deliver big on comforting flavor and indulgent texture. They’re perfect for busy days, last-minute guests, or any time you want a crowd-pleasing dessert that feels like a warm hug in every bite.
Ingredients You’ll Need
These ingredients are straightforward yet play an essential role in creating the perfect texture and taste. Each element works harmoniously—from the creamy peanut butter that gives the bars their signature flavor, to the powdered sugar that adds subtle sweetness and helps achieve that fudgy consistency.
- 2 cups creamy peanut butter: The star of the show, providing rich, nutty flavor and a velvety texture.
- ½ cup unsalted butter, softened (1 stick): Adds smoothness and helps bind the bars together for that perfect bite.
- 2 teaspoons vanilla extract: Enhances the natural flavors and adds warmth.
- ½ teaspoon salt: Balances the sweetness and amplifies the peanut butter taste.
- 4-5 cups powdered sugar: Gradually incorporated to sweeten and give structure; start with 4 cups and add more if needed.
- 1 ½ cups chocolate chips: For the luscious, melt-in-your-mouth chocolate topping.
- 1 teaspoon coconut oil: Ensures smooth melting of the chocolate for a glossy finish.
- 2 tablespoons festive sprinkles (optional): Adds a playful pop of color and fun texture on top.
How to Make No-Bake Peanut Butter Bars Recipe
Step 1: Prepare Your Pan
Start by lining an 8×8 or 9×9 inch dish with parchment paper. This simple prep step ensures easy removal of the bars once they set, so you get perfect clean edges every time without any stickiness.
Step 2: Mix the Peanut Butter and Butter
In a large bowl, combine the creamy peanut butter and softened butter. Blend them on medium speed with an electric mixer until completely smooth and creamy. This creates the perfect base to incorporate other ingredients seamlessly.
Step 3: Add Vanilla and Salt
Next, stir in the vanilla extract and salt. These add layers of flavor that brighten and deepen the taste, balancing out the richness of the peanut butter and butter mix.
Step 4: Incorporate the Powdered Sugar
Gradually add the powdered sugar, mixing on low speed to avoid a sugary cloud of powder everywhere. As you mix and scrape the bowl’s sides, watch the dough transform into thick, large crumbles. If the dough feels too wet, add a little more sugar — this step is all about getting that perfect dough-like consistency.
Step 5: Form the Base
Scrape your dough into the prepared pan and press it down firmly and evenly. For a flawlessly smooth surface, place parchment or wax paper over the top and gently press down, smoothing out any bumps or cracks. This base is going to be the foundation for all that delicious chocolate goodness.
Step 6: Melt the Chocolate
Combine the chocolate chips and coconut oil in a microwave-safe bowl and heat in 30-second bursts, stirring thoroughly each time until the chocolate is silky and completely melted. This method prevents burning and ensures a glossy, pourable chocolate layer.
Step 7: Top with Chocolate and Sprinkles
Pour the melted chocolate evenly over the peanut butter layer, spreading it lovingly to cover every corner. While the chocolate is still soft, sprinkle on festive sprinkles for a burst of color and joyful crunch that also makes these bars perfect for celebrations.
Step 8: Chill and Set
Refrigerate the entire pan for about 20 minutes. This chilling time allows the chocolate topping to firm up beautifully while the bars set to an irresistible fudgy texture.
Step 9: Serve and Enjoy
Once set, slice into 16 perfect squares and enjoy these no-bake delights chilled or at room temperature. Each bite is rich with peanut butter flavor and complemented by that smooth chocolate layer on top.
How to Serve No-Bake Peanut Butter Bars Recipe
Garnishes
While festive sprinkles already make these bars look fabulous, you can also add a light dusting of cocoa powder, crushed peanuts, or a drizzle of caramel sauce for an extra special touch. Fresh berries on the side can add a sweet-tart contrast that plays wonderfully with the creamy bars.
Side Dishes
These bars are a sweet star on their own but pair beautifully with a scoop of vanilla ice cream or a cup of strong coffee or tea to balance their richness. You could also serve them alongside fresh fruit for a perfect dessert platter.
Creative Ways to Present
Try cutting the bars into fun shapes using cookie cutters for parties, or serve them on a decorative platter lined with parchment and string a ribbon around the tray for gifting. Layering the bars with whipped cream and berries in individual jars also turns these into awesome grab-and-go treats.
Make Ahead and Storage
Storing Leftovers
Keep your leftover No-Bake Peanut Butter Bars in an airtight container in the refrigerator. They’ll stay fresh and flavorful for up to a week, making them an easy snack to reach for whenever a peanut butter craving hits.
Freezing
These bars freeze very well! Wrap individual pieces tightly in plastic wrap and place them in a freezer-safe container or bag. They can be frozen for up to 2 months and make a quick thaw-and-eat treat whenever you want.
Reheating
Because these bars are best enjoyed cold or at room temperature, reheating isn’t necessary. If you prefer them softer, simply let them sit out for about 15 minutes to warm to your liking. Avoid microwaving to preserve their texture.
FAQs
Can I use crunchy peanut butter instead of creamy?
Absolutely! Crunchy peanut butter will add a delightful texture with bits of nuts throughout the bars, making each bite even more interesting. Just keep in mind the bars might be a little less smooth.
Is it possible to make these bars vegan?
Yes, use vegan butter or coconut oil instead of regular butter and ensure the chocolate chips are dairy-free. The bars will still be delicious and just as indulgent.
What if I don’t have coconut oil for melting chocolate?
You can substitute the coconut oil with a small amount of vegetable oil or leave it out entirely, though adding oil helps the chocolate stay glossy and soft rather than firming up too hard.
Can this recipe be doubled or tripled for larger batches?
For sure! Just scale the ingredients accordingly and use a larger pan or multiple pans. The process remains exactly the same, making this recipe perfect for parties or gifting.
How do I get the bars out of the pan without breaking them?
Thanks to the parchment paper lining, you can easily lift the entire slab out by grabbing the paper edges and placing it on a cutting board before slicing gently. This prevents sticking and ensures neat squares.
Final Thoughts
I cannot recommend this No-Bake Peanut Butter Bars Recipe enough for anyone who loves a fast, fuss-free treat that doesn’t compromise on flavor or texture. Whether you’re making them to satisfy a sudden sweet tooth or sharing with friends and family, these bars will quickly become a beloved classic in your recipe rotation. So, grab your ingredients and try this recipe today—it’s as fun to make as it is to eat!
“`
Print
No-Bake Peanut Butter Bars Recipe
- Prep Time: 10 minutes
- Cook Time: 0 minutes
- Total Time: 15 minutes
- Yield: 16 servings
- Category: Dessert
- Method: No-Cook
- Cuisine: American
Description
These No-Bake Peanut Butter Bars are a quick and easy treat combining creamy peanut butter with a sweet powdered sugar base, topped with a rich chocolate layer and festive sprinkles. Perfect for holiday gatherings or anytime you want a delicious, hassle-free dessert that requires no baking.
Ingredients
Base
- 2 cups creamy peanut butter
- ½ cup unsalted butter, softened (1 stick)
- 2 teaspoons vanilla extract
- ½ teaspoon salt
- 4–5 cups powdered sugar (start with 4 cups and add more if too wet)
Topping
- 1 ½ cups chocolate chips
- 1 teaspoon coconut oil
- 2 tablespoons festive sprinkles (optional)
Instructions
- Prepare Your Pan: Line an 8×8” or 9×9” dish with parchment paper and set aside to prevent sticking and make removal easier.
- Mix the Peanut Butter and Butter: In a large bowl, combine the creamy peanut butter and softened butter. Blend on medium speed using an electric hand mixer or a stand mixer with paddle attachment until smooth and creamy.
- Add Vanilla and Salt: Incorporate the vanilla extract and salt into the peanut butter mixture. Mix thoroughly to evenly distribute the flavors.
- Incorporate the Powdered Sugar: Gradually add powdered sugar to the mixture, mixing on low speed after each addition. Scrape down the sides of the bowl as needed. Begin with 4 cups of powdered sugar and add more if the mixture is too wet to form a dough-like consistency.
- Form the Base: Once the sugar is fully incorporated and the dough resembles large crumbles, transfer it into the prepared pan. Press down firmly and evenly to create a smooth, compact base. For a polished surface, place parchment or wax paper on top and press flat.
- Melt the Chocolate: In a microwave-safe bowl, combine the chocolate chips and coconut oil. Microwave for 30 seconds, then stir. Repeat heating in 30-second intervals, stirring between each, until fully melted and smooth.
- Top with Chocolate: Pour the melted chocolate evenly over the peanut butter base and spread it gently to cover the surface completely.
- Add the Sprinkles: Before the chocolate sets, sprinkle the festive sprinkles on top to add color and texture.
- Chill and Set: Place the bars in the refrigerator for at least 20 minutes to allow the chocolate topping to firm up and the bars to set.
- Serve and Enjoy: Once set, cut into squares and enjoy chilled or at room temperature for a delightful no-bake treat.
Notes
- Adjust the amount of powdered sugar to achieve the desired consistency; more sugar will make the bars firmer.
- Use creamy peanut butter for a smooth texture; crunchy peanut butter can be substituted for added texture.
- If you don’t have coconut oil, a neutral oil like vegetable oil can be used to help melt the chocolate smoothly.
- Store leftover bars in an airtight container in the refrigerator for up to one week.
- For a dairy-free version, substitute butter with a vegan margarine and ensure the chocolate chips are dairy-free.


