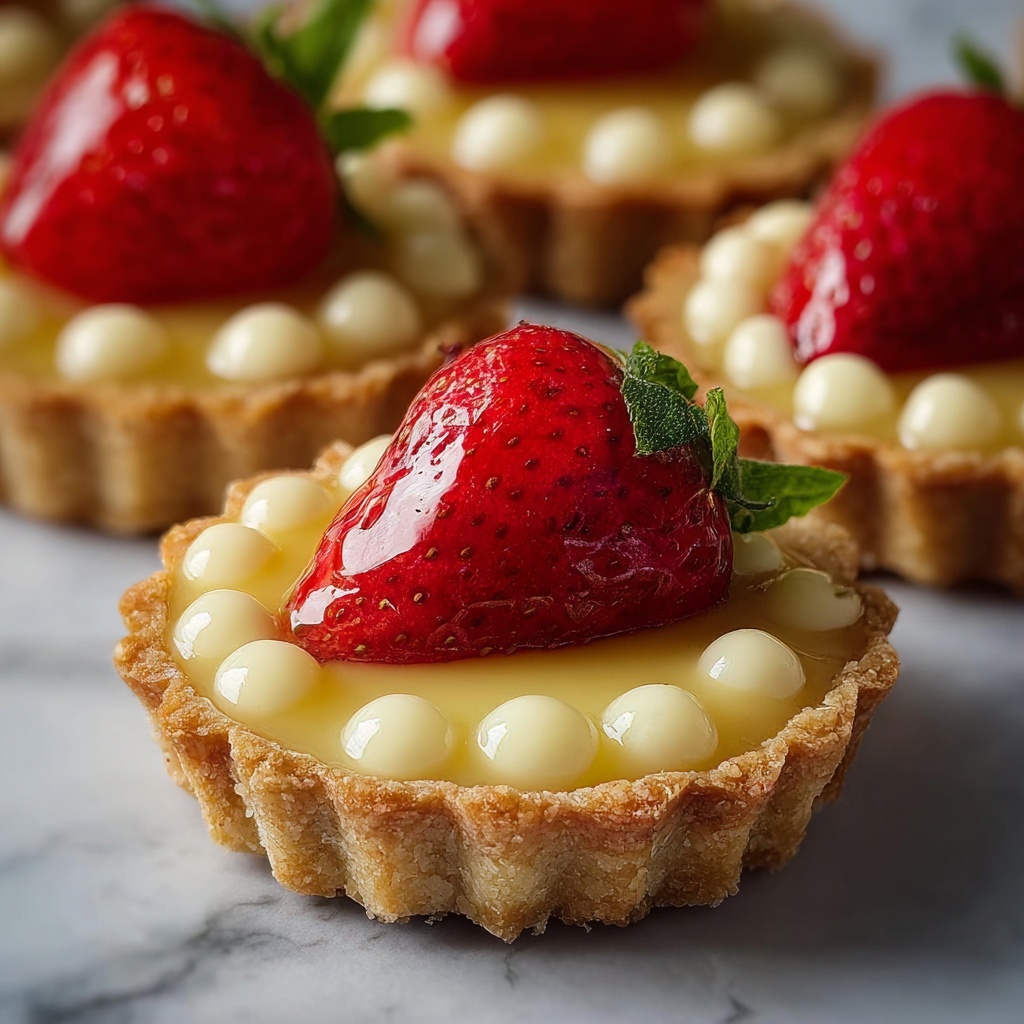
If you’re looking for a dessert that’s both charming and bursting with fresh, fruity flavor, this Brazilian Strawberry Tartlets Recipe is an absolute must-try. Picture a crisp, buttery tart shell cradling a luscious, creamy filling made from sweetened condensed milk, topped with juicy, vibrant strawberries that sparkle with a glaze. It’s a perfect little indulgence that balances richness with freshness in every bite. Whether you’re serving it at a family gathering or just treating yourself, these tartlets bring a touch of Brazilian sunshine to your table.
Ingredients You’ll Need
This recipe calls for a handful of simple ingredients, each playing an essential role in bringing the Brazilian Strawberry Tartlets Recipe to life. From the flaky tart crust to the creamy filling and fresh, tangy strawberries, every component adds flavor, texture, or beautiful color to this delightful treat.
- All-purpose flour: The foundation of our crisp, golden tart crust providing structure and lightness.
- Unsalted butter, cold and cubed: Creates a tender, flaky texture in the crust that melts in your mouth.
- Powdered sugar: Adds gentle sweetness and helps balance the tartness of strawberries.
- Egg yolk: Binds the dough together and enriches the crust with a silky texture.
- Cold water: Helps bring the dough together without warming the butter, keeping it flaky.
- Pinch of salt: Enhances all the flavors and rounds out the sweetness perfectly.
- Sweetened condensed milk: The star ingredient in the creamy, luscious filling that’s uniquely Brazilian.
- Cornstarch: Thickens the filling to a smooth, luscious consistency.
- Milk: Lightens and smooths the filling while keeping it rich and creamy.
- Vanilla extract: Adds warmth and depth to the filling’s flavor.
- Heavy cream (optional): Whipped in for a lighter, fluffier filling variation.
- Fresh strawberries: The crown jewel topping — juicy, sweet, and beautifully vibrant.
- Strawberry jelly or apricot glaze (optional): A shiny glaze that gives each tartlet a professional finish and adds a subtle extra sweetness.
How to Make Brazilian Strawberry Tartlets Recipe
Step 1: Prepare the Tart Crust
Start by combining the dry ingredients — flour, powdered sugar, and salt — in a food processor or a bowl if you prefer hands-on baking. Add the cold, cubed butter and pulse until the mixture looks like coarse crumbs, which means the butter is just right for a flaky crust.
Step 2: Bring the Dough Together
Add in the egg yolk and cold water, one tablespoon at a time, mixing gently until your dough just comes together. Be careful not to overwork it to keep your tart shells tender. Form the dough into a disk, wrap it in plastic wrap, and pop it in the fridge for at least 30 minutes to chill.
Step 3: Bake Tart Shells
Preheat your oven to 350°F (175°C). Roll out the chilled dough and cut into circles that fit your mini tart pans or muffin tin. Press the dough gently into the molds, prick the bottoms with a fork to prevent bubbling, and bake for 12 to 15 minutes, until the edges turn a lovely golden color. Let them cool completely before adding the filling.
Step 4: Make the Creamy Filling
For the luscious filling, whisk together sweetened condensed milk, milk, and cornstarch in a saucepan over medium heat. Stir constantly to prevent lumps as the mixture thickens over 5 to 7 minutes. Remove from heat and stir in vanilla for that irresistible warmth.
Step 5: Add Texture (Optional)
If you want a lighter filling, gently fold in whipped heavy cream once the mixture has cooled slightly. This adds an airy texture that beautifully contrasts with the crisp tart shells.
Step 6: Assemble the Tartlets
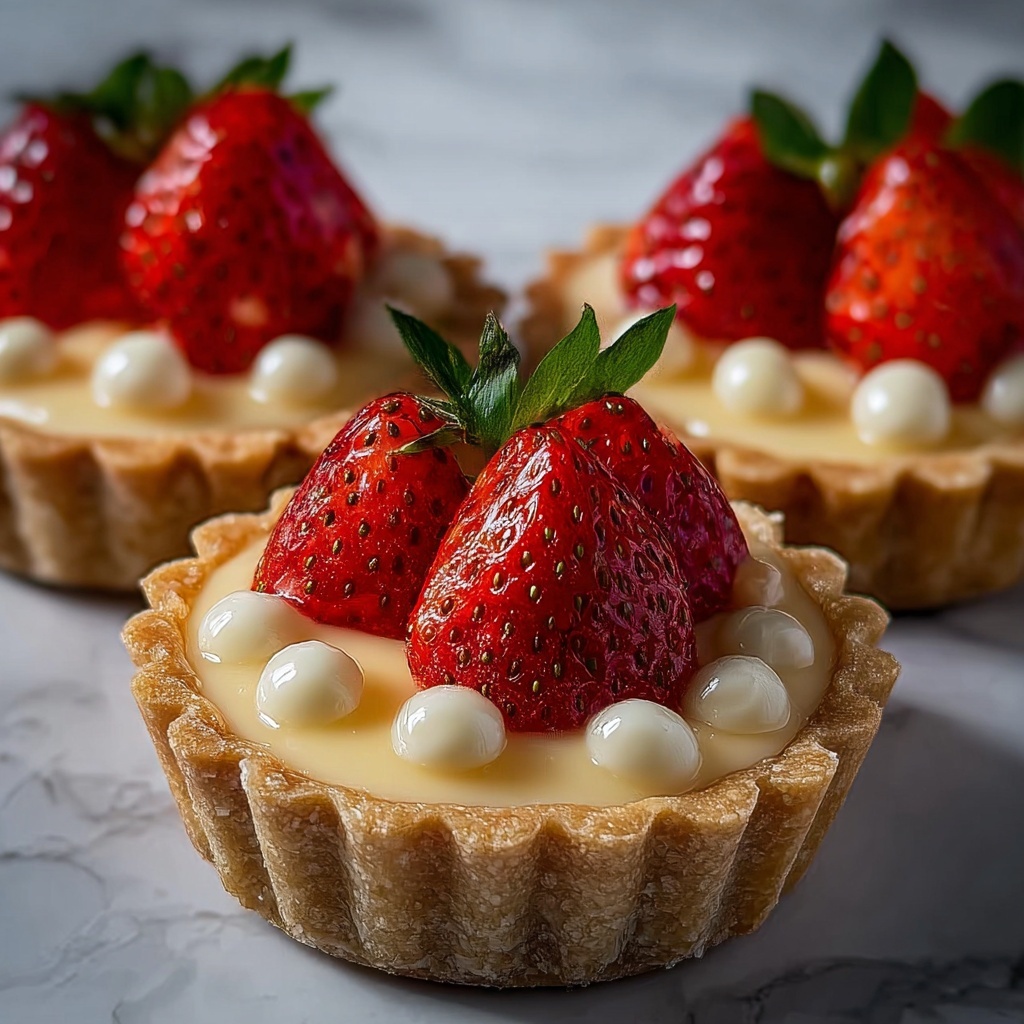
Spoon the creamy filling into each cooled tart shell. Then, top each tartlet with halved fresh strawberries, arranged neatly to look inviting and fresh.
Step 7: Add a Shiny Glaze (Optional)
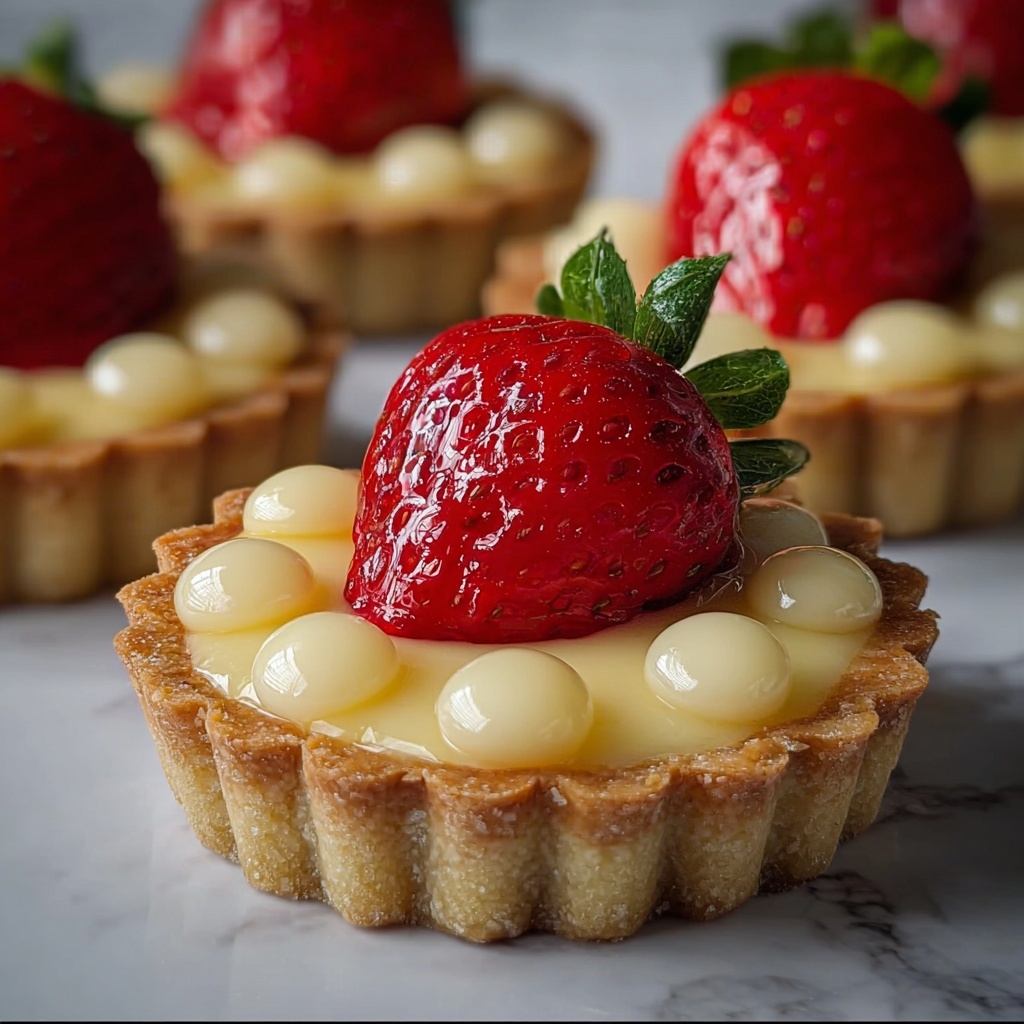
For that extra professional touch, warm the strawberry jelly or apricot glaze slightly and brush it over the strawberries for a glossy finish that will catch everyone’s eye and add a subtle sweetness.
How to Serve Brazilian Strawberry Tartlets Recipe
Garnishes
Consider dusting a little powdered sugar or adding a few fresh mint leaves on top for a pop of color and freshness that complements the strawberries perfectly. A dollop of whipped cream can also enhance the creamy highlight of this dessert.
Side Dishes
These tartlets pair wonderfully with a light, fruity dessert wine or a simple cup of freshly brewed coffee or tea. They also make a charming companion to a scoop of vanilla ice cream on warmer days.
Creative Ways to Present
Try arranging the tartlets on a rustic wooden board lined with fresh strawberry leaves for a farm-to-table vibe, or serve them on elegant china for a more refined look. You can also offer an array of glazes or fruit toppings so guests can customize their own Brazilian Strawberry Tartlets Recipe experience.
Make Ahead and Storage
Storing Leftovers
Store any leftover tartlets in an airtight container in the refrigerator. They will keep their texture and flavor beautifully for up to 2 days, although they’re best enjoyed fresh.
Freezing
While you can freeze the tart shells separately before filling, it’s best not to freeze the filled tartlets as strawberries and cream fillings don’t freeze well. For future convenience, prepare and freeze the shells, then fill fresh before serving.
Reheating
If you want to warm the tart shells, a few minutes in a preheated oven at 300°F (150°C) does the trick. Avoid heating the filled tartlets to preserve the fresh strawberry and creamy filling textures.
FAQs
Can I use frozen strawberries instead of fresh?
Fresh strawberries are ideal for this Brazilian Strawberry Tartlets Recipe because they maintain their shape and brightness, but if you only have frozen, make sure to thaw and drain them well to avoid soggy tartlets.
What can I substitute for sweetened condensed milk?
Since this recipe relies heavily on sweetened condensed milk for that authentic creamy texture and sweetness, any substitute might alter the flavor; however, you could try a homemade condensed milk alternative or a thickened cream mixture, keeping in mind the taste will be different.
Is it possible to make this dessert vegan?
While traditional ingredients like butter, egg yolk, and condensed milk are not vegan, you can experiment with plant-based butter, egg replacements, and sweetened condensed coconut milk to create a vegan-friendly version, though results may vary.
How long does it take to make these tartlets?
This Brazilian Strawberry Tartlets Recipe takes about 25 minutes of active prep time and 15 minutes to bake, plus chilling time for the dough, so plan for at least an hour to comfortably prepare it from start to finish.
Can I make larger tartlets with this recipe?
Absolutely! Just increase the size of your tart pans and adjust baking times accordingly — larger tarts may need a few extra minutes in the oven to ensure the crust is fully baked and golden.
Final Thoughts
I can’t recommend this Brazilian Strawberry Tartlets Recipe enough if you want to impress with a dessert that’s both stunning and deliciously satisfying. It’s a wonderful balance of textures and flavors that feels fresh yet indulgent, making it a perfect sweet ending to any meal. So go ahead, gather these simple ingredients, and fall in love with a classic treat that’s as joyful to make as it is to eat!
Print
Brazilian Strawberry Tartlets Recipe
- Prep Time: 25 minutes
- Cook Time: 15 minutes
- Total Time: 40 minutes (plus 30 minutes chilling)
- Yield: 12 tartlets
- Category: Dessert
- Method: Baking
- Cuisine: Brazilian
- Diet: Vegetarian
Description
These Brazilian Strawberry Tartlets feature a delicate, buttery crust filled with a creamy condensed milk custard and topped with fresh, juicy strawberries. Perfectly bite-sized, they combine a tender pastry with a smooth, vanilla-infused filling and a glossy fruit topping, making an elegant and delicious dessert for gatherings or a special treat.
Ingredients
For the Tart Crust
- 1 1/2 cups all-purpose flour
- 1/2 cup unsalted butter, cold and cubed
- 1/4 cup powdered sugar
- 1 egg yolk
- 1–2 tablespoons cold water (as needed)
- Pinch of salt
For the Filling
- 1 can (14 oz) sweetened condensed milk
- 1 tablespoon cornstarch
- 1/2 cup milk
- 1 teaspoon vanilla extract
- 1/2 cup heavy cream (optional, for lighter texture)
For the Topping
- 1 pint fresh strawberries, hulled and halved
- 1/4 cup strawberry jelly or apricot glaze (for shine, optional)
Instructions
- Make the Tart Crust: In a food processor or by hand, combine the all-purpose flour, powdered sugar, and salt. Add the cold, cubed unsalted butter and pulse or cut in until the mixture resembles coarse crumbs, ensuring even distribution of butter for a tender crust.
- Form the Dough: Add the egg yolk and cold water, one tablespoon at a time, gently mixing until the dough just comes together without becoming sticky.
- Refrigerate Dough: Shape the dough into a disk, wrap it tightly in plastic wrap, and refrigerate for at least 30 minutes to firm up and relax the gluten, which makes rolling easier.
- Preheat Oven: Set your oven to 350°F (175°C), preparing it to bake the tart shells evenly.
- Shape Tart Shells: Roll out the chilled dough on a lightly floured surface to about 1/8 inch thickness. Cut circles to fit mini tart pans or muffin tins, press them gently into the pans, and prick the bottoms with a fork to prevent puffing during baking.
- Bake Shells: Bake the tart shells for 12 to 15 minutes until the edges turn a light golden brown. Remove from oven and allow them to cool completely before filling to maintain crispness.
- Prepare Filling Base: In a medium saucepan over medium heat, whisk together the sweetened condensed milk, milk, and cornstarch until smooth, ensuring no lumps remain.
- Cook Filling: Stir the mixture constantly for about 5 to 7 minutes until it thickens noticeably, then remove from heat and mix in the vanilla extract for added fragrance and flavor.
- Cool and Lighten Filling: Let the filling cool slightly; to lighten its texture, gently fold in the whipped heavy cream if using, which provides a fluffy, creamy consistency.
- Fill Tart Shells: Spoon the prepared filling evenly into the cooled tart shells, smoothing the surface for a neat finish.
- Arrange Strawberries: Place the halved fresh strawberries on top of each filled tart, arranging them neatly and decoratively to enhance visual appeal.
- Optional Glaze: Warm the strawberry jelly or apricot glaze slightly and brush it over the strawberries to give a shiny, appetizing finish and help preserve freshness.
Notes
- Make sure to chill the dough thoroughly before baking to prevent shrinking.
- For a dairy-free version, substitute butter with coconut oil and heavy cream with coconut cream.
- Use fresh, ripe strawberries for the best flavor and appearance.
- The jelly or glaze is optional but recommended for an attractive shine and slight sweetness on the strawberries.
- Tartlets can be stored covered in the refrigerator for up to 2 days; add strawberries just before serving to maintain freshness.

