If you have been searching for that perfect, crispy, and utterly delicious snack that fits perfectly into your gluten-free lifestyle, look no further. This Homemade Gluten-Free Breadsticks Recipe is a true game-changer. It offers golden, flavorful breadsticks with just the right amount of chewiness and a wonderful herbal hint that will leave you craving more. Whether you’re pairing them with your favorite soup, dipping sauces, or enjoying them straight from the oven, these breadsticks bring warmth and comfort to any table without compromising on taste or texture.
Ingredients You’ll Need
The magic of this recipe lies in its simplicity and the quality of each ingredient. Every element is carefully chosen to create the perfect balance of flavor, moisture, and texture that gluten-free baking often struggles to achieve.
- Gluten-free all-purpose flour (with xanthan gum): The foundation for structure and elasticity, ensuring your breadsticks hold together beautifully.
- Baking powder: Gives those breadsticks a gentle rise and lightness that keeps them from being too dense.
- Salt: Enhances the flavors of every ingredient and balances the dough.
- Garlic powder (optional): Adds a savory depth without overpowering, perfect for garlic lovers.
- Dried oregano or Italian seasoning: Infuses an aromatic herbal note that makes these breadsticks irresistible.
- Olive oil: Contributes moisture, tenderness, and a subtle fruity nuance to the dough.
- Warm water: Activates the baking powder and helps bring the dough together smoothly.
- Honey or sugar (optional): Just a touch for balance and to enhance browning.
- Grated Parmesan cheese (optional): For a nutty, savory topping that browns beautifully.
- Melted butter or olive oil for brushing: Adds a golden sheen and keeps breadsticks moist on the outside.
- Extra herbs or salt for topping: A final flourish for flavor and visual appeal.
How to Make Homemade Gluten-Free Breadsticks Recipe
Step 1: Prepare Your Oven and Baking Sheet
Start by preheating your oven to 400°F (200°C). Line a baking sheet with parchment paper to prevent sticking and to help the breadsticks bake evenly. This simple prep step sets the stage for perfect golden breadsticks.
Step 2: Mix Dry Ingredients
In a large bowl, whisk together your gluten-free all-purpose flour, baking powder, salt, garlic powder if using, and dried oregano or Italian seasoning. Combining these first ensures that the herbs and seasonings are evenly distributed, building flavor into each bite.
Step 3: Add Wet Ingredients and Form Dough
Pour in olive oil, warm water, and honey or sugar if you want that hint of sweetness. Stir gently until a soft dough forms. The dough should be manageable but not too sticky—if it clings to your fingers excessively, sprinkle in a bit more flour gradually. This balance is key for shaping breadsticks that hold their form but stay tender.
Step 4: Shape the Breadsticks
Divide the dough into 8 equal pieces for uniform baking and portion control. Roll each piece into a rope shape, aiming for about 6 to 7 inches in length. Then, place them spaced out on your lined baking sheet. This shaping step is satisfying and lets you customize the thickness of your breadsticks.
Step 5: Brush and Add Toppings
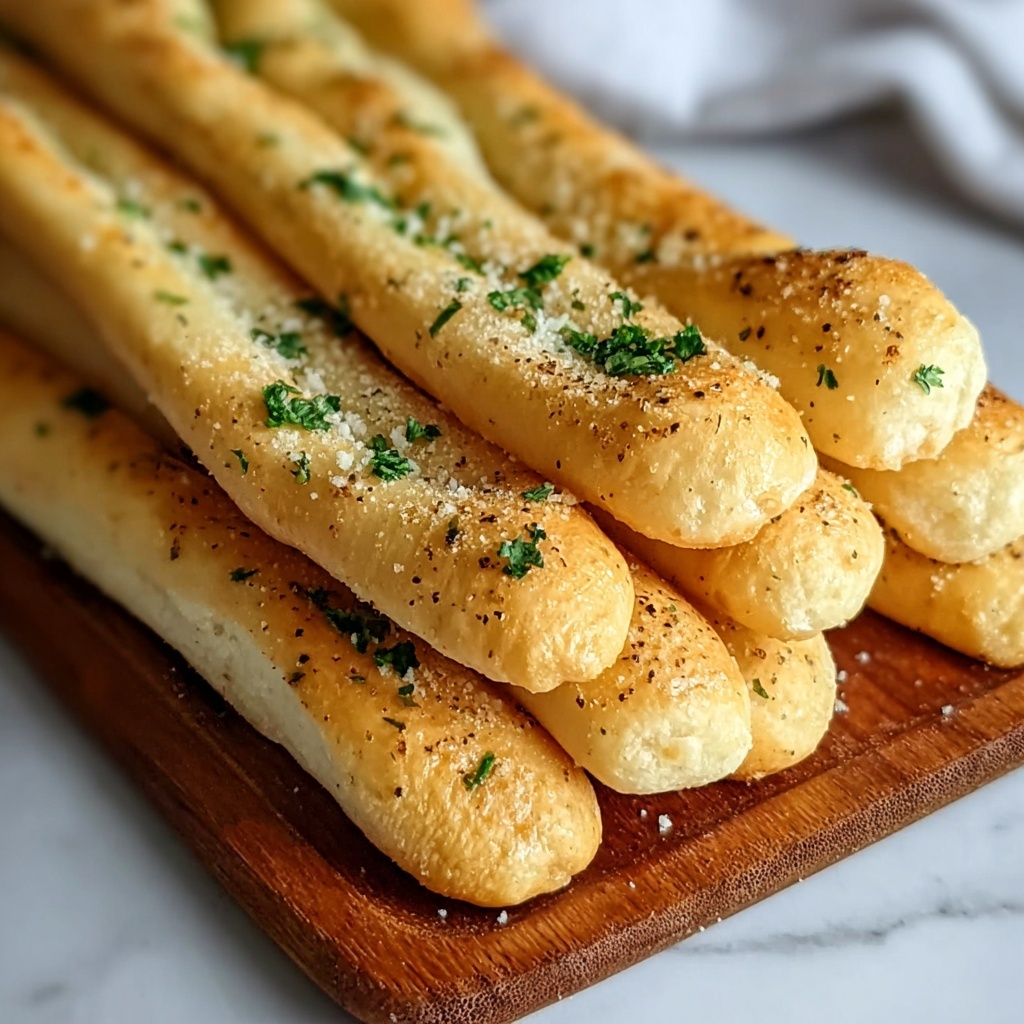
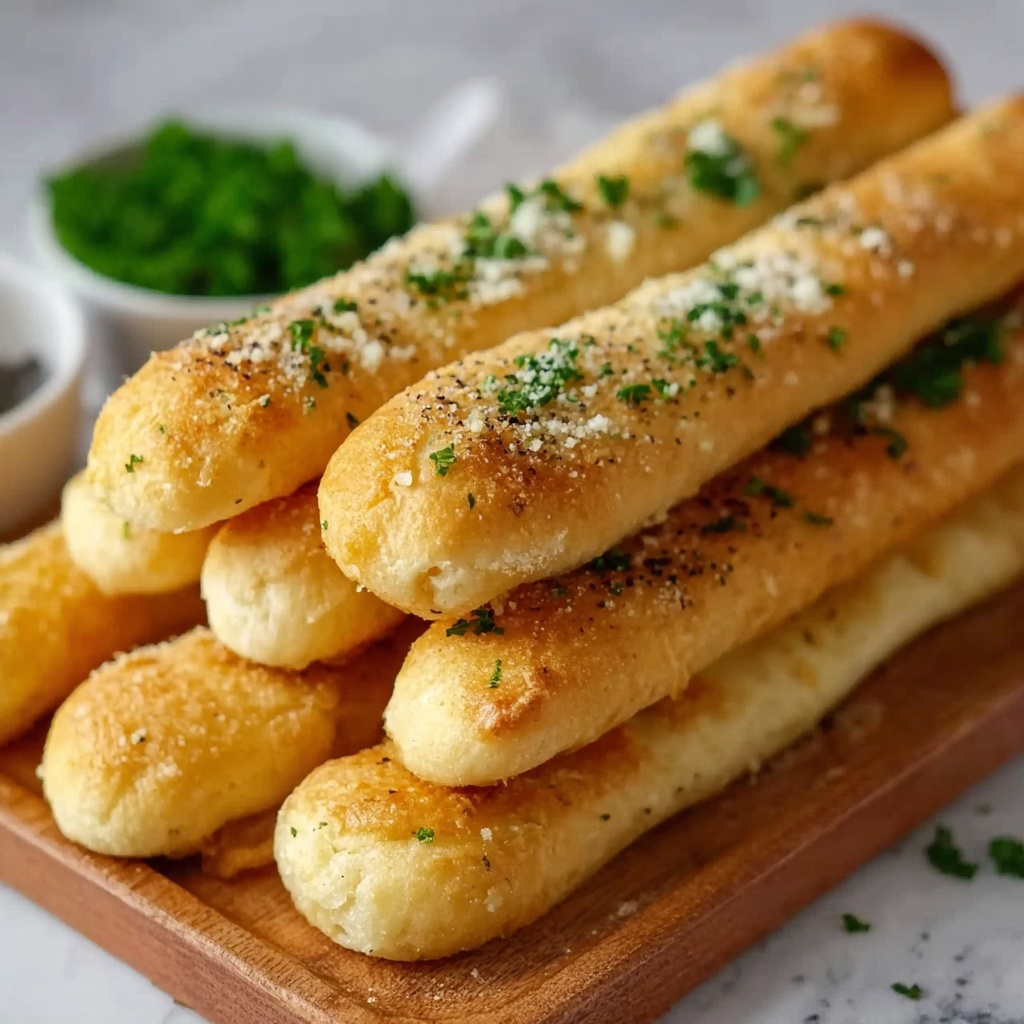
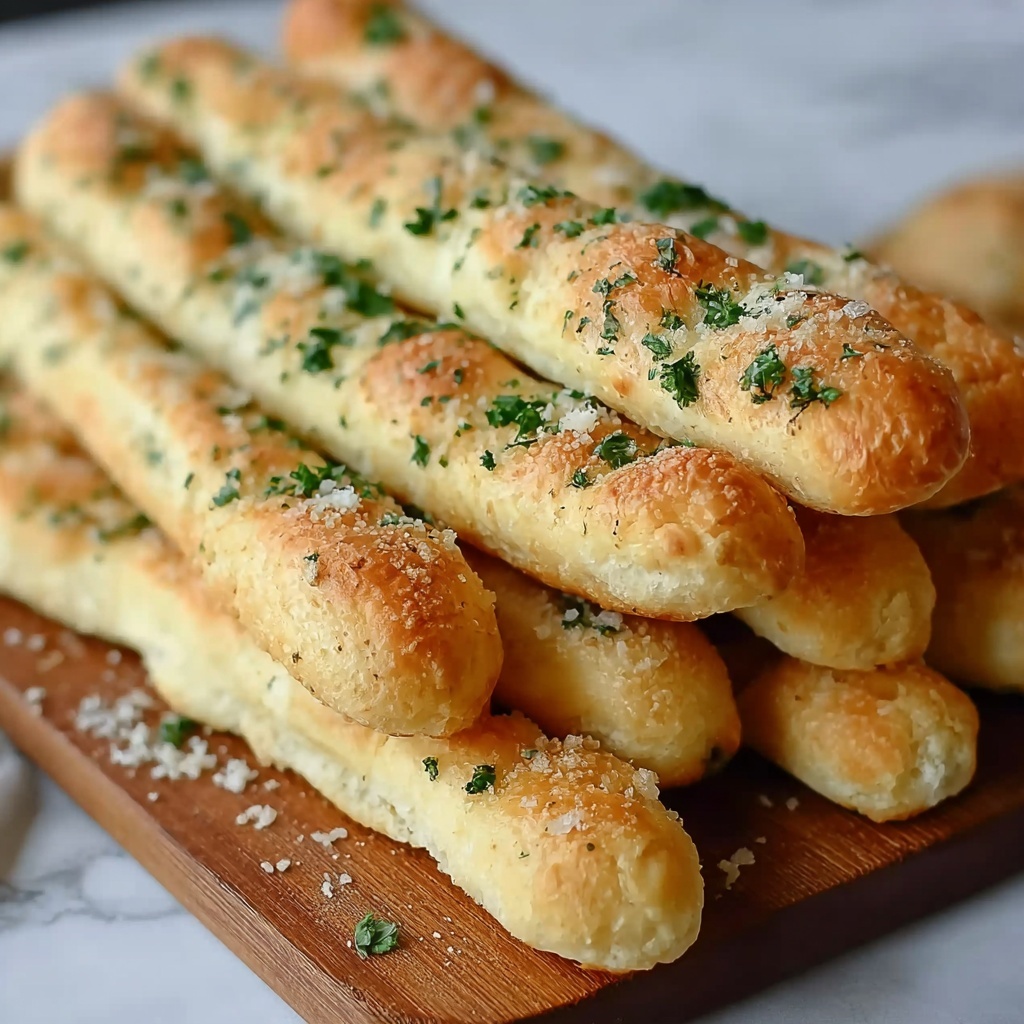
Using a brush, coat each breadstick lightly with melted butter or olive oil to encourage that beautiful golden crust. If you love a cheesy finish, sprinkle grated Parmesan on top along with additional herbs or a pinch of salt. These little extras make a big difference in flavor and appearance.
Step 6: Bake Until Golden
Pop your baking sheet into the oven and bake for 15 to 18 minutes. Keep an eye on them in the last few minutes—they’re done when they turn light golden and feel firm but not hard to the touch. Freshly baked, these breadsticks will smell absolutely irresistible and have that perfect texture you crave.
How to Serve Homemade Gluten-Free Breadsticks Recipe
Garnishes
Let’s talk toppings and garnishes that elevate your breadsticks. Fresh chopped parsley or basil tossed on after baking adds a burst of color and freshness. A light sprinkle of sea salt or crushed red pepper flakes can also add a delightful final kick. Get creative and match garnishes to your meal theme.
Side Dishes
These breadsticks are incredibly versatile as a side. They pair wonderfully with hearty soups like tomato basil or a creamy butternut squash. They also complement pasta dishes superbly, especially when dipped in marinara, pesto, or a cheesy sauce. Consider serving alongside salads for a lighter meal with a bit of crunch and satisfaction.
Creative Ways to Present
For a fun twist at your next gathering, bundle your breadsticks in a rustic cloth napkin tied with twine. Alternatively, stand them upright in a tall jar or glass for easy grabbing. You can even serve with multiple dipping bowls filled with different sauces to encourage friendly taste testing. Presentation makes all the difference and these breadsticks are charmingly adaptable.
Make Ahead and Storage
Storing Leftovers
If you have any leftover breadsticks (which might be rare), store them in an airtight container at room temperature for up to two days. This keeps them from drying out and helps maintain their delightful texture.
Freezing
To enjoy these breadsticks anytime, freeze them after they’ve cooled completely. Place them in a freezer-safe bag or container with parchment paper between pieces to avoid sticking. They will keep well for up to 3 months.
Reheating
When you’re ready to enjoy your frozen or stored breadsticks, reheat them in a preheated oven at 350°F (175°C) for about 5 to 7 minutes. This freshens up their crispness wonderfully. Avoid microwaves as they tend to make gluten-free breadsticks chewy or soggy.
FAQs
Can I make this recipe dairy-free?
Absolutely! Just skip the Parmesan cheese and use olive oil instead of butter for brushing. The breadsticks will still be full of flavor and have a beautiful texture.
Do I need to use xanthan gum in the gluten-free flour?
Most gluten-free all-purpose flours have xanthan gum added, but double-check your packaging. If your blend lacks it, add about 1/4 teaspoon to help bind the dough and improve elasticity.
Can I add other herbs or spices?
Yes! Feel free to experiment with rosemary, thyme, or even a pinch of smoked paprika for a unique twist. Mixing herbs can bring exciting new flavor dimensions to your breadsticks.
How do I prevent the breadsticks from being too dry?
Be careful not to over-bake and make sure you brush them generously with butter or olive oil before baking. Also, avoid overworking the dough, which can toughen the final product.
Can I make smaller or larger breadsticks?
Definitely. Just adjust the baking time accordingly—smaller sticks will take less time, and larger ones a bit longer. Keep an eye on their color and firmness as your best indicator.
Final Thoughts
Embracing gluten-free baking doesn’t mean you have to sacrifice flavor or fun, and this Homemade Gluten-Free Breadsticks Recipe is proof of that. With simple ingredients and straightforward steps, you’ll impress yourself and your loved ones with every bite. So, roll up your sleeves, preheat that oven, and treat yourself to a batch of these warm, herb-kissed breadsticks today. They’re more than just a side— they’re a comforting celebration in every crunchy, tender mouthful.
Print
Homemade Gluten-Free Breadsticks Recipe
- Prep Time: 10 minutes
- Cook Time: 15 minutes
- Total Time: 25 minutes
- Yield: 8 breadsticks
- Category: Side Dish
- Method: Baking
- Cuisine: American
- Diet: Gluten Free, Vegetarian
Description
These Homemade Gluten-Free Breadsticks are a delicious and easy-to-make side dish perfect for those following a gluten-free diet. Soft on the inside with a slightly crispy exterior, they’re flavored with herbs and optionally brushed with melted butter or olive oil for extra richness. Perfectly paired with soups, salads, or as a snack on their own.
Ingredients
Dry Ingredients
- 1 1/2 cups gluten-free all-purpose flour (with xanthan gum)
- 1 tablespoon baking powder
- 1/2 teaspoon salt
- 1/2 teaspoon garlic powder (optional)
- 1/2 teaspoon dried oregano or Italian seasoning
Wet Ingredients
- 1/4 cup olive oil
- 2/3 cup warm water
- 1 tablespoon honey or sugar (optional, for a touch of sweetness)
Toppings
- 2 tablespoons grated Parmesan cheese (optional)
- Melted butter or olive oil for brushing
- Extra herbs or salt for topping
Instructions
- Preheat Oven and Prepare Baking Sheet: Preheat your oven to 400°F (200°C) and line a baking sheet with parchment paper to prevent sticking and for easy cleanup.
- Mix Dry Ingredients: In a large bowl, whisk together the gluten-free all-purpose flour, baking powder, salt, garlic powder, and dried oregano or Italian seasoning until evenly combined.
- Add Wet Ingredients: Pour in the olive oil, warm water, and honey or sugar if using. Stir the mixture until a soft dough forms; if it feels too sticky, incorporate a little more flour gradually to reach the right consistency.
- Shape Dough into Breadsticks: Divide the dough evenly into 8 pieces. Roll each portion into a rope shape, approximately the length of your baking sheet, and place them spaced out on the prepared baking sheet.
- Brush and Add Toppings: Lightly brush the breadsticks with melted butter or olive oil. Sprinkle grated Parmesan cheese, additional herbs, or salt on top if desired for extra flavor and texture.
- Bake: Place the baking sheet in the preheated oven and bake the breadsticks for 15 to 18 minutes, or until they turn lightly golden and feel firm to the touch.
- Serve Warm: Remove from oven and serve the breadsticks warm alongside your favorite soups, salads, or dips for a delightful gluten-free treat.
Notes
- For a dairy-free version, omit the Parmesan cheese and substitute butter with olive oil when brushing.
- These breadsticks are best enjoyed fresh but can be reheated in the oven to regain their crispness.
- If dough sticks excessively, add gluten-free flour sparingly to avoid drying out.
- Customize toppings by adding different herbs or seeds to suit your taste preferences.
