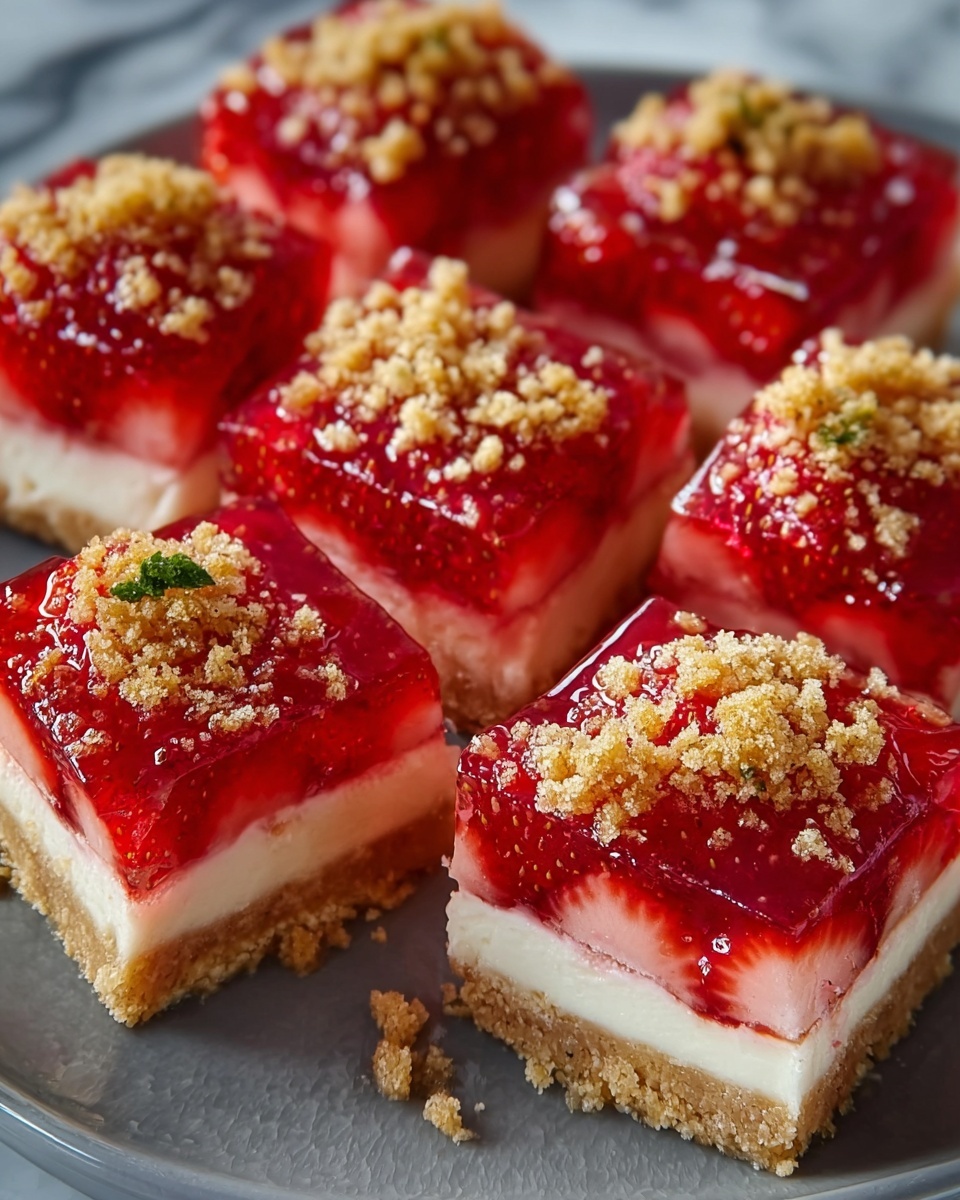
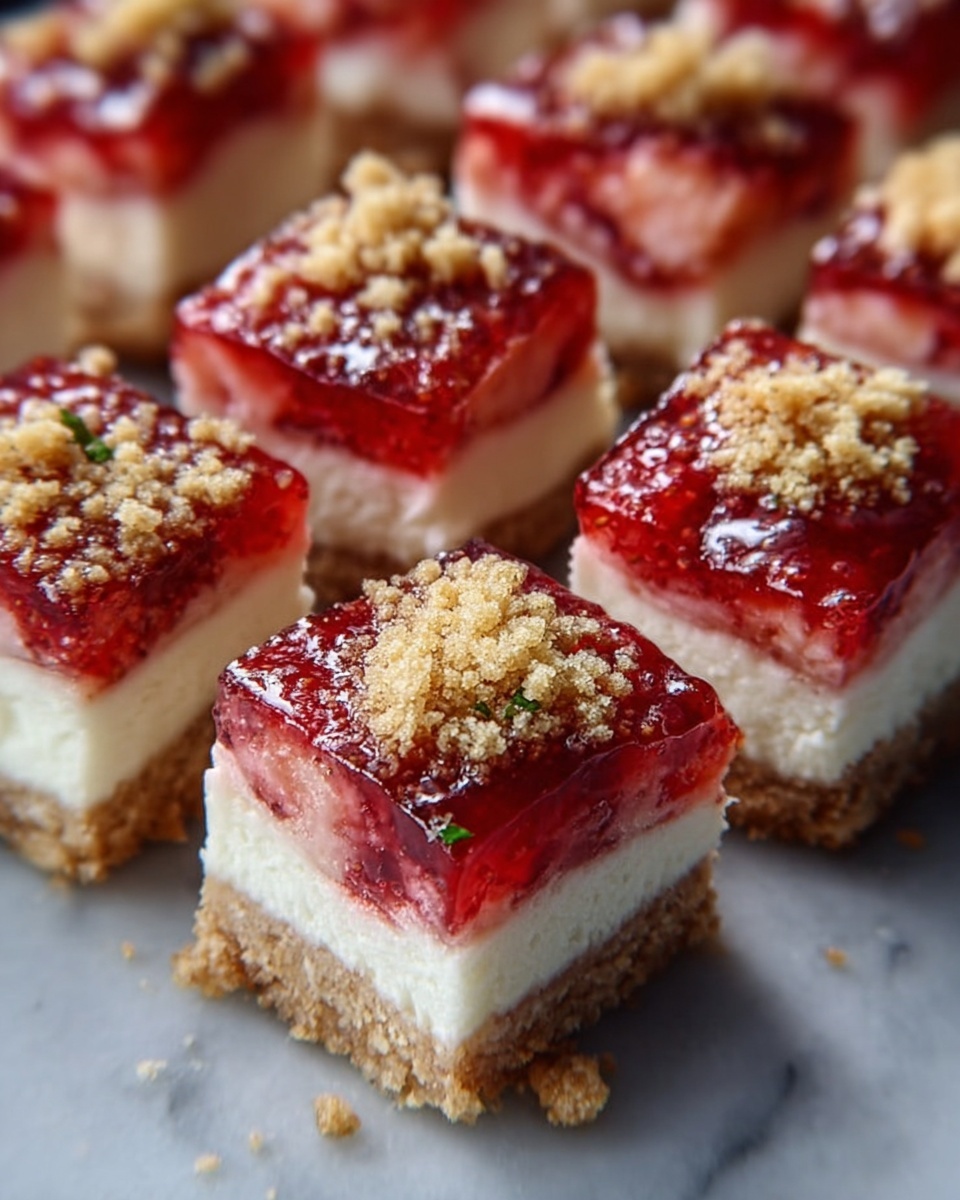
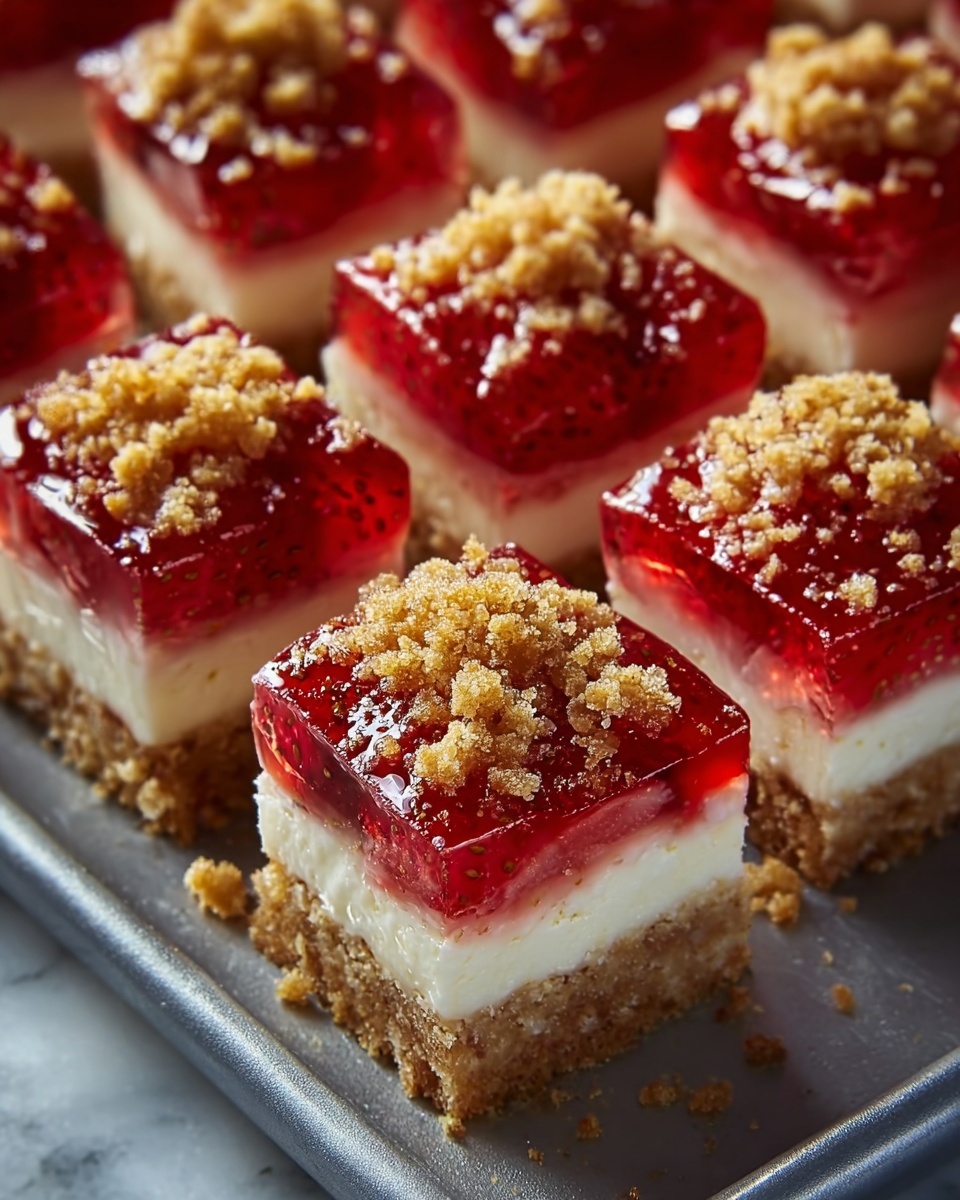
If you’re looking for a delightful treat that brings together the perfect balance of creamy sweetness and a little crunchy surprise, then you will absolutely love this Strawberry Crunch Cheesecake Bites Recipe. These little bites pack all the luscious flavor of classic cheesecake with an irresistible crunch and a fresh strawberry twist, making them the perfect snack or party appetizer. Easy to make yet bursting with texture and flavor, this recipe is one you’ll find yourself coming back to again and again.
Ingredients You’ll Need
Gathering the right ingredients is key to nailing the taste and texture of these cheesecake bites. Each item plays a crucial role in delivering the creamy, crunchy, and fruity sensation that makes the recipe so special.
- Cream cheese: The base for that unmistakable creamy, tangy cheesecake flavor.
- Strawberries: Fresh or frozen, they add juicy sweetness and vibrant color.
- Graham cracker crumbs: Essential for that irresistible crunchy crust that contrasts perfectly with the smooth filling.
- Sugar: Sweetens the mixture just right without overwhelming the strawberries.
- Vanilla extract: Enhances the depth of flavor in the cheesecake filling.
- Butter: Binds the crust ingredients and adds a rich, satisfying taste.
- Egg: Helps set the cheesecake bites to hold their shape but keeps them tender.
How to Make Strawberry Crunch Cheesecake Bites Recipe
Step 1: Prepare Your Ingredients
Start by preheating your oven to 325°F (165°C) and lining a mini muffin tin with paper liners or lightly greasing it. Meanwhile, chop your strawberries into small, bite-sized pieces to ensure they are evenly distributed throughout the cheesecake bites.
Step 2: Make the Crunchy Crust
Combine the graham cracker crumbs, melted butter, and a tablespoon of sugar in a bowl. Press a small spoonful of this mixture firmly into the bottom of each mini muffin cup to form a crunchy base that will offer a wonderful contrast to the creamy cheesecake topping.
Step 3: Whip Up the Cheesecake Batter
In another bowl, beat together the softened cream cheese and sugar until smooth and creamy. Add the egg and vanilla extract, mixing until just combined. Gently fold in the chopped strawberries, taking care not to overmix and break down the fruit.
Step 4: Assemble and Bake
Spoon the cheesecake batter evenly over the crust in each muffin cup, filling them close to the top. Bake in your preheated oven for about 15-20 minutes or until the edges are set and the center still has a slight jiggle. This ensures a velvety texture when cooled.
Step 5: Cool and Chill
Once baked, allow the strawberry crunch cheesecake bites to cool at room temperature before transferring them to the refrigerator for at least 2 hours or overnight. Chilling helps them firm up perfectly, making them easy to remove from the muffin tin and ready to enjoy.
How to Serve Strawberry Crunch Cheesecake Bites Recipe
Garnishes
For that eye-catching finish, sprinkle a little extra graham cracker crumbs on top or add a thin slice of fresh strawberry to each bite. A light dusting of powdered sugar or a drizzle of melted white chocolate elevates these bites into ear-to-ear smile territory.
Side Dishes
Serve these cheesecake bites alongside a crisp mixed green salad for a light contrast or pair them with a scoop of vanilla ice cream to make the dessert experience even more indulgent. A cup of fresh brewed coffee or iced tea also complements the rich and fruity flavors superbly.
Creative Ways to Present
Try arranging your Strawberry Crunch Cheesecake Bites Recipe on a pretty platter with edible flowers or fresh mint leaves for a classy touch. Or wrap a few in parchment paper tied with a colorful ribbon as charming homemade gifts for friends and family—they’re that good!
Make Ahead and Storage
Storing Leftovers
Keep any leftover cheesecake bites in an airtight container in the refrigerator. They will stay fresh for up to 4 days, making them a convenient treat to enjoy throughout the week without losing their delightful texture or flavor.
Freezing
If you want to keep these bites longer, freeze them in a single layer on a baking sheet before transferring to a freezer-safe container. They can be frozen for up to 1 month. Thaw in the refrigerator overnight before serving to preserve their creamy goodness.
Reheating
These cheesecake bites are best enjoyed chilled, so skip reheating. If you prefer them slightly softer, let them sit at room temperature for about 15 minutes. This will bring out their rich flavors without compromising the texture.
FAQs
Can I use frozen strawberries for this recipe?
Absolutely! Just make sure to thaw and drain them well to avoid adding extra moisture that could affect the texture of your cheesecake bites.
Is it possible to make these gluten-free?
Yes! Substitute the graham cracker crumbs with gluten-free alternatives or crushed gluten-free cookies to keep the crunchy crust while accommodating gluten sensitivities.
Can I prepare these without a mini muffin tin?
You can use small silicone molds or miniature cupcake pans as alternatives, just adjust the baking time slightly and keep an eye on them.
How long will these cheesecake bites keep in the fridge?
Stored properly in an airtight container, they will stay fresh for up to 4 days in the refrigerator.
Can I add other fruits besides strawberries?
Definitely! Blueberries, raspberries, or chopped peaches make delicious substitutions or additions, giving you fun ways to personalize your Strawberry Crunch Cheesecake Bites Recipe.
Final Thoughts
There’s something so wonderfully satisfying about these Strawberry Crunch Cheesecake Bites Recipe that makes every bite a little celebration. Whether you’re sharing them with friends, packing them for a picnic, or sneaking one after dinner, they never fail to please. So roll up your sleeves, gather your ingredients, and enjoy the magic that happens when creamy cheesecake meets crunchy crust and fresh strawberries. You won’t regret it!
Print
Strawberry Crunch Cheesecake Bites Recipe
- Prep Time: 10 minutes
- Cook Time: 45-50 minutes
- Total Time: 55-60 minutes
- Yield: 1 loaf (about 8 servings)
- Category: Bread
- Method: Baking
- Cuisine: American
Description
Delightful cheddar cheese loaf combining savory flavors with a tender crumb, perfect for serving as a snack or alongside meals. This quick and easy recipe uses simple ingredients and requires just one bowl for dry ingredients and another for wet, making it a convenient choice for a cheesy homemade bread.
Ingredients
Dry Ingredients
- 2 cups all-purpose flour
- 4 teaspoons baking powder
- 1 tablespoon sugar
- 1½ teaspoons garlic powder
- ½ teaspoon salt
- 1½ cups shredded cheddar cheese
Wet Ingredients
- 1 cup milk
- 1 large egg
- 2 tablespoons butter, melted
Instructions
- Preheat the Oven: Preheat your oven to 350°F (175°C) and grease or spray a loaf pan to prevent sticking during baking.
- Mix Dry Ingredients: In a large mixing bowl, whisk together the all-purpose flour, baking powder, sugar, garlic powder, and salt. Stir in the shredded cheddar cheese to evenly distribute it throughout the mixture.
- Combine Wet Ingredients: In a separate bowl, whisk the milk, egg, and melted butter until fully blended and smooth.
- Combine Wet and Dry: Pour the wet ingredients into the bowl with dry ingredients and stir gently until just combined. Avoid overmixing to maintain a tender texture.
- Prepare Batter for Baking: Spoon or pour the batter into the prepared loaf pan, smoothing the top for even baking.
- Bake the Loaf: Place the pan in the oven and bake for 45-50 minutes, or until the top turns a beautiful golden brown and a toothpick inserted comes out clean.
- Cool and Serve: Remove the loaf from the oven and cool it on a wire rack. Once cooled, carefully remove from the pan, slice, and serve as a delicious cheesy treat.
Notes
- Do not overmix the batter to avoid a dense texture; stir just until ingredients are combined.
- For a sharper cheddar flavor, use aged cheddar cheese.
- Can be served warm as a snack or chilled and sliced for sandwiches.
- Store leftovers in an airtight container at room temperature for up to 2 days or refrigerate for up to 5 days.
- To reheat, warm slices in a toaster oven or microwave briefly.


