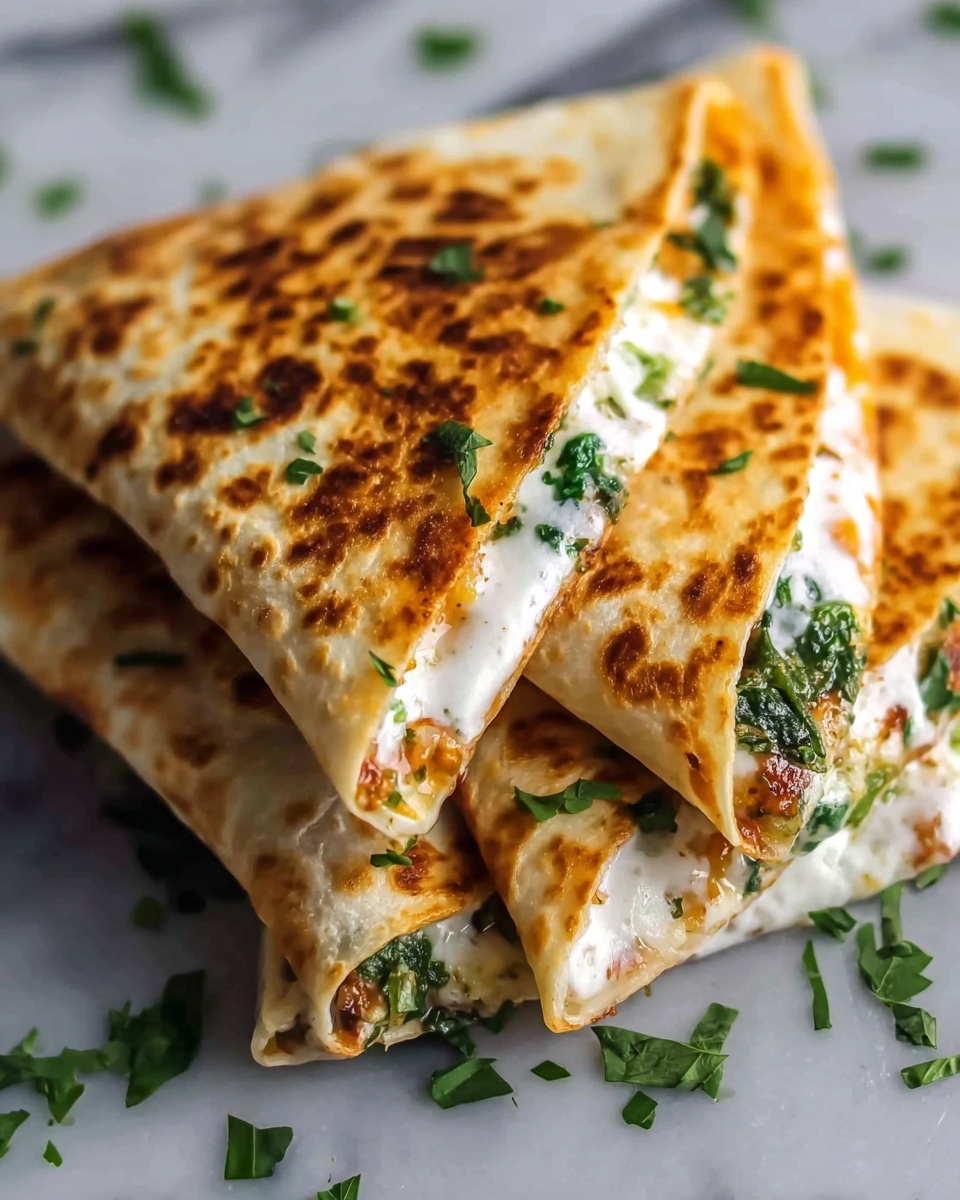
If you love the idea of quesadillas but crave a fun, portable twist, this Quesadilla Cones Recipe is about to become your new favorite go-to snack or meal. Imagine all your favorite quesadilla fillings packed into a crispy, cheesy cone that’s as delicious to eat as it is to look at. Whether you’re cooking for a casual family dinner or impressing friends at a party, these quesadilla cones are bursting with vibrant flavors, textures, and that perfect melty cheese pull. They’re surprisingly simple to make, yet feel downright special.
Ingredients You’ll Need
Gathering a handful of fresh, flavorful ingredients is all it takes to bring this Quesadilla Cones Recipe to life. Each item plays a crucial role, from building that juicy and spiced interior to creating the golden, crispy exterior that everyone will rave about.
- Olive oil: For sautéing veggies perfectly and adding subtle richness.
- Red onion, diced: Adds sweet, sharp notes and a little crunch.
- Bell peppers (any color), diced: Brings a fresh, vibrant pop of color and sweetness.
- Shredded cooked chicken: The hearty, protein-packed base of your filling.
- Fajita seasoning: Infuses smoky, zesty flavor that’s essential for that fiesta vibe.
- Salsa: Adds juicy, tangy moisture and a little kick to the mix.
- Large flour tortilla wraps: The flexible canvas that becomes your crispy cone.
- Shredded cheddar cheese: Melts beautifully, creating gooey, cheesy pockets inside.
- Oil spray: Helps crisp the cones perfectly without excess grease.
- Sour cream: Perfect for cooling down each bite and adding creamy tang.
- Fresh coriander (cilantro), chopped: Offers a bright, herbaceous note as a garnish.
How to Make Quesadilla Cones Recipe
Step 1: Preheat and Prepare
Begin by heating your oven to 180°C (350°F) if you plan to bake the quesadilla cones. This step ensures they cook evenly and develop that golden, crisp finish that makes them irresistible.
Step 2: Sauté the Veggies
Warm the olive oil in a large pan over medium heat, then add the diced red onion and bell peppers. Cook them gently until they soften and gain some charred spots, about 5 to 7 minutes. This caramelization adds depth and sweetness, making each bite truly satisfying.
Step 3: Mix the Filling
In a spacious bowl, combine shredded cooked chicken with fajita seasoning and salsa. Stir in the sautéed onion and peppers, letting all those flavors blend beautifully. This mixture is what brings the heart and soul to the Quesadilla Cones Recipe.
Step 4: Shape the Cones
Take each flour tortilla and cut it in half. Fold each half into a cone shape—a little like forming a paper cone—and secure the shape using toothpicks to keep everything tightly packed as you fill them later.
Step 5: Layer Cheese and Filling
Start by adding a layer of shredded cheddar at the bottom of each tortilla cone. Then, fill generously with the chicken and vegetable mixture, followed by another layer of cheese on top. This layering ensures gooey cheese pulls and keeps the filling scrumptiously sealed inside.
Step 6: Cook to Crispy Perfection
If air frying, line the basket with baking paper, arrange the cones with space between them, and lightly spray with oil. Cook at 180°C (350°F) for around 8 minutes until crisp and golden. Alternatively, place the cones on a baking tray lined with baking paper, spray lightly with oil, and bake in the preheated oven for about 12 minutes. Both methods deliver that crunch everyone loves.
Step 7: Serve Fresh and Hot
Once cooked, carefully remove the toothpicks and serve the quesadilla cones immediately. Their piping hot, crispy exterior and melty, flavorful center demand to be enjoyed right away!
How to Serve Quesadilla Cones Recipe

Garnishes
To elevate your Quesadilla Cones Recipe, don’t skimp on garnishes. A dollop of fresh sour cream brings cooling creaminess, and a sprinkle of chopped coriander adds an herby brightness that cuts through the richness. You can also add some slices of avocado or a dash of hot sauce for extra flair.
Side Dishes
Serve these quesadilla cones alongside a fresh, zesty salad or a bowl of black beans for a well-rounded meal. Mexican-style rice works beautifully too, complementing the flavors without stealing the spotlight from your star creation.
Creative Ways to Present
For parties or casual gatherings, stand your quesadilla cones upright in a decorative jar or cone holder. You can even offer a variety of dipping sauces in small bowls to let everyone customize their bites—think guacamole, salsa verde, or chipotle mayo. Presentation is half the fun with this recipe!
Make Ahead and Storage
Storing Leftovers
If you have leftover quesadilla cones, place them in an airtight container in the refrigerator. They’ll keep well for up to two days, though they’re best enjoyed fresh for optimal crispness and flavor.
Freezing
You can freeze the cooked cones by wrapping each one tightly in plastic wrap and then placing them in a freezer-safe bag. They should last up to one month frozen. Just be sure to thaw them in the fridge before reheating to maintain texture and taste.
Reheating
Reheat your quesadilla cones in an oven or air fryer at 180°C (350°F) until heated through and crispy again. Avoid microwaving as it can make the cones soggy and diminish that delightful crunch you worked so hard to achieve.
FAQs
Can I use other types of cheese in this Quesadilla Cones Recipe?
Absolutely! While cheddar is a classic choice for its melting quality and tangy flavor, feel free to experiment with Monterey Jack, mozzarella, or a Mexican cheese blend to match your taste preference.
Is this recipe suitable for vegetarians?
To make it vegetarian, simply replace the cooked chicken with sautéed mushrooms, black beans, or spiced tofu. The fajita seasoning and veggies keep the flavor vibrant and satisfying.
Can I prepare the fillings in advance?
Yes, the chicken and vegetable filling can be made a day ahead and refrigerated. This makes assembling and cooking the cones on the day much quicker and stress-free.
What’s the best way to shape the tortilla cones without tearing?
Use fresh, pliable flour tortillas and avoid forcing the fold sharply. Gently mold them into cones and use toothpicks to hold their shape securely. If they resist, warming them slightly makes them more flexible.
Can these quesadilla cones be made gluten-free?
Definitely! Swap the flour tortillas for gluten-free wraps or corn tortillas if you’re careful to handle them gently when forming cones. This substitution helps make the recipe inclusive without sacrificing flavor.
Final Thoughts
Trying out this Quesadilla Cones Recipe is like welcoming a little festive celebration to your kitchen any day of the week. They’re easy to make, irresistibly tasty, and versatile enough for countless twists. Whether you’re cooking for yourself, your family, or friends, these cones deliver a wow factor that’s bound to bring smiles and satisfied sighs. I can’t wait for you to give them a try and make this fun idea your next signature dish!
Print
Quesadilla Cones Recipe
- Prep Time: 15 minutes
- Cook Time: 12 minutes
- Total Time: 27 minutes
- Yield: 4 servings
- Category: Snack
- Method: Air Frying
- Cuisine: Mexican-inspired
Description
These Quesadilla Cones are a fun and delicious twist on the classic quesadilla, filled with a flavorful mixture of sautéed peppers, onions, seasoned shredded chicken, and melted cheddar cheese. Perfectly crispy on the outside and gooey inside, they make a great snack or meal, served with sour cream and fresh coriander.
Ingredients
Filling
- 1 tbsp olive oil
- 1 red onion, diced
- 2 bell peppers (any color), diced
- 2 cups shredded cooked chicken
- 1 tbsp fajita seasoning
- 1/2 cup salsa
Quesadilla Cones
- 4 large flour tortilla wraps
- 1 1/2 cups shredded cheddar cheese
- Oil spray
- Sour cream, for serving
- Fresh coriander (cilantro), chopped, for serving
Instructions
- Preheat the oven (optional): Preheat your oven to 180°C (350°F) if you intend to bake the quesadilla cones instead of air frying.
- Sauté the vegetables: In a large pan, heat the olive oil over medium heat. Add the diced red onion and diced bell peppers. Fry, stirring occasionally, until the vegetables are softened and slightly charred, about 5-7 minutes.
- Prepare the filling: In a large mixing bowl, combine the shredded cooked chicken with the fajita seasoning and salsa. Add the sautéed peppers and onions to the bowl and stir everything well to combine thoroughly.
- Form the cones: Cut each large flour tortilla in half. Fold each half into a cone shape and secure the edges with toothpicks to hold their shape during cooking.
- Stuff the cones: Place a layer of shredded cheddar cheese at the bottom inside each cone. Spoon the chicken and vegetable filling into the cones, then top with more shredded cheese to ensure a cheesy melt throughout.
- Air fry the cones: Line the air fryer basket with baking paper to prevent sticking. Arrange the cones spaced apart in the basket and lightly spray them with oil. Air fry at 180°C (350°F) for 8 minutes until golden and crispy.
- Bake the cones (alternative method): Alternatively, line a baking tray with baking paper and place the cones spaced out on the tray. Spray them lightly with oil and bake in the preheated oven at 180°C (350°F) for 12 minutes until crisp and the cheese has melted.
- Serve: Carefully remove the toothpicks from each cone and serve immediately. Offer sour cream and freshly chopped coriander on the side along with napkins for easy handling.
Notes
- For best results, use large flour tortillas that can hold the cone shape easily.
- If air frying, check the cones midway to ensure they do not overbrown.
- You can customize the filling by adding beans, corn, or different types of cheese.
- Use toothpicks with caution and remove them fully before serving to prevent choking hazards.
- Leftover quesadilla cones can be reheated in the oven or air fryer to maintain crispiness.

