Description
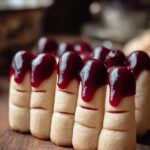
Witch Finger Cookies are spooky, fun-to-make treats perfect for Halloween parties. These buttery almond-flavored cookies are shaped like fingers, complete with knuckles and red-painted almond fingernails for a creepy yet delicious effect. They bake quickly to a tender, slightly crisp texture that pairs wonderfully with their subtle nutty and vanilla flavors.
Ingredients
Scale
Almond Fingernails
- 48 whole blanched almonds
- 2 tsp red gel food coloring
Cookie Dough
- 8 oz unsalted butter, at room temperature
- 8 oz powdered sugar (2 cups)
- 1 large egg, at room temperature
- 1 tbsp vanilla extract
- 2 tsp almond extract
- 15 oz all-purpose flour (3.5 cups)
- 2.5 oz almond flour (¾ cup)
- 1 tsp salt
Instructions
- Paint the Almonds: Use a small food-safe paintbrush to apply red gel food coloring to the top of each whole blanched almond. This will serve as the ‘fingernail’ for the witch finger cookies.
- Dry the Almonds: Let the painted almonds dry completely on a paper towel. This step can be done a few days in advance to save time on the baking day.
- Preheat Oven: Set your oven to 350°F (175°C) and line several baking sheets with parchment paper to prevent sticking and for easy cleanup.
- Mix Dry Ingredients: In a medium bowl, whisk together the all-purpose flour, almond flour, and salt until well combined. Set aside to incorporate flavors and ensure even texture.
- Cream Butter and Sugar: In a large mixing bowl, use a hand or stand mixer to cream the unsalted butter and powdered sugar together until the mixture is light and fluffy, which helps create a tender cookie.
- Add Wet Ingredients: Add the egg, vanilla extract, and almond extract to the creamed butter mixture. Mix thoroughly until all ingredients are well combined and the batter is smooth.
- Combine Wet and Dry Ingredients: Gradually add the dry ingredient mixture to the wet mixture, mixing until a uniform dough forms without any streaks of flour.
- Shape the Cookies: Roll walnut-sized portions of dough into long, thin snake shapes to resemble fingers. Place them on the prepared baking sheets. Press your finger gently down the middle of each to create knuckles, and use a toothpick to draw lines above and below the knuckles for added detail.
- Add the Fingernails: Press one red-painted almond onto the tip of each shaped cookie to resemble a fingernail, securing it gently into the dough.
- Bake: Bake the cookies for about 10 minutes, or until the edges are firm but the centers remain pale. Avoid overbaking to keep the cookies tender. Let the cookies cool completely on the baking sheets to firm up before handling.
Notes
- Allow painted almonds to dry thoroughly to avoid smudging during cookie assembly.
- You can paint the almonds several days in advance to save preparation time.
- Handle the shaped dough gently to maintain the finger details and prevent cracking.
- Store cookies in an airtight container at room temperature for up to one week.
- For an extra spooky effect, you can add a tiny bit of gel food coloring on the knuckles to simulate bruises.